> ## Documentation Index
> Fetch the complete documentation index at: https://docs.apricotsurvey.com/llms.txt
> Use this file to discover all available pages before exploring further.
# Connect Klaviyo Integration
Connect Apricot with **Klaviyo** to send survey respondents to your Klaviyo lists and use survey data in your marketing workflows.
## Connect Apricot to Klaviyo
First, connect your Klaviyo account to Apricot using your Klaviyo API keys. To do that, follow the steps below:
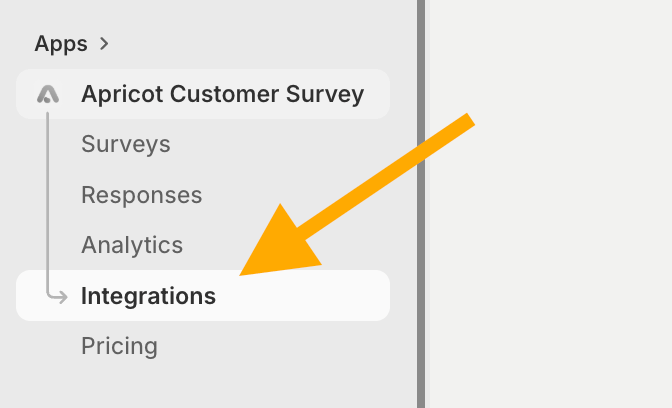
From the Apricot Customer Survey submenu, go to **Integrations** and find **Klaviyo**.
 [Log in](https://www.klaviyo.com/login) to your Klaviyo account or [create a new one](https://www.klaviyo.com/register) if you do not have an account.
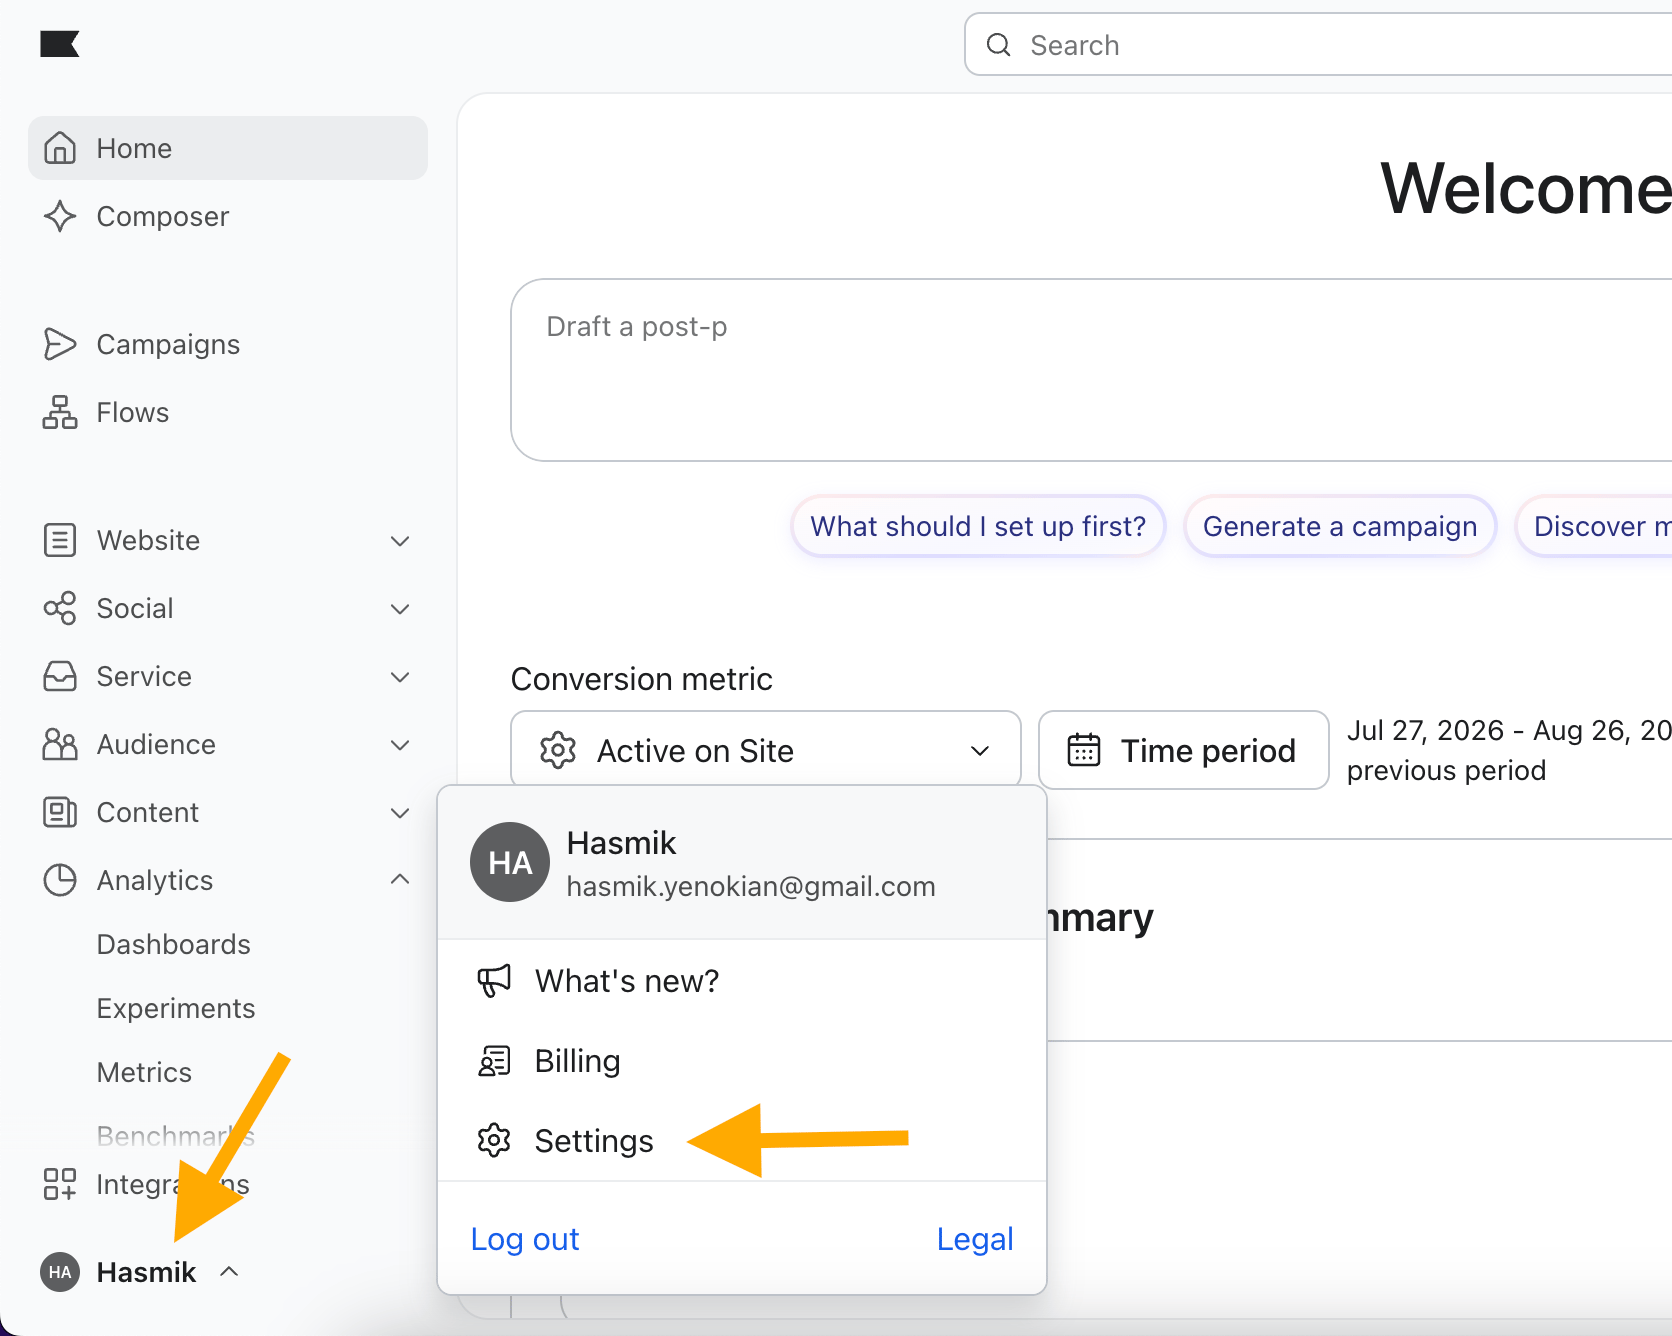
Click your account name in the bottom-left corner and go to:
**Settings → API Keys**
[Log in](https://www.klaviyo.com/login) to your Klaviyo account or [create a new one](https://www.klaviyo.com/register) if you do not have an account.
Click your account name in the bottom-left corner and go to:
**Settings → API Keys**
 Your **Public API Key**, also called your **Site ID**, is displayed on the **API Keys page**.
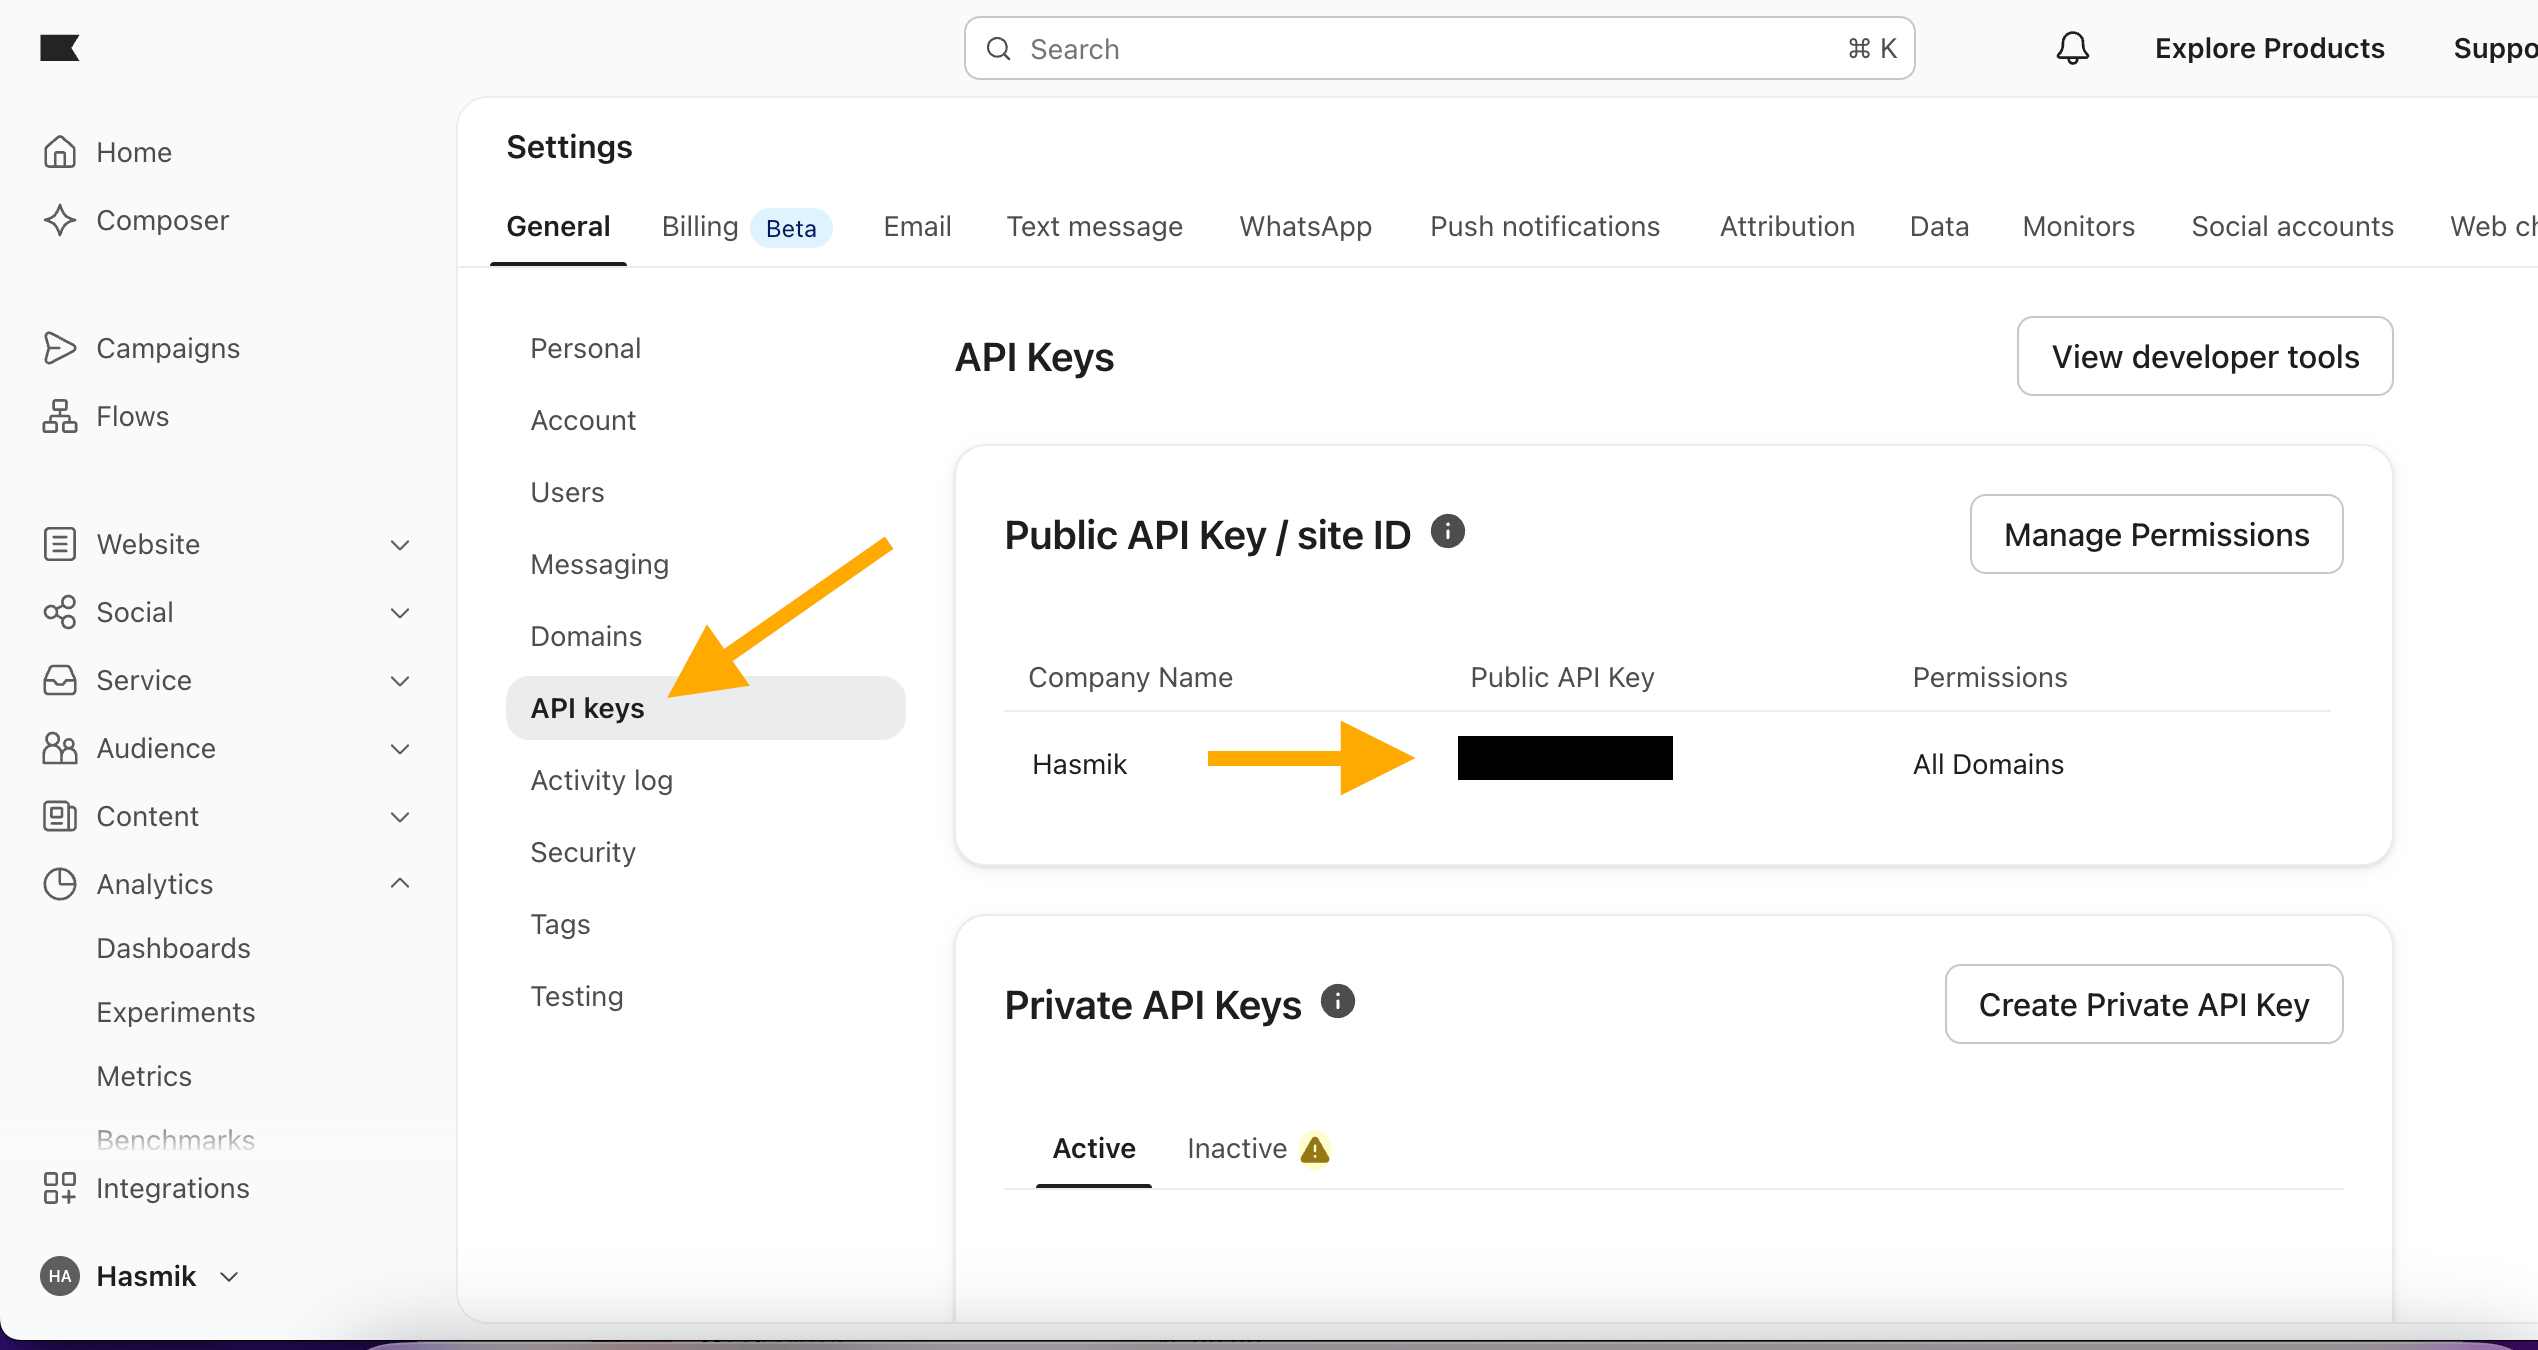 **Copy** the key and **return** **to Apricot** and paste it into the corresponding field.
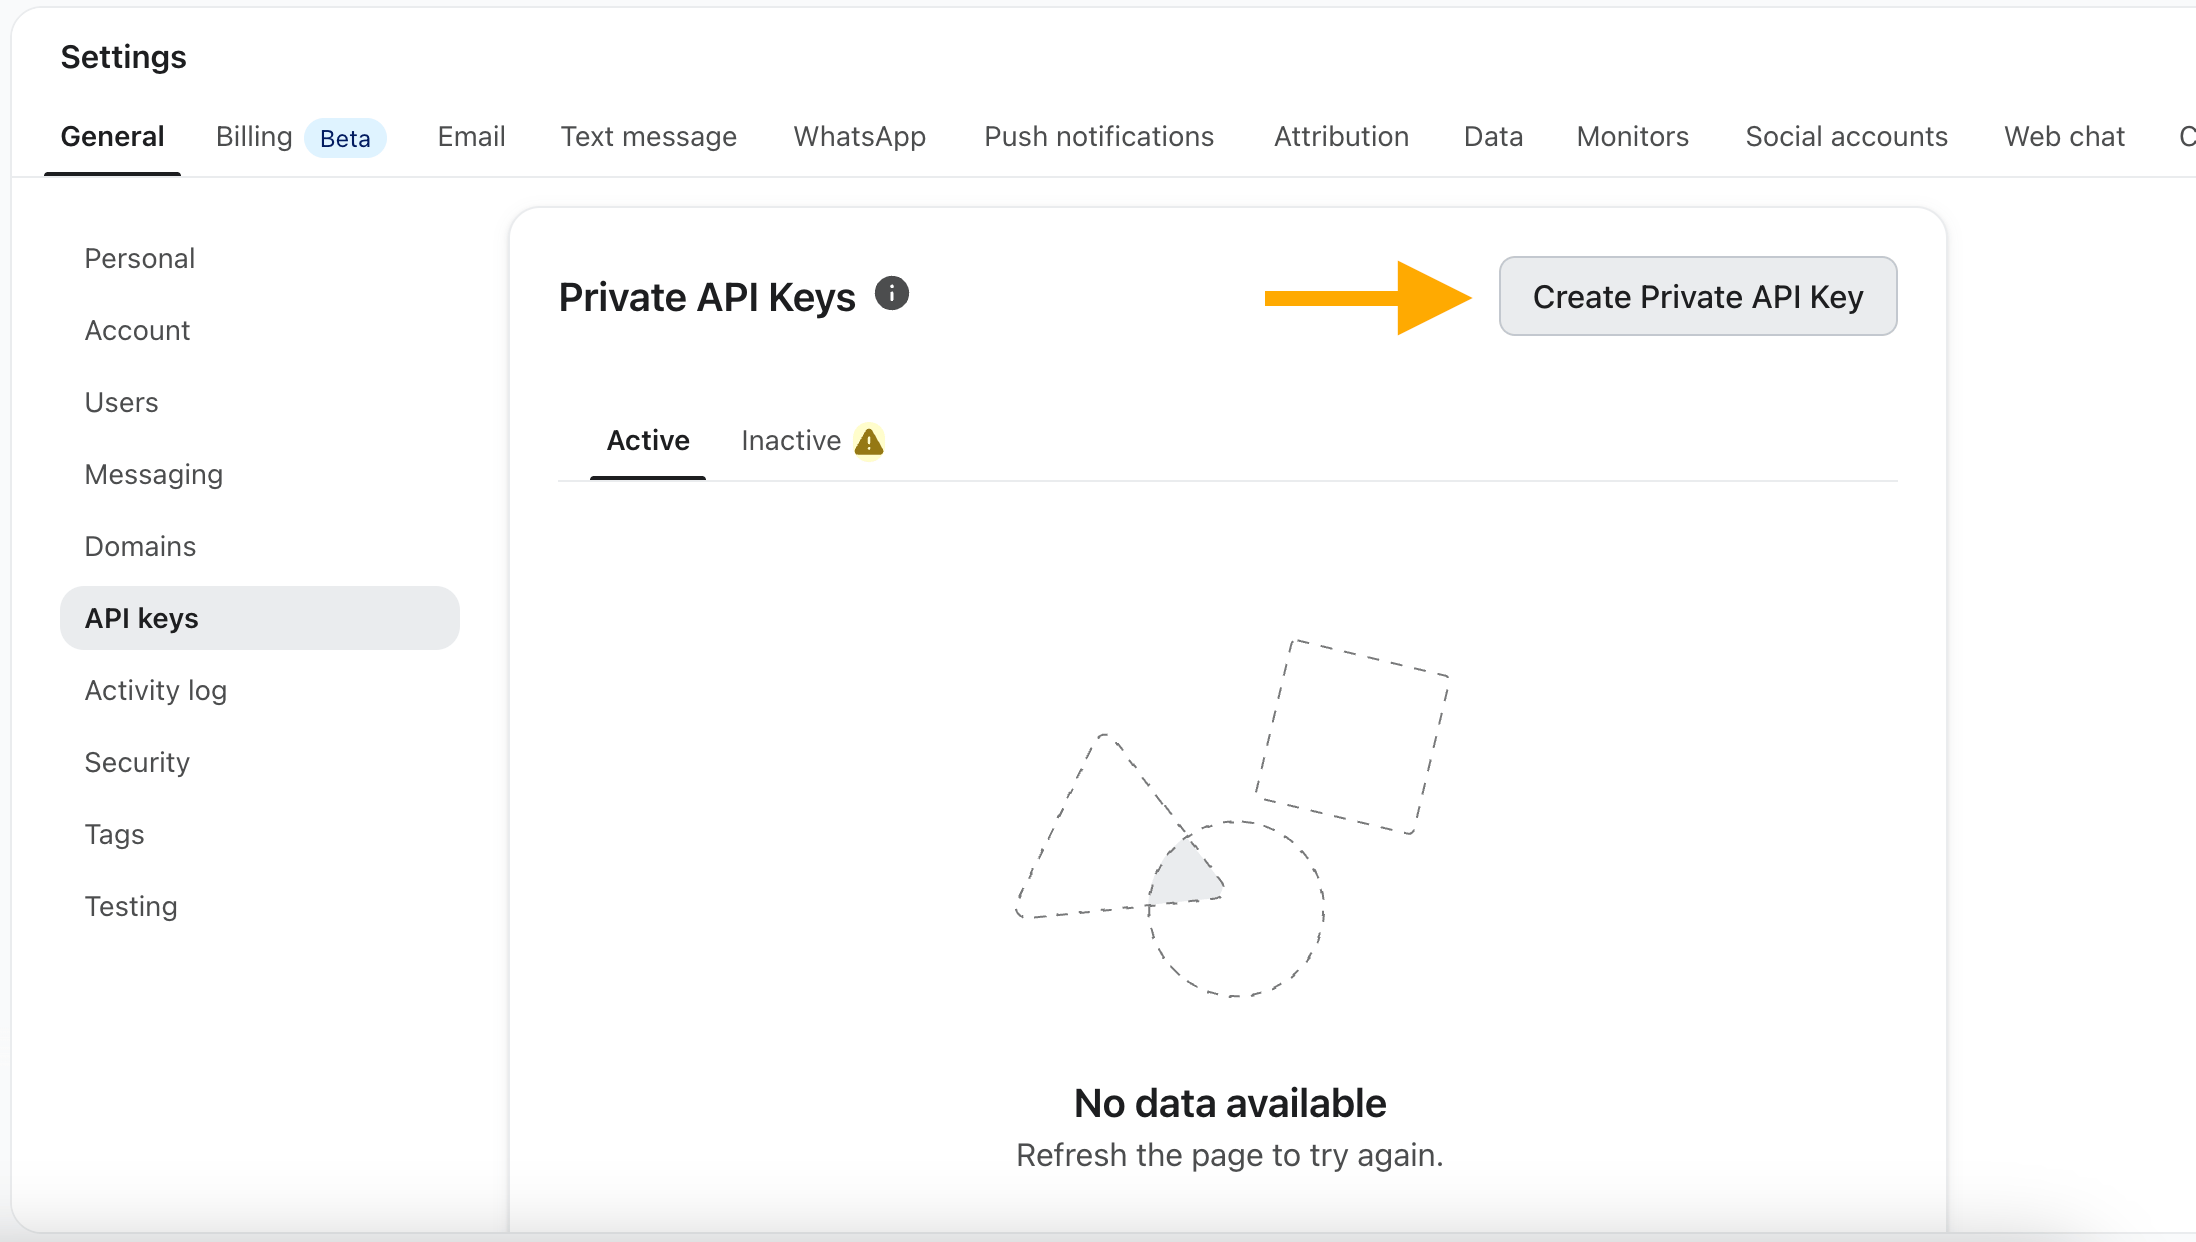
In **Klaviyo**, stay on the **Settings → API Keys** page.
Under **Private API Keys**, click **Create Private API Key.**
**Copy** the key and **return** **to Apricot** and paste it into the corresponding field.
In **Klaviyo**, stay on the **Settings → API Keys** page.
Under **Private API Keys**, click **Create Private API Key.**
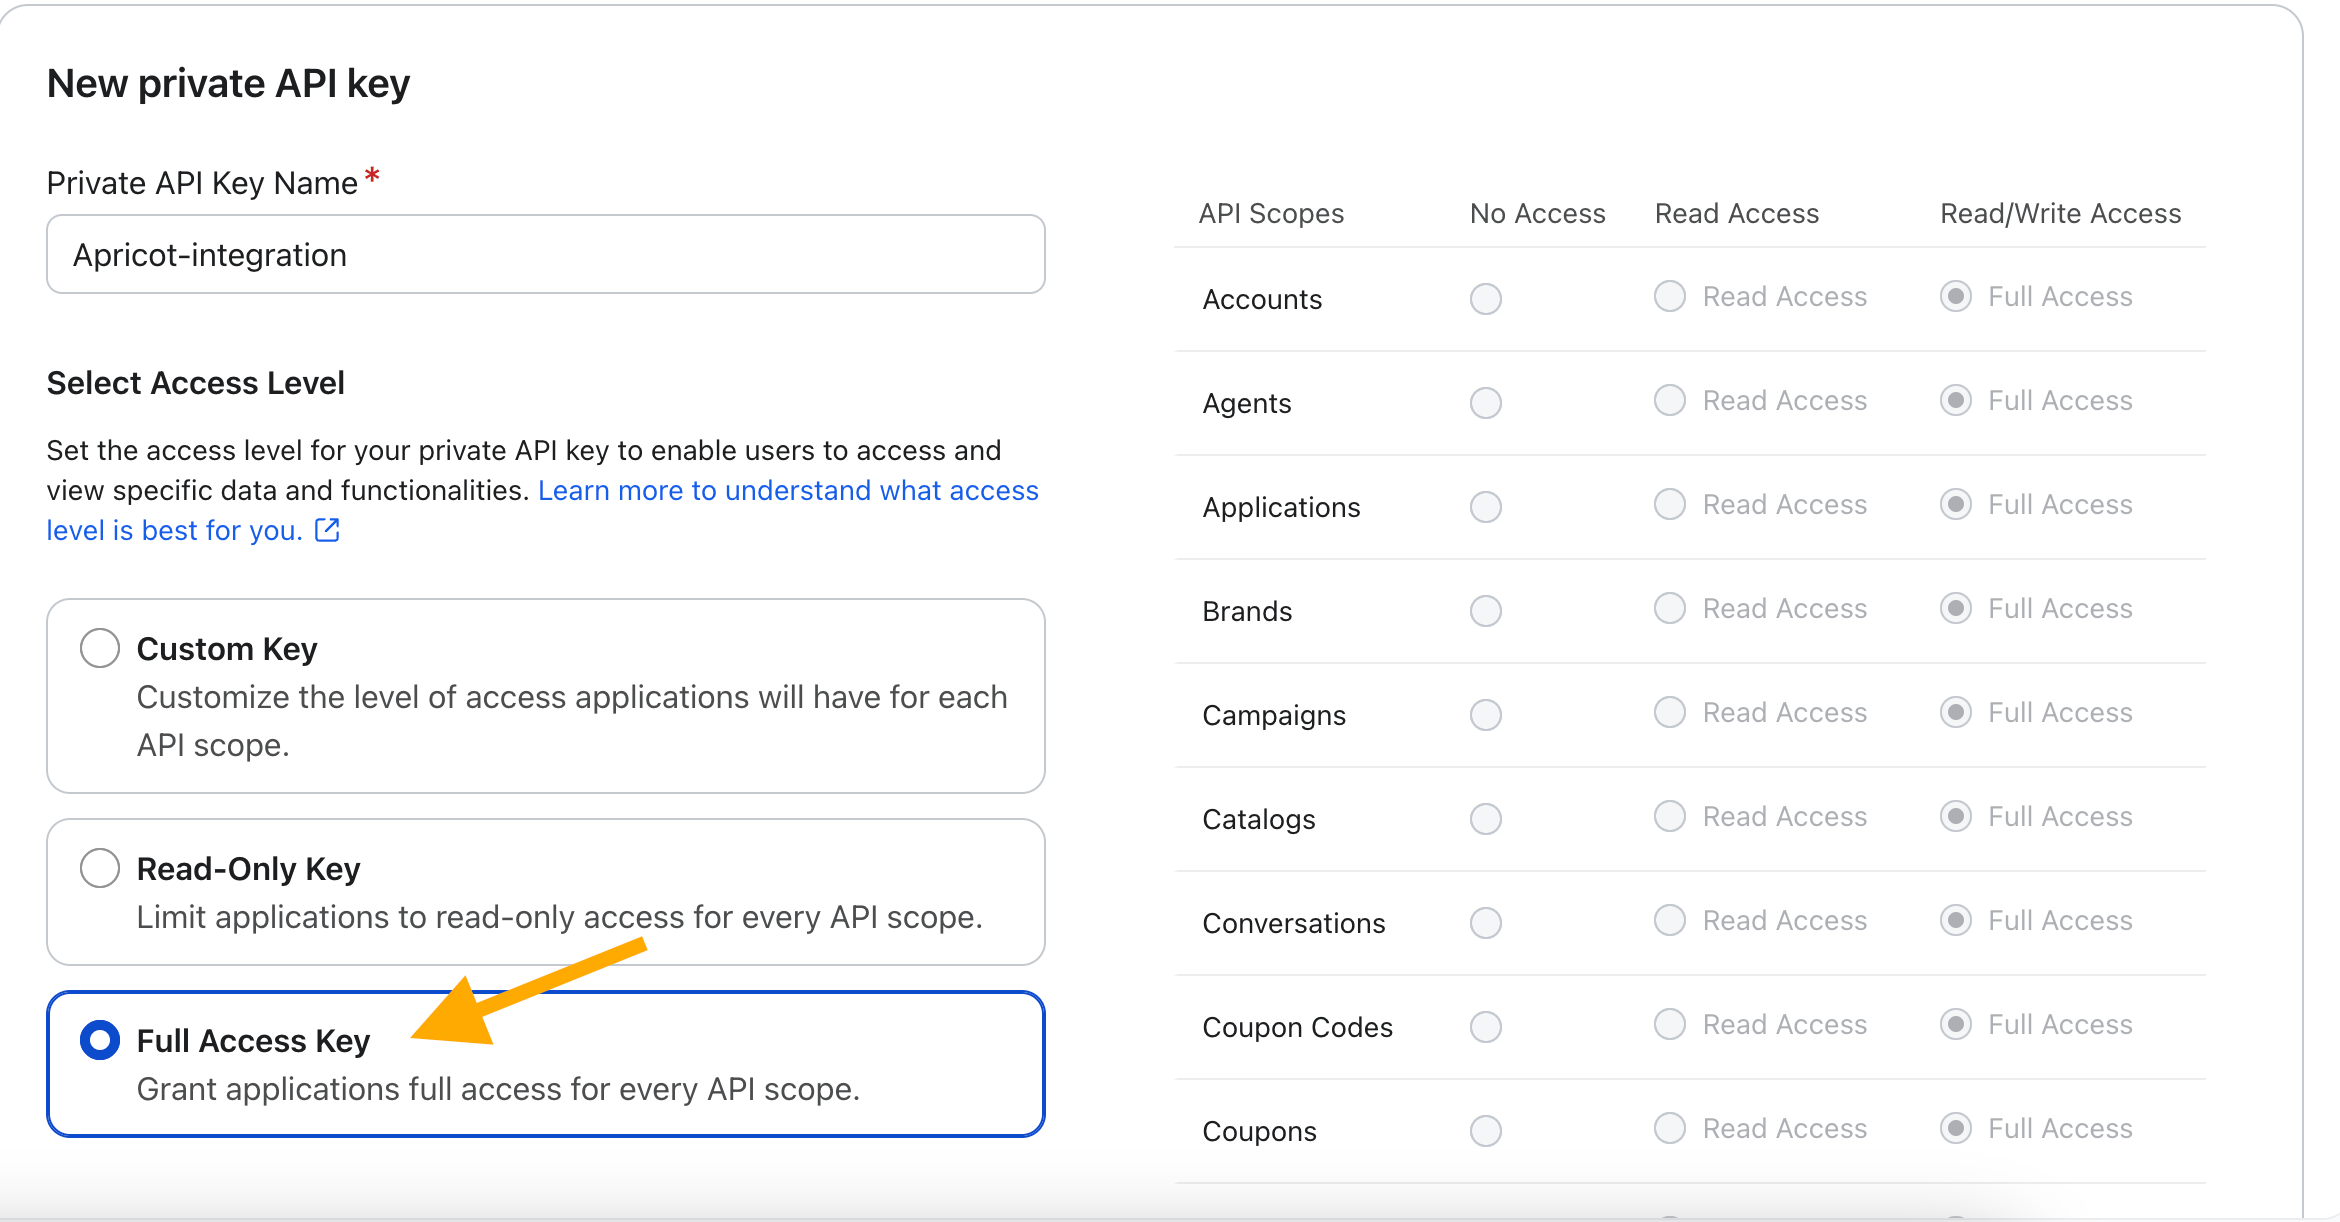
 Give the key a name so you can easily identify that it is being used for Apricot.
Choose **Full Access Key** as the access level and click **Create**.
Give the key a name so you can easily identify that it is being used for Apricot.
Choose **Full Access Key** as the access level and click **Create**.
 **Copy** the private API key and **return to Apricot.**
Klaviyo **only** **shows** the private API key when it is created. **Save it securely** before leaving the page and never share it publicly.
Enter your **Public API Key** and **Private API Key** in the corresponding fields in Apricot.
Click **Connect**.
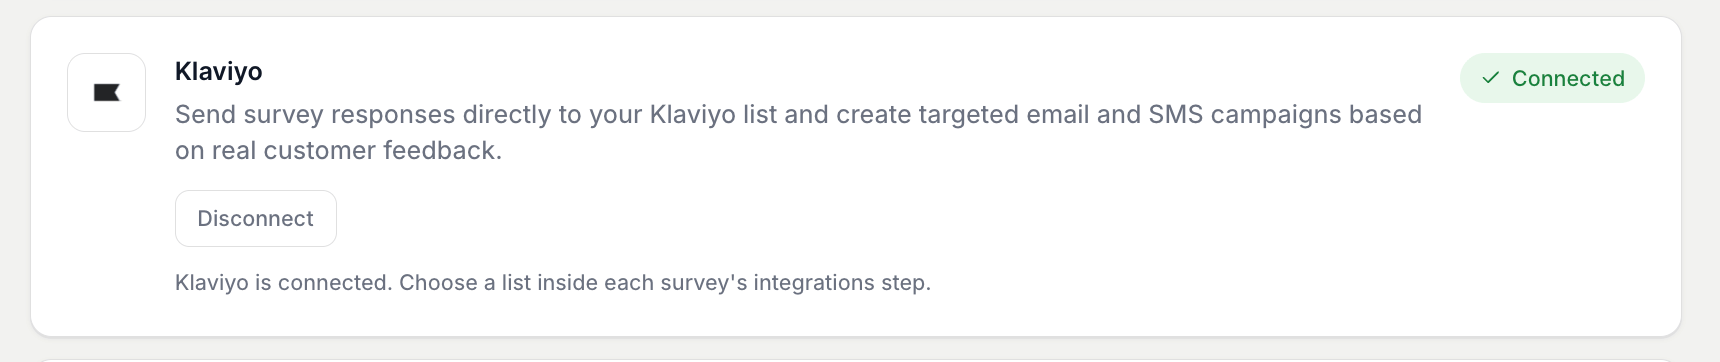
Once the connection is successful, a **green Connected badge** appears, confirming that your Klaviyo account is connected to Apricot.
**Copy** the private API key and **return to Apricot.**
Klaviyo **only** **shows** the private API key when it is created. **Save it securely** before leaving the page and never share it publicly.
Enter your **Public API Key** and **Private API Key** in the corresponding fields in Apricot.
Click **Connect**.
Once the connection is successful, a **green Connected badge** appears, confirming that your Klaviyo account is connected to Apricot.
 ## Activate Klaviyo for a Survey
After connecting Klaviyo to Apricot, enable the integration for each survey where you want to send respondents to Klaviyo.
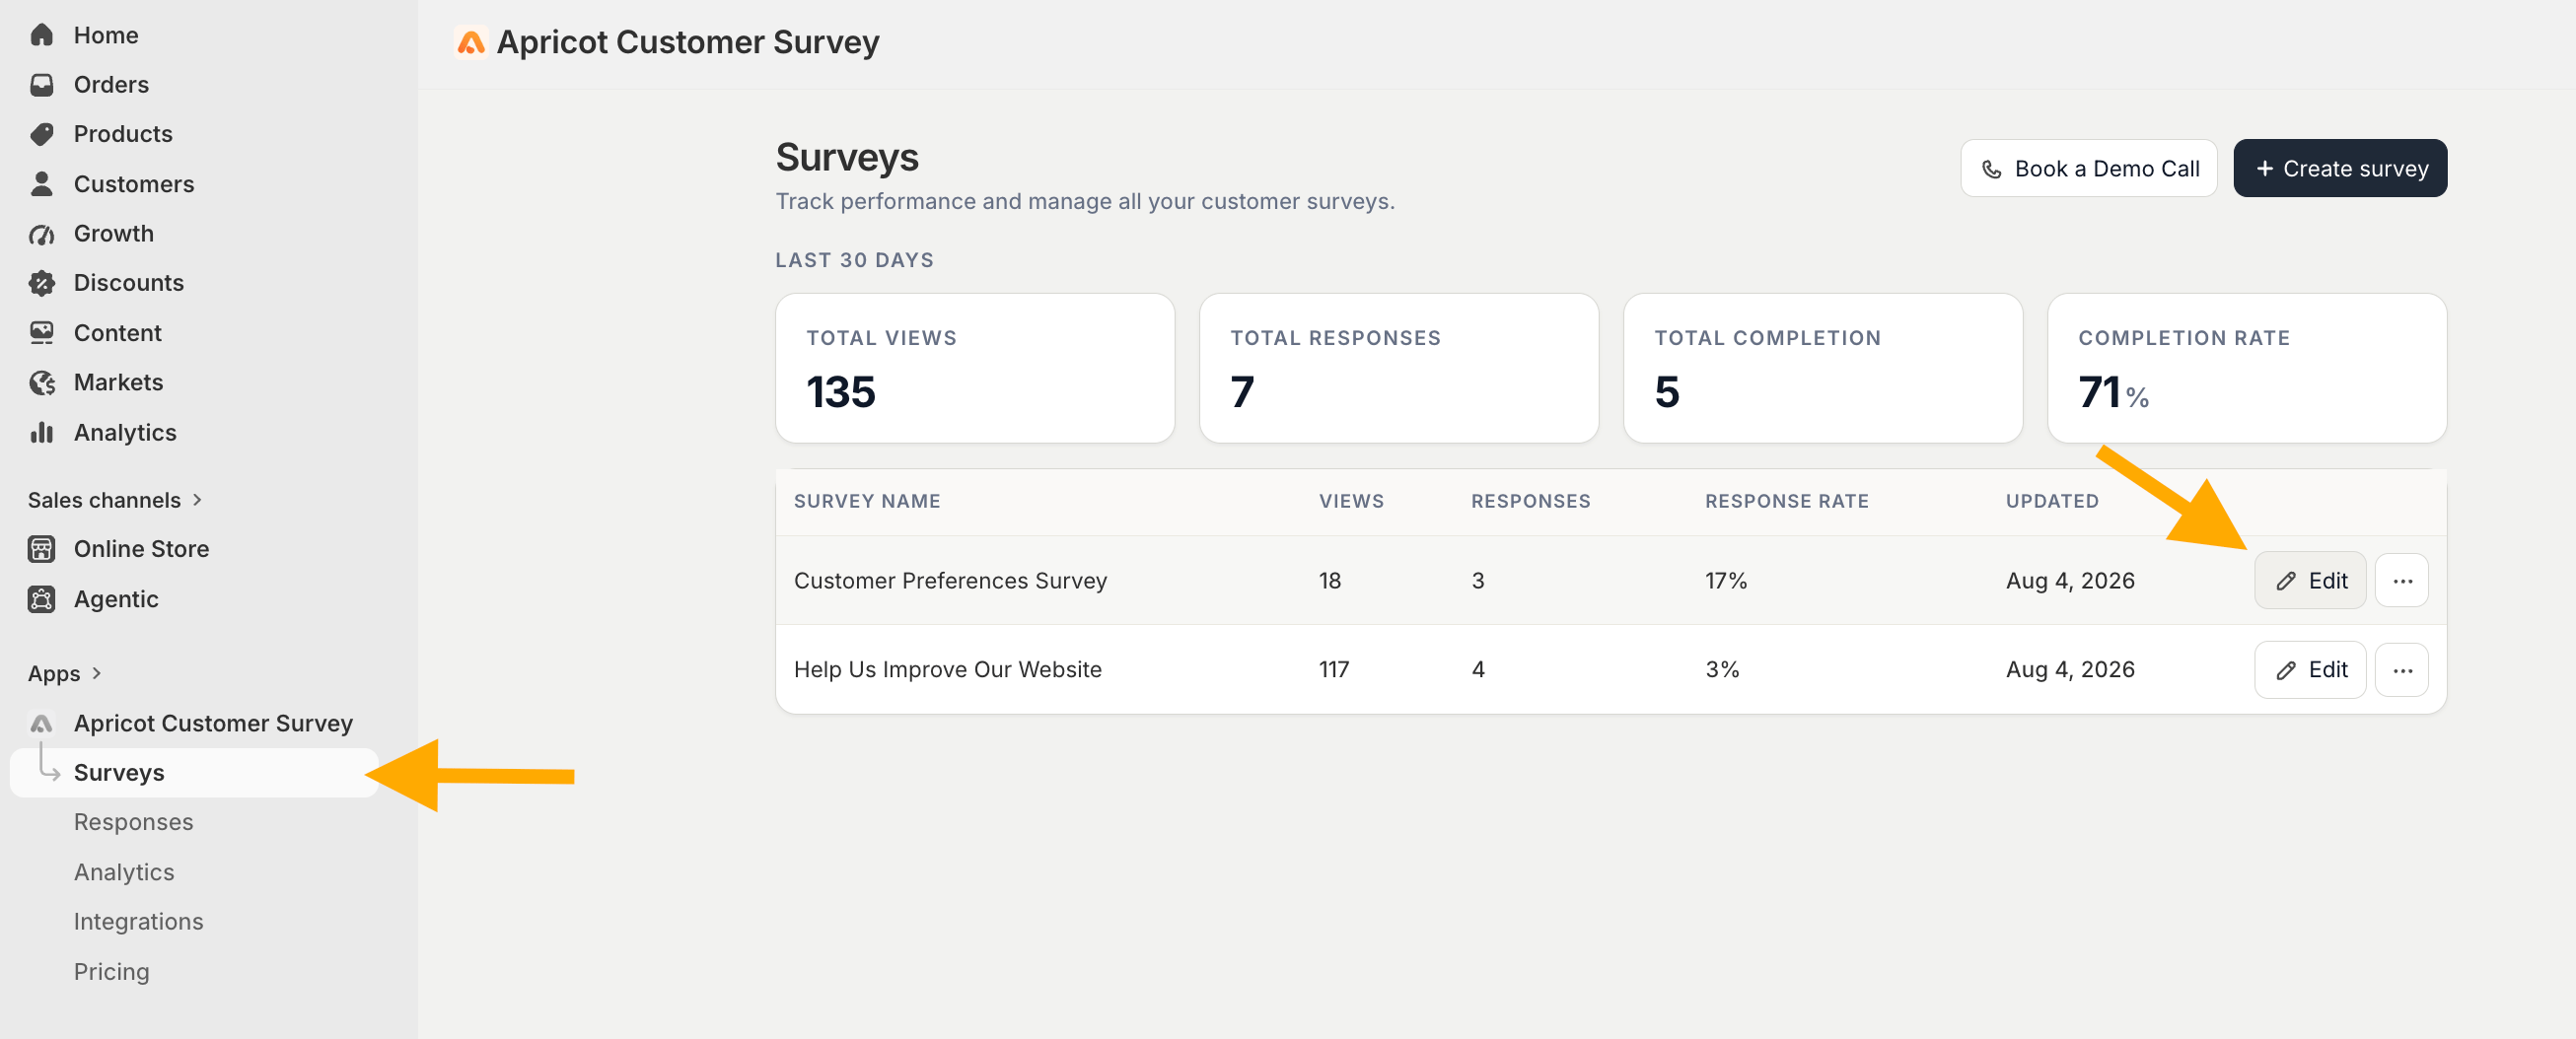
Go to:
**Apricot Dashboard → Surveys → Select your survey → Edit → Integrations**
## Activate Klaviyo for a Survey
After connecting Klaviyo to Apricot, enable the integration for each survey where you want to send respondents to Klaviyo.
Go to:
**Apricot Dashboard → Surveys → Select your survey → Edit → Integrations**
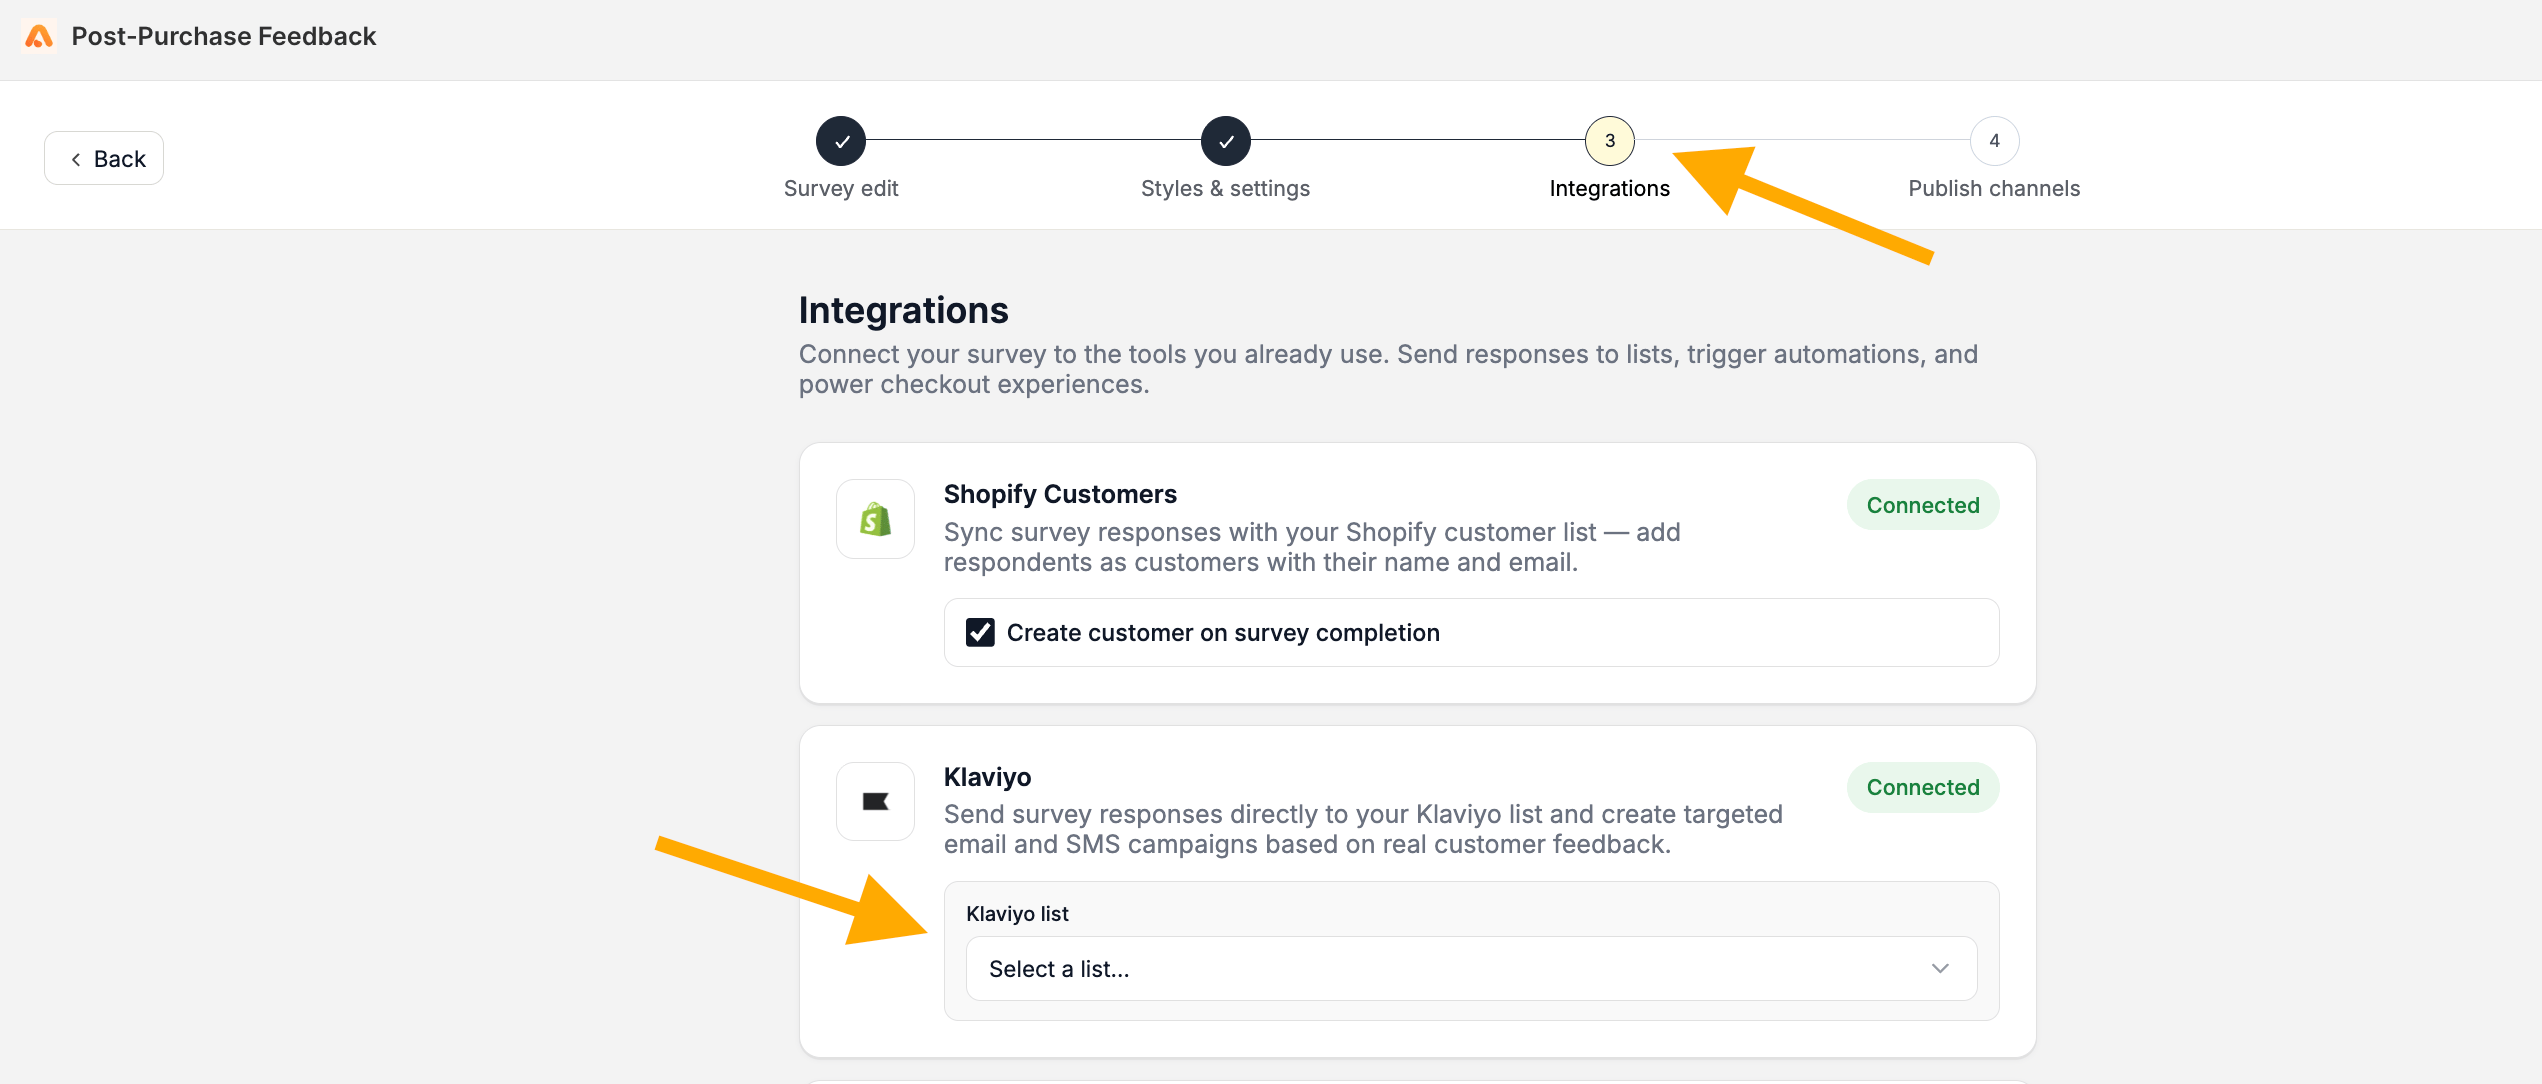
 Find **Klaviyo** in the integrations list.
Select the **Klaviyo List** where you want to add respondents from this survey.
Find **Klaviyo** in the integrations list.
Select the **Klaviyo List** where you want to add respondents from this survey.
 **Save** your changes to activate Klaviyo for the survey.
Connecting Klaviyo to Apricot does not automatically enable it for every survey. You need to **select a Klaviyo list separately for each survey** you want to connect.
This documentation is built and hosted on [Mintlify](https://mintlify.com), a developer documentation platform.
**Save** your changes to activate Klaviyo for the survey.
Connecting Klaviyo to Apricot does not automatically enable it for every survey. You need to **select a Klaviyo list separately for each survey** you want to connect.
This documentation is built and hosted on [Mintlify](https://mintlify.com), a developer documentation platform.