> ## Documentation Index
> Fetch the complete documentation index at: https://docs.apricotsurvey.com/llms.txt
> Use this file to discover all available pages before exploring further.
# Connect Mailchimp Integration
Connect Apricot with Mailchimp to send survey respondents to your Mailchimp audience and use survey data in your email marketing workflows.
## Connect Apricot to Mailchimp
First, connect your Mailchimp account to Apricot by following the steps below using your Mailchimp username and API key.
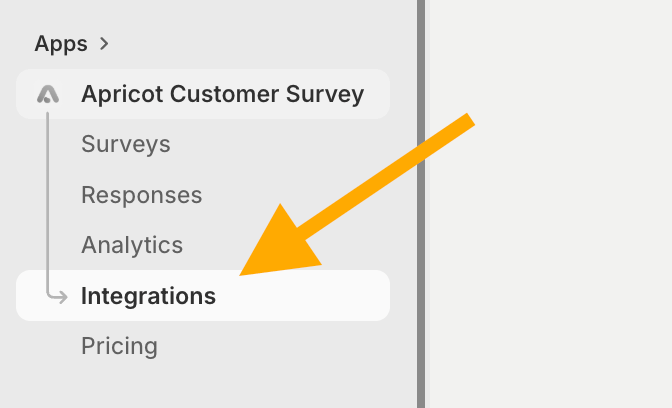
From the **Apricot Customer Survey** submenu, go to **Integrations**.
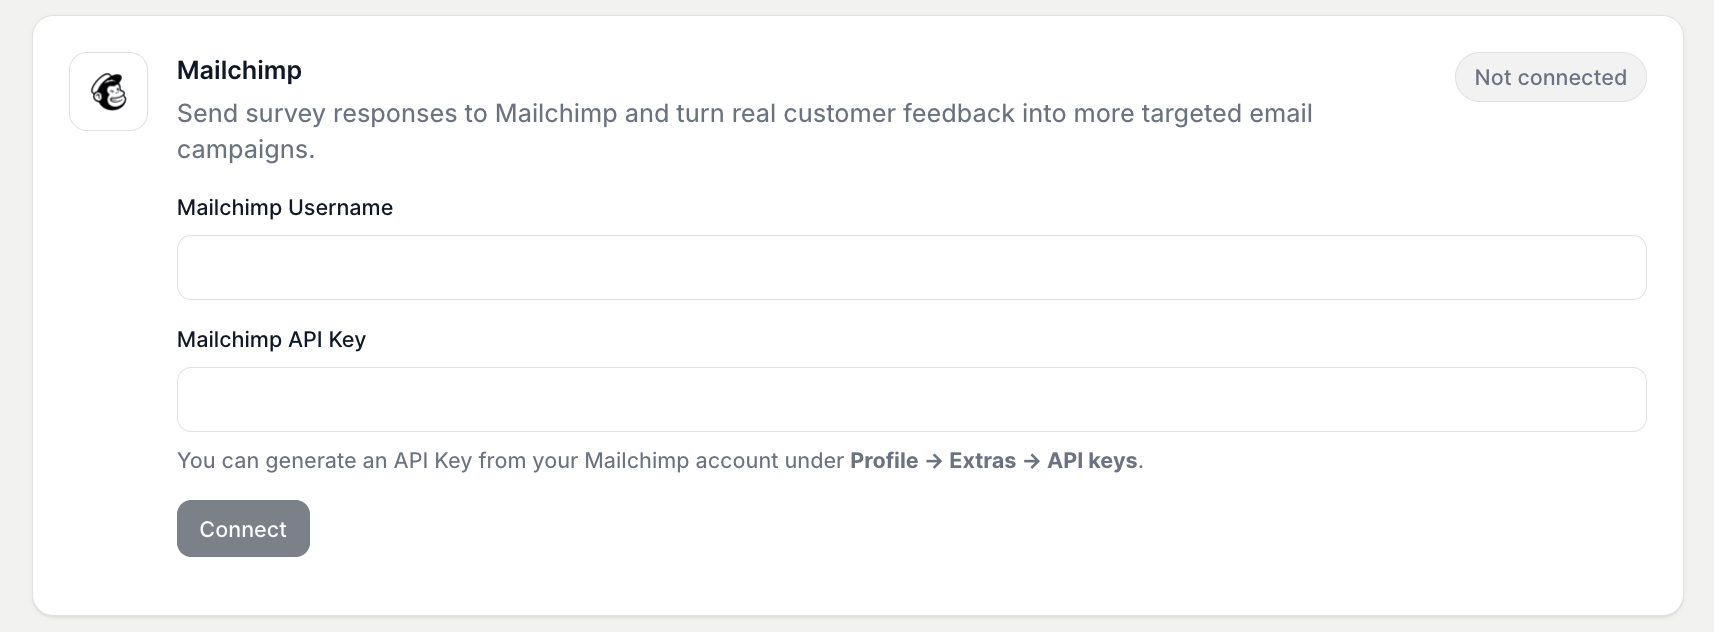
 Find **Mailchimp** in the integrations list.
 [Log in](https://login.mailchimp.com/?locale=en) to your Mailchimp account, or create a new account if you don't have one yet.
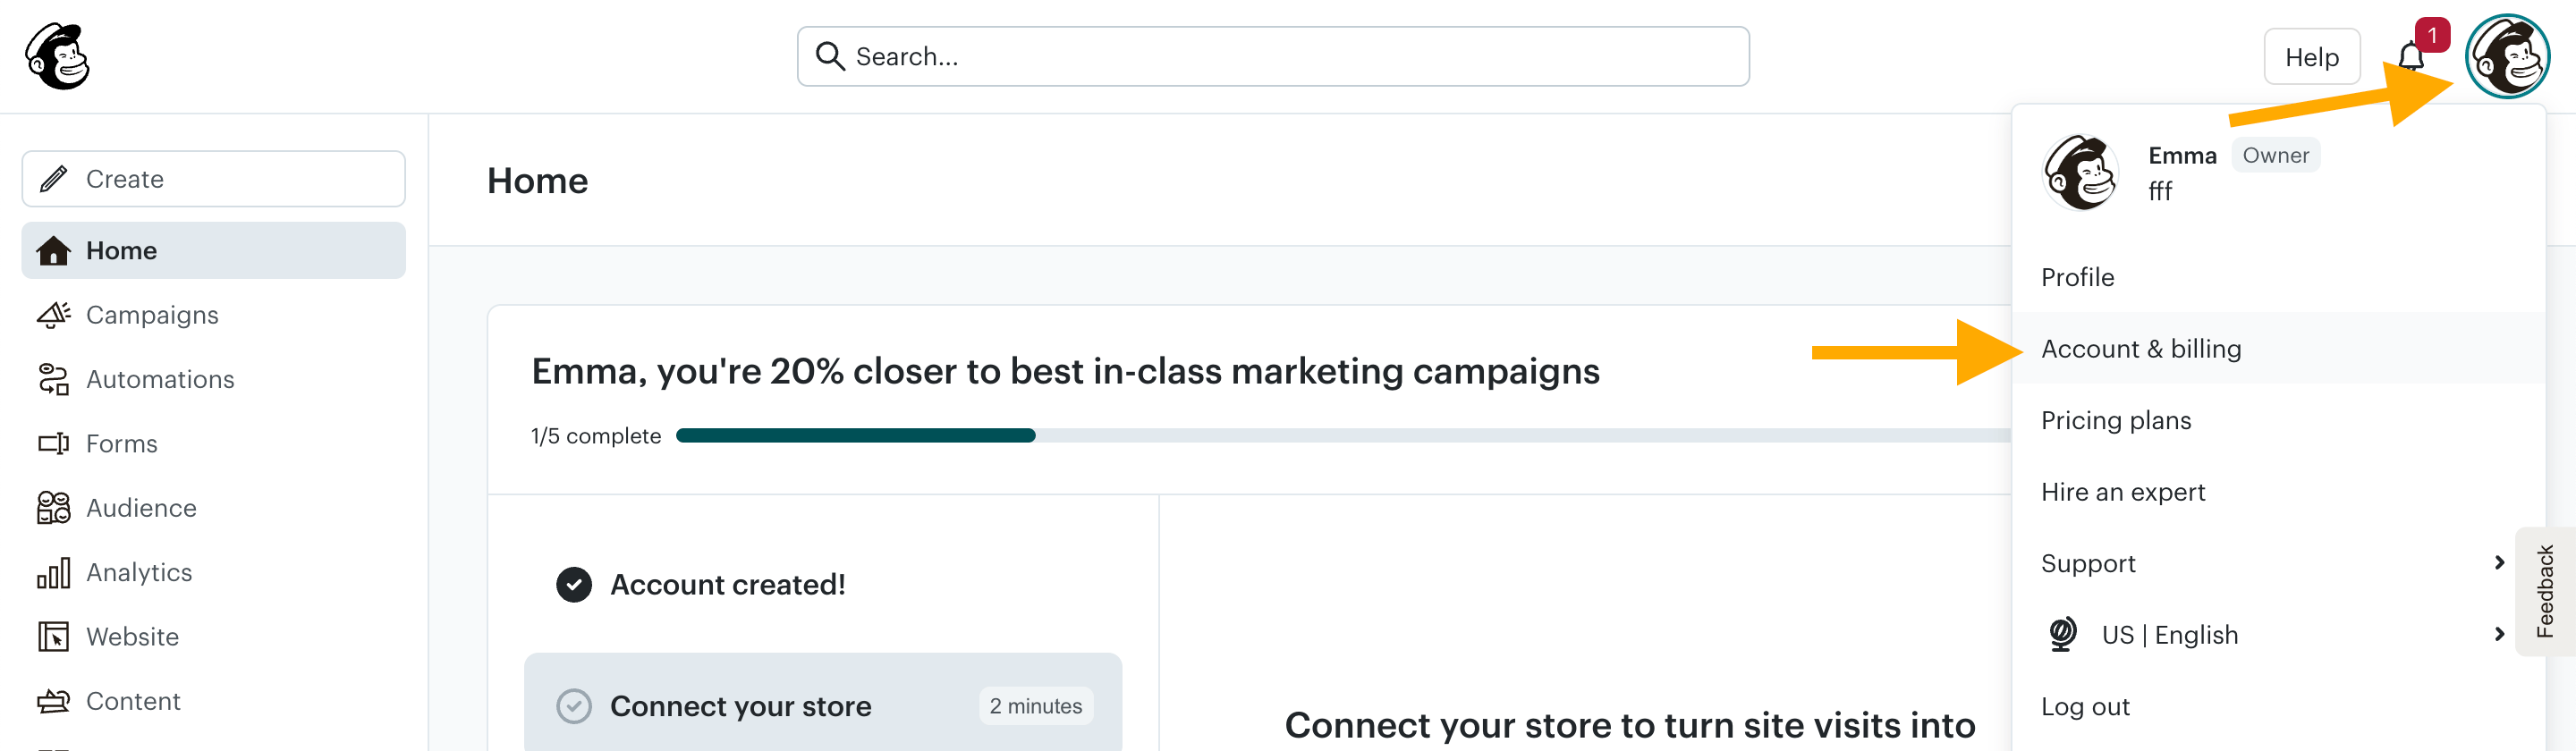
Click your profile icon, then go to **Account & billing**.
[Log in](https://login.mailchimp.com/?locale=en) to your Mailchimp account, or create a new account if you don't have one yet.
Click your profile icon, then go to **Account & billing**.
 Move to **Settings,** then **Users.**
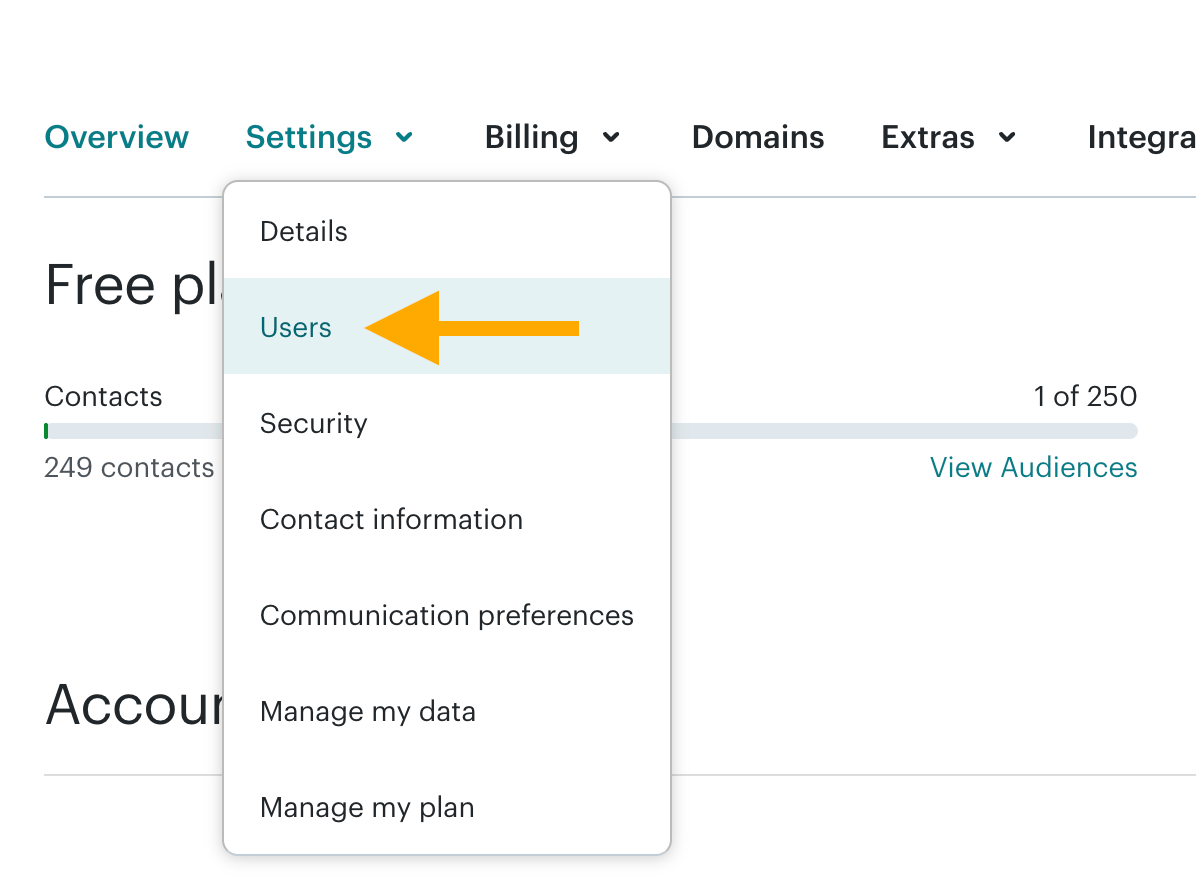 Find your account in the list and copy your **Username**. This is the **email address** you used to create your Mailchimp account.
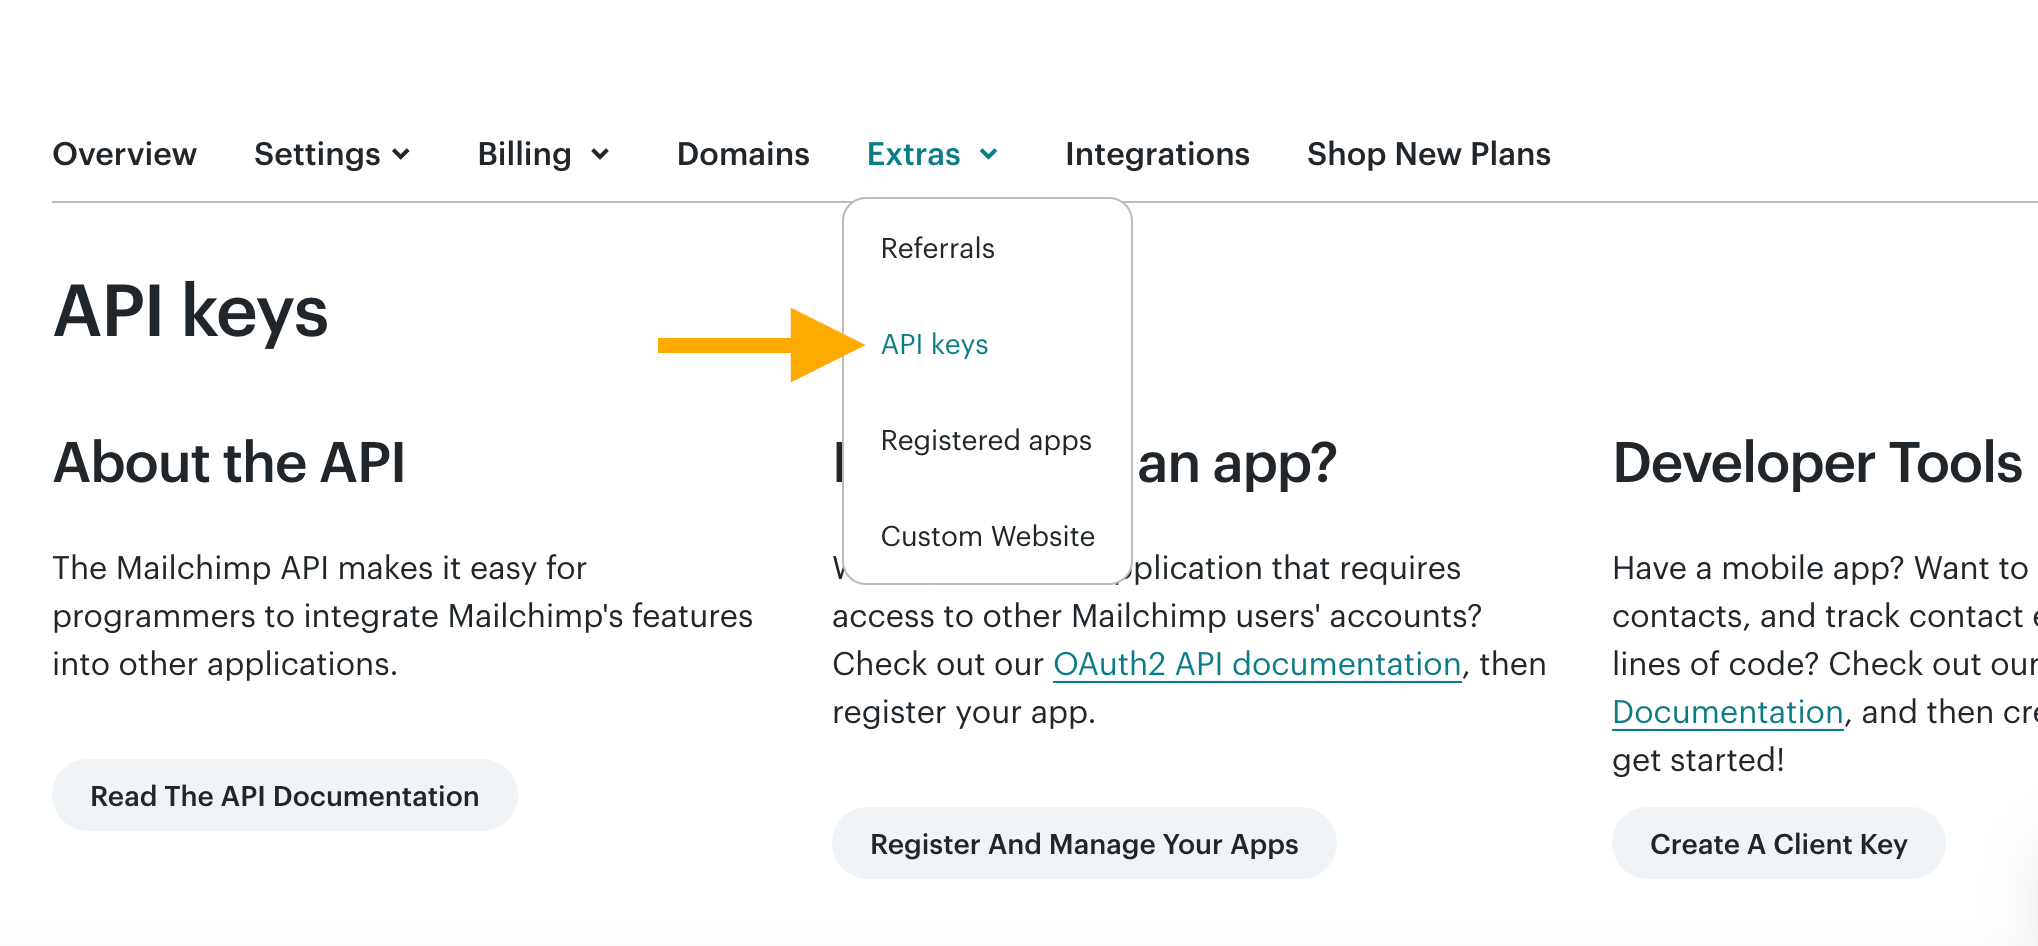
To find your **Mailchimp API Key**, open the **Extras** menu from the same screen as in the previous step(Account & Billing), then click **API keys**.
Find your account in the list and copy your **Username**. This is the **email address** you used to create your Mailchimp account.
To find your **Mailchimp API Key**, open the **Extras** menu from the same screen as in the previous step(Account & Billing), then click **API keys**.
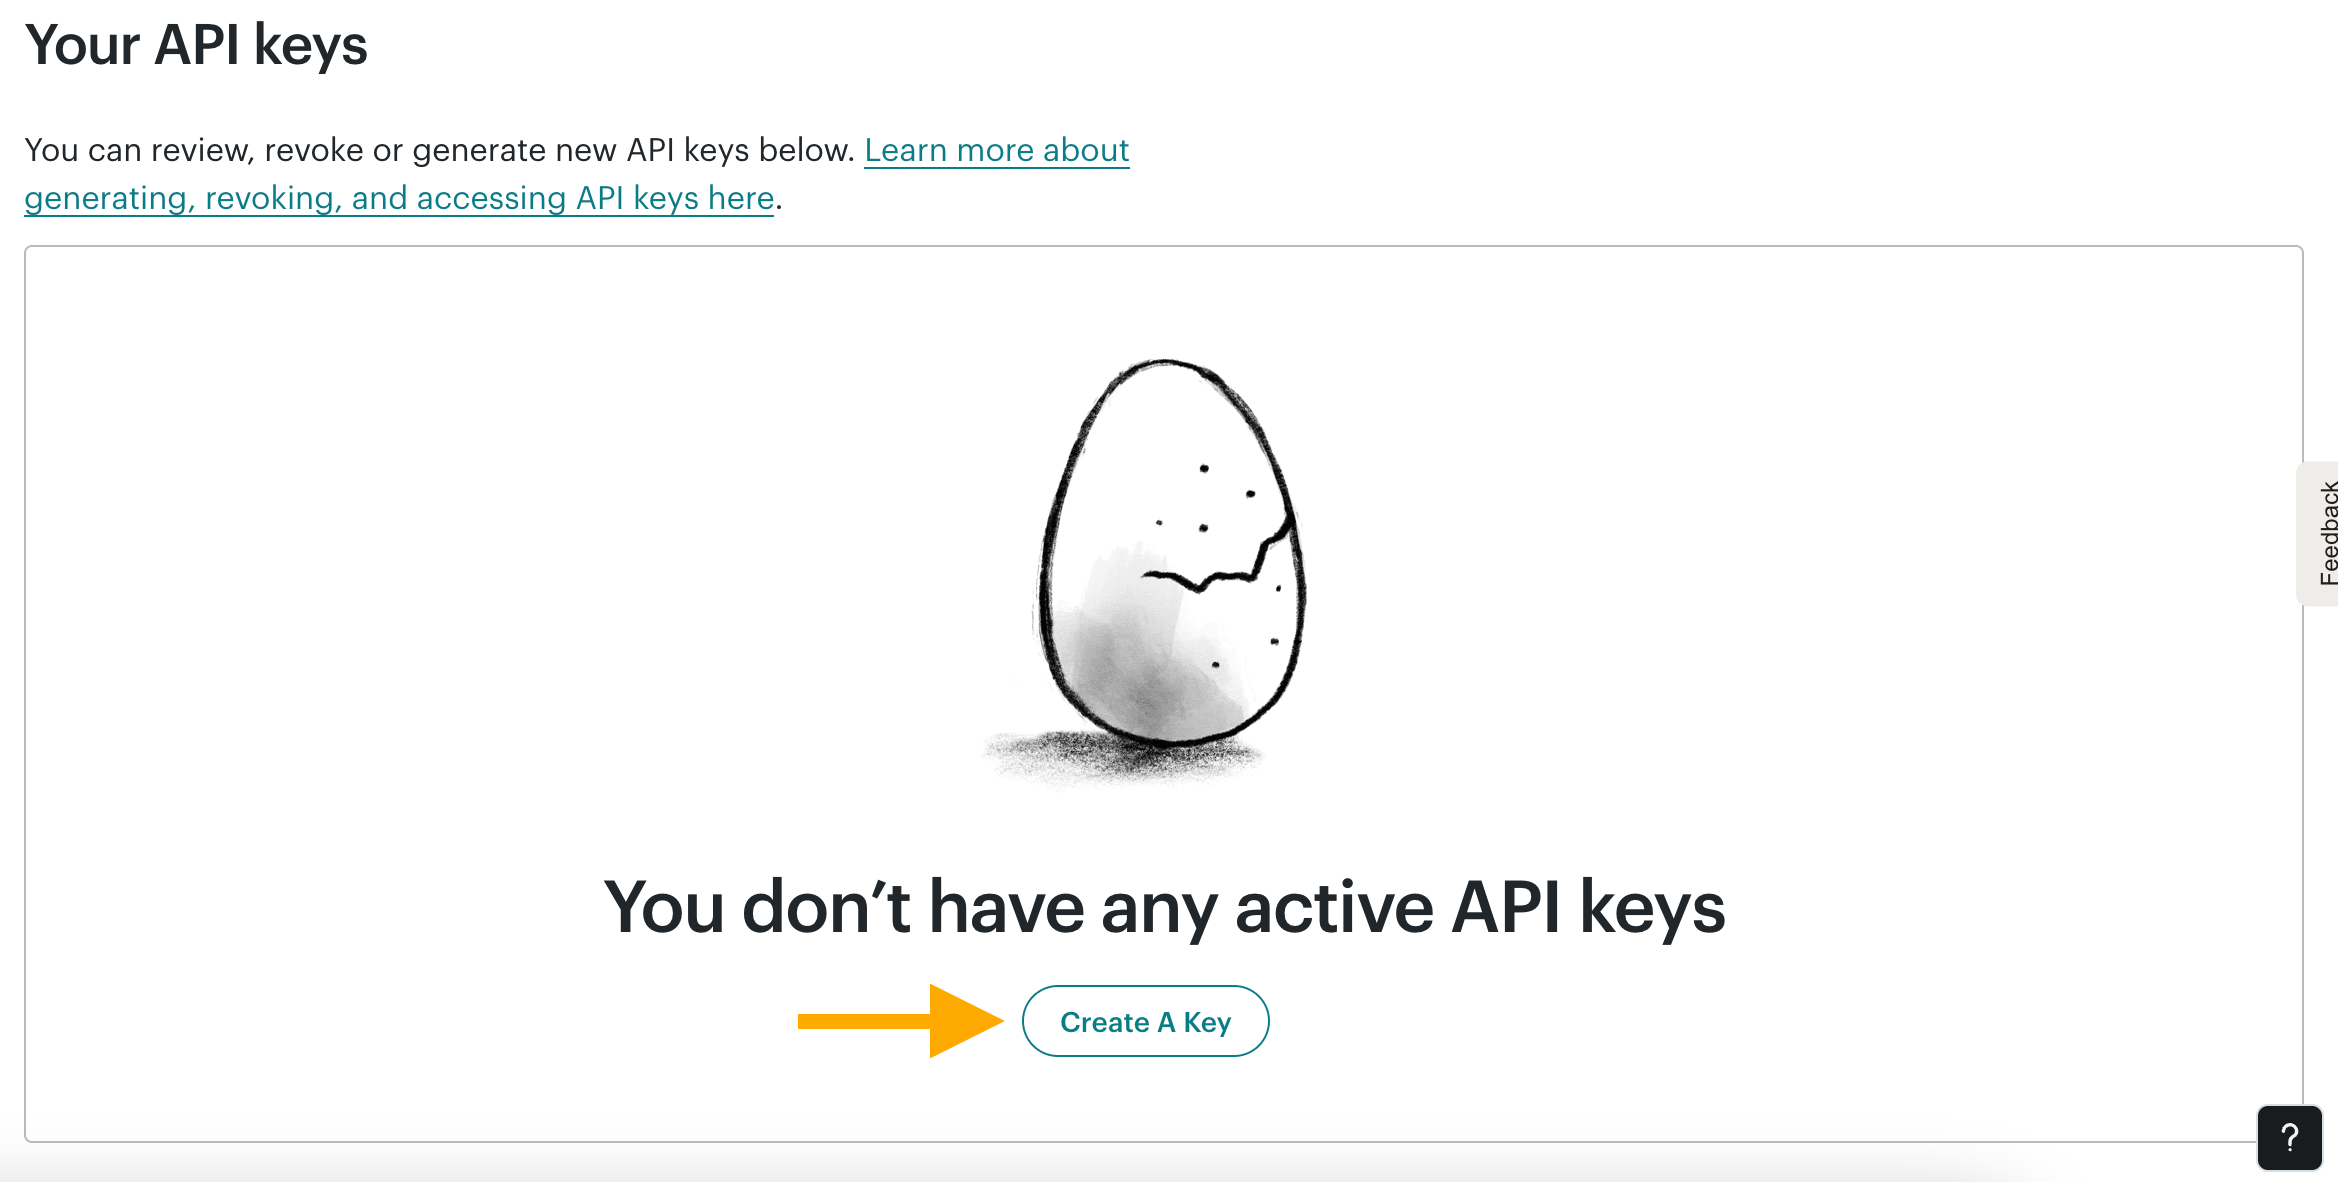
 Under **Your API keys**, click **Create A Key.**
 Enter a name for your key and click **Generate Key**.
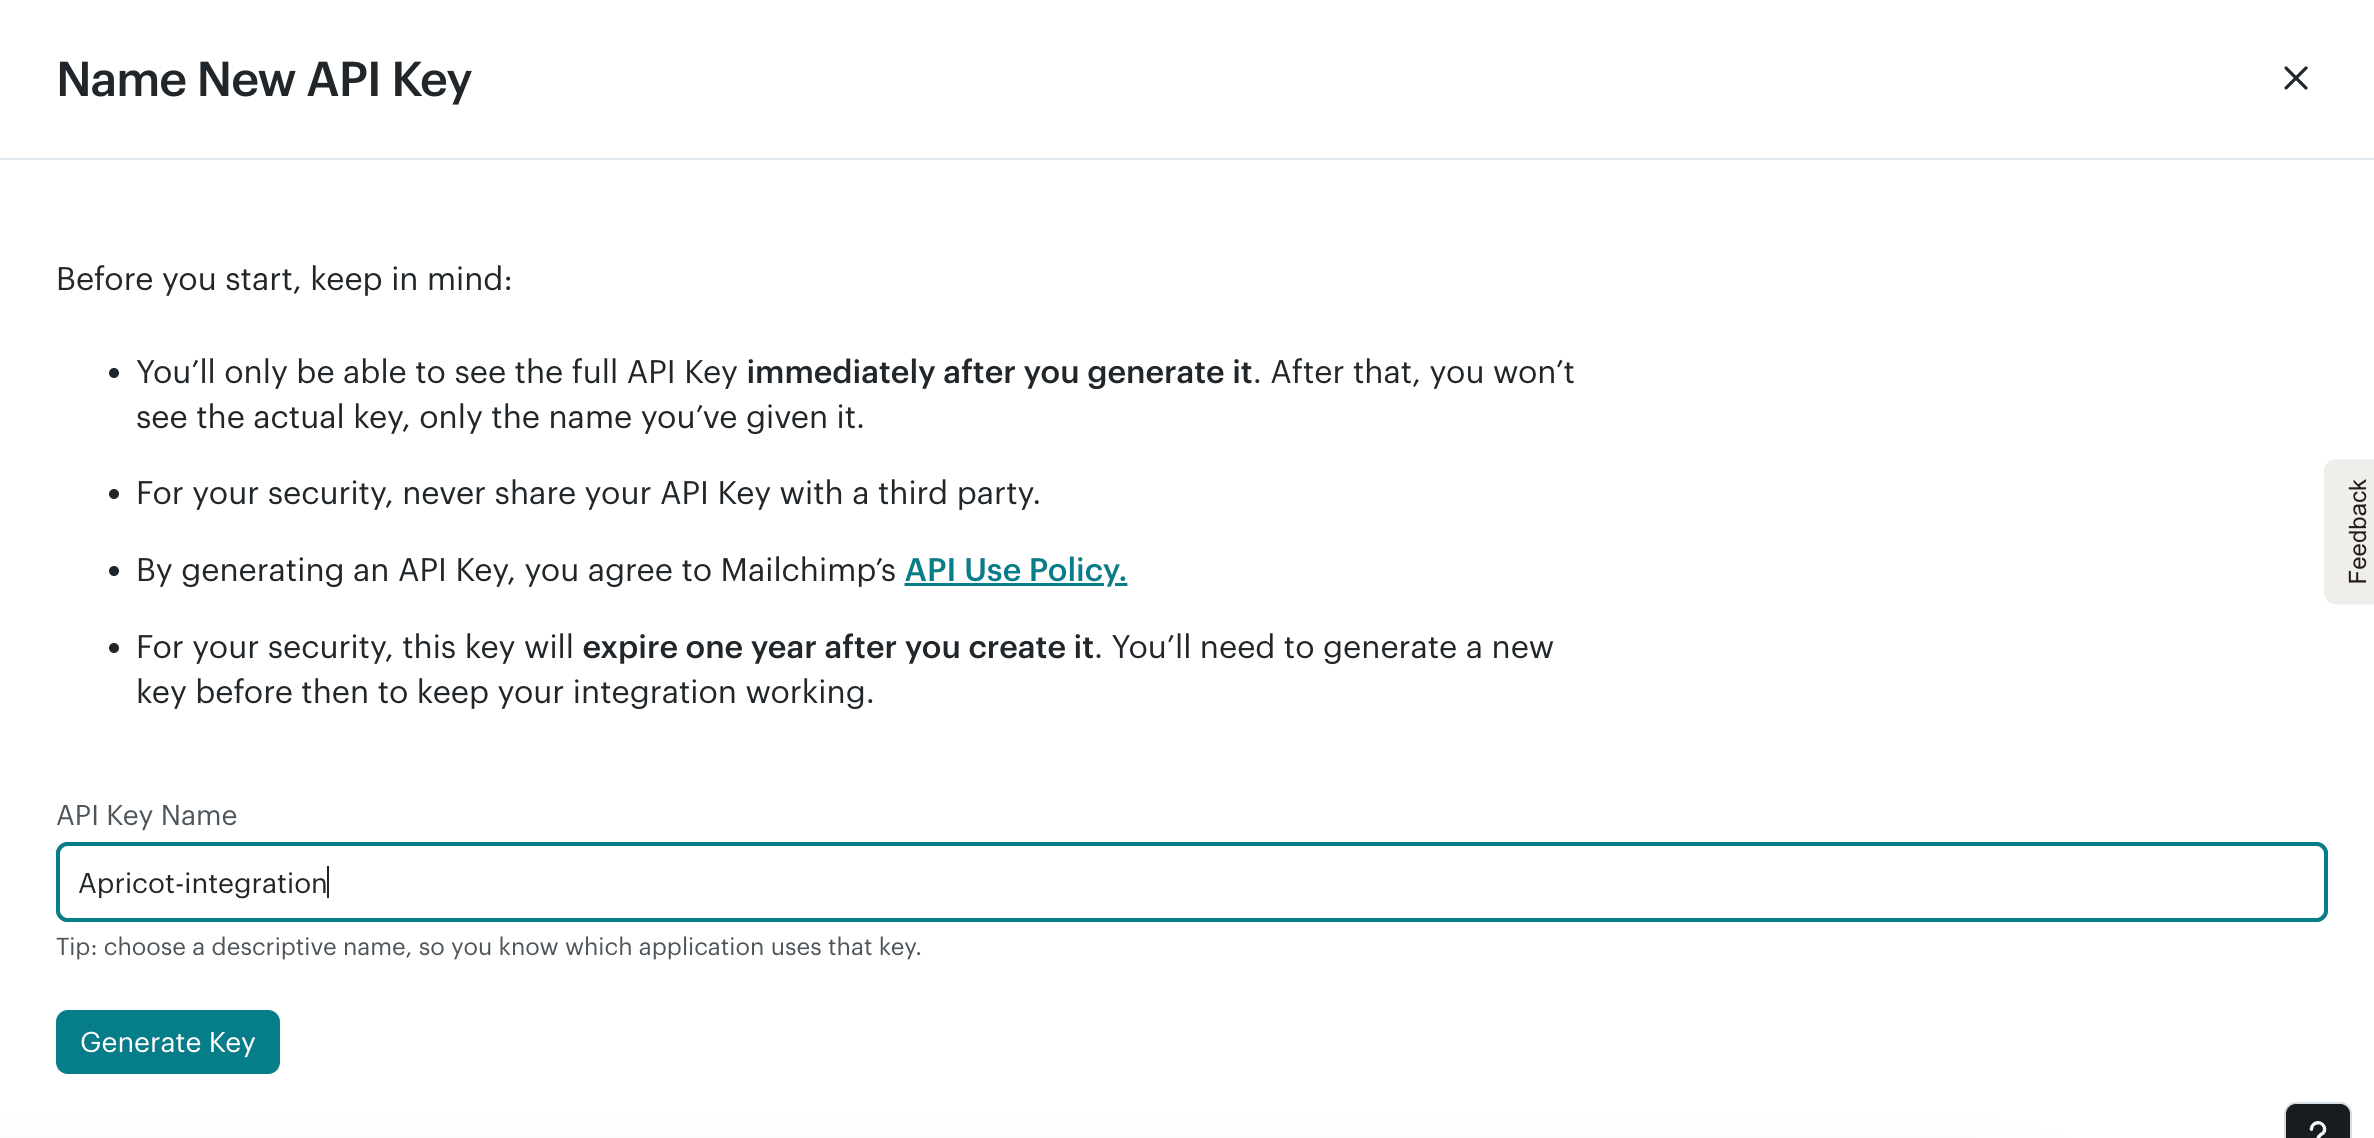 You’ll **only** **be able to see** the full API Key immediately after you generate it. After that, you won’t see the actual key, only the name you’ve given it.
**Copy the new API key immediately** and store it somewhere secure. Mailchimp may not show the full key again.
Return to the Apricot integration settings and paste the key into the Mailchimp API Key field.
After entering your **Mailchimp username** and **API key**, click **Connect**.
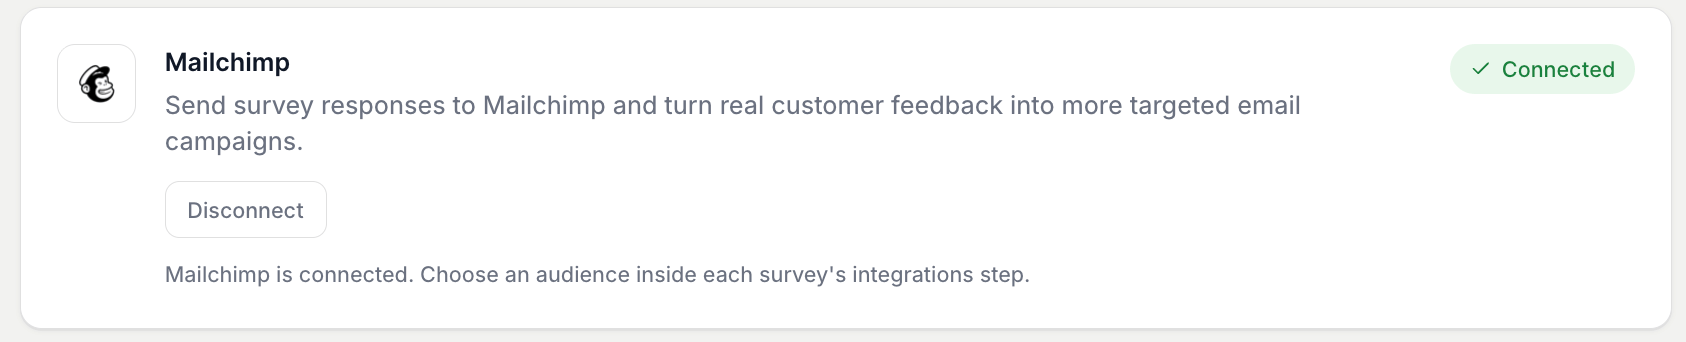
Once the connection is successful, a **green Connected badge** will appear, confirming that your Mailchimp account is connected to Apricot.
You’ll **only** **be able to see** the full API Key immediately after you generate it. After that, you won’t see the actual key, only the name you’ve given it.
**Copy the new API key immediately** and store it somewhere secure. Mailchimp may not show the full key again.
Return to the Apricot integration settings and paste the key into the Mailchimp API Key field.
After entering your **Mailchimp username** and **API key**, click **Connect**.
Once the connection is successful, a **green Connected badge** will appear, confirming that your Mailchimp account is connected to Apricot.
 ## Activate Mailchimp for a Survey
After connecting Mailchimp to Apricot, select the audience you want to use for each survey.
Go to:
**Apricot Dashboard → Surveys → Select your survey → Edit → Integrations**
## Activate Mailchimp for a Survey
After connecting Mailchimp to Apricot, select the audience you want to use for each survey.
Go to:
**Apricot Dashboard → Surveys → Select your survey → Edit → Integrations**
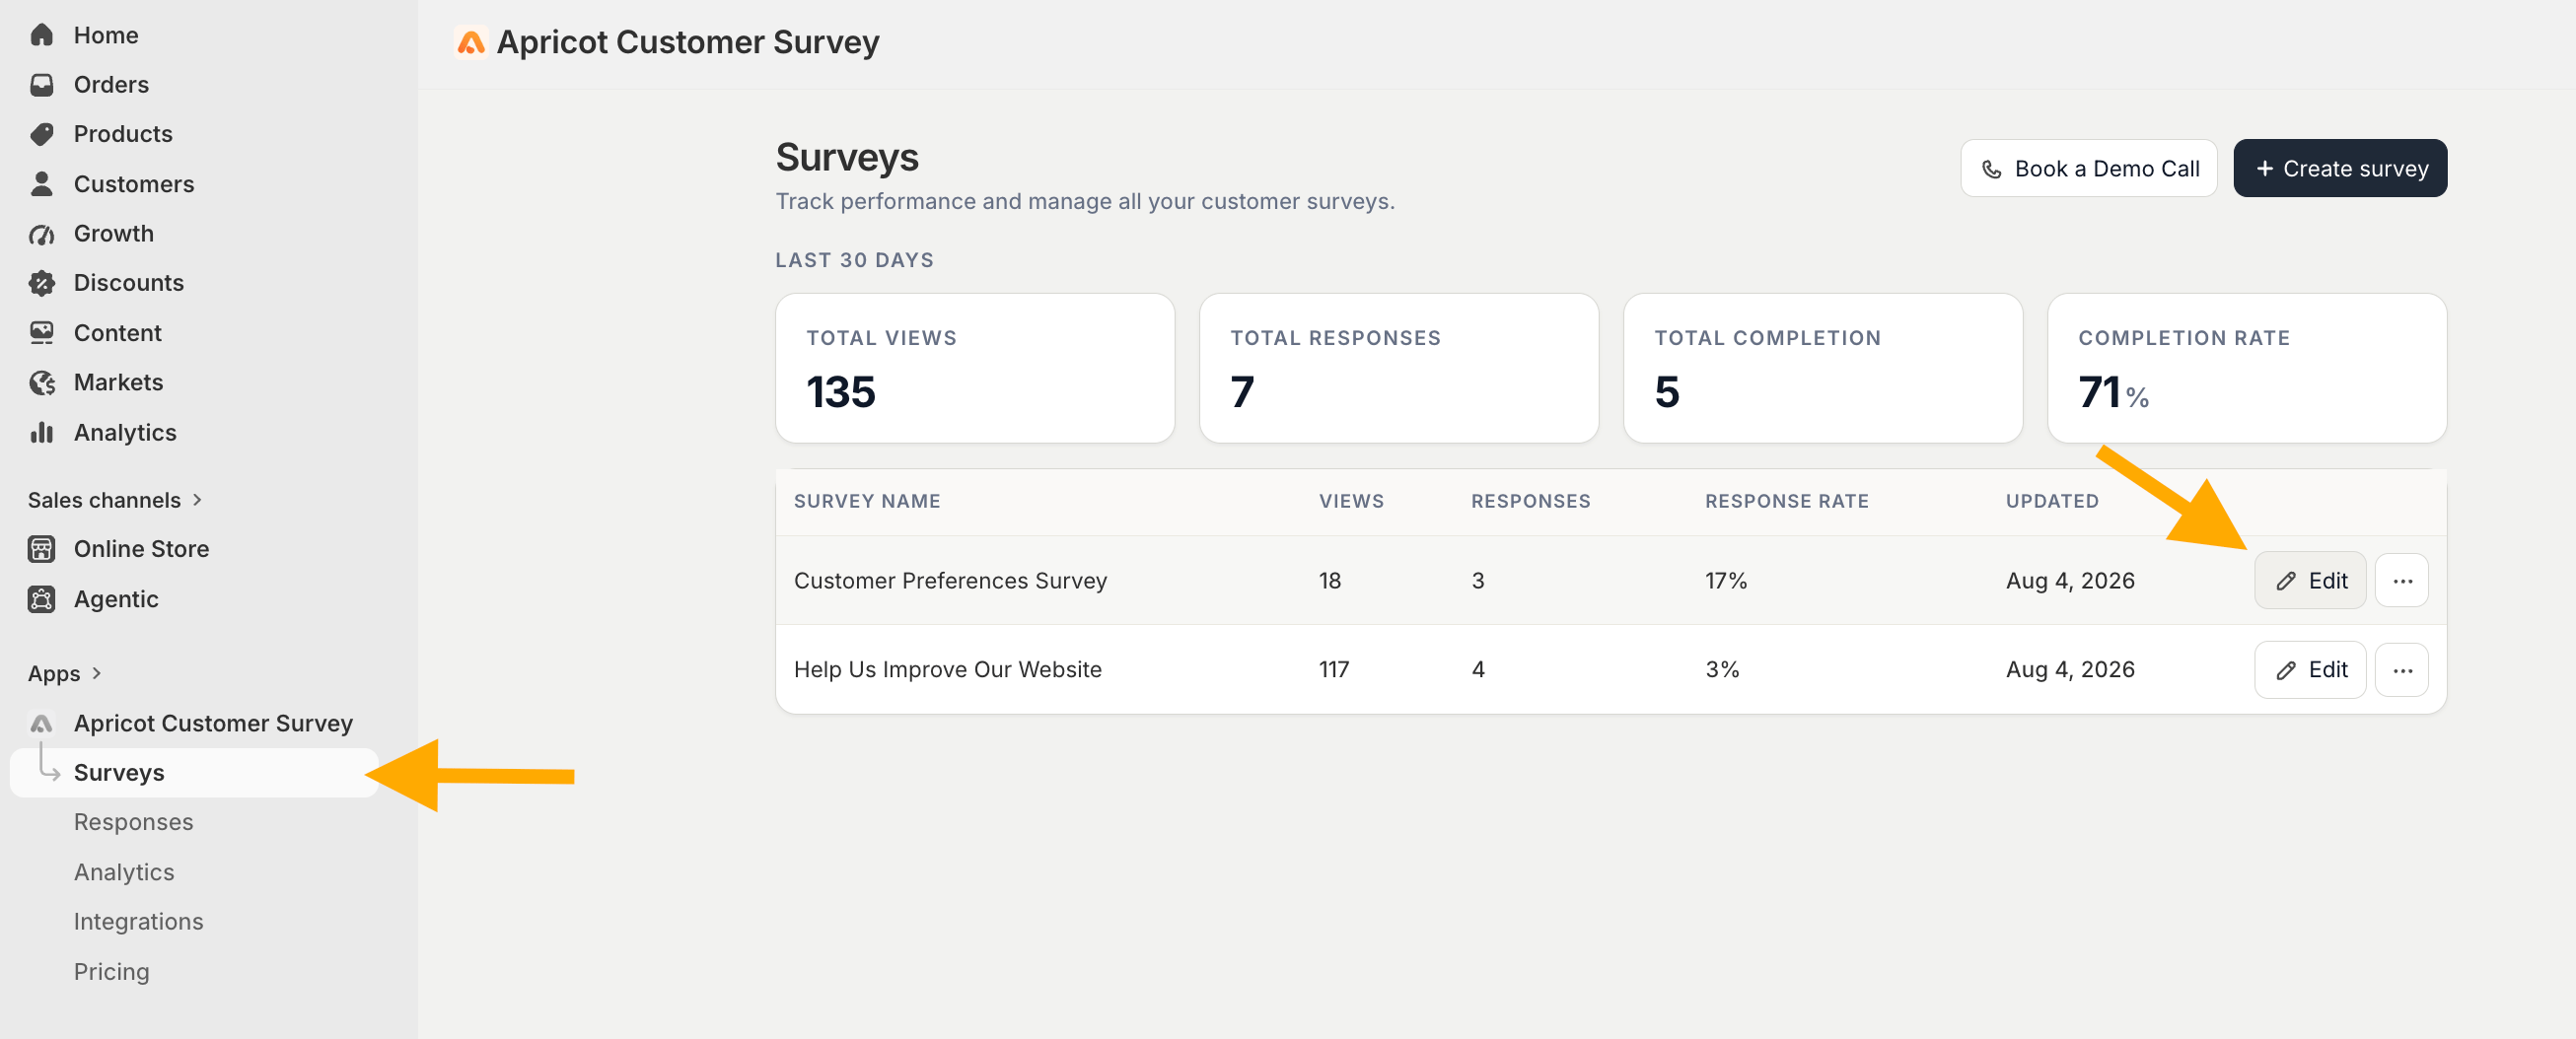 Find **Mailchimp** in the **integrations** list.
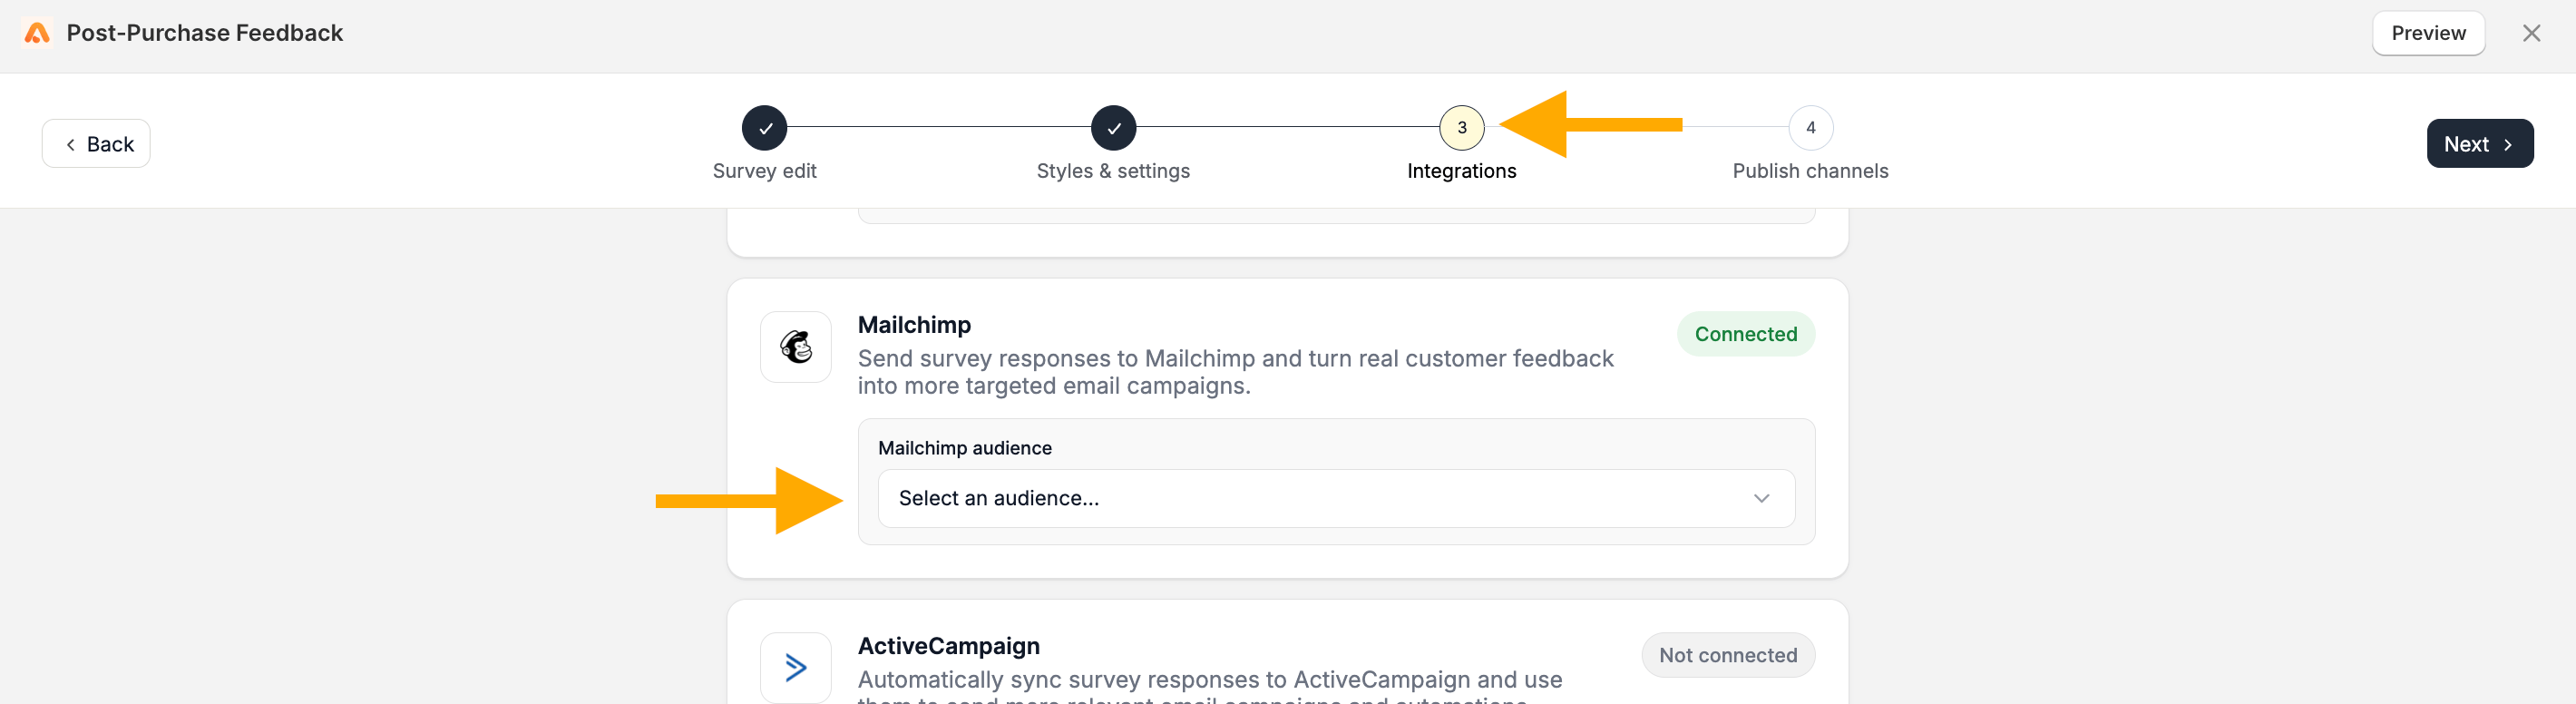 Select the **Audience** where you want to add respondents from this survey.
**Save** your changes to activate Mailchimp for the survey.
Connecting Mailchimp to Apricot does not automatically enable it for every survey. You need to **select a Mailchimp audience separately for each survey** you want to connect.
This documentation is built and hosted on [Mintlify](https://mintlify.com), a developer documentation platform.
Select the **Audience** where you want to add respondents from this survey.
**Save** your changes to activate Mailchimp for the survey.
Connecting Mailchimp to Apricot does not automatically enable it for every survey. You need to **select a Mailchimp audience separately for each survey** you want to connect.
This documentation is built and hosted on [Mintlify](https://mintlify.com), a developer documentation platform.