> ## Documentation Index
> Fetch the complete documentation index at: https://docs.apricotsurvey.com/llms.txt
> Use this file to discover all available pages before exploring further.
# On-site Surveys (Popup)
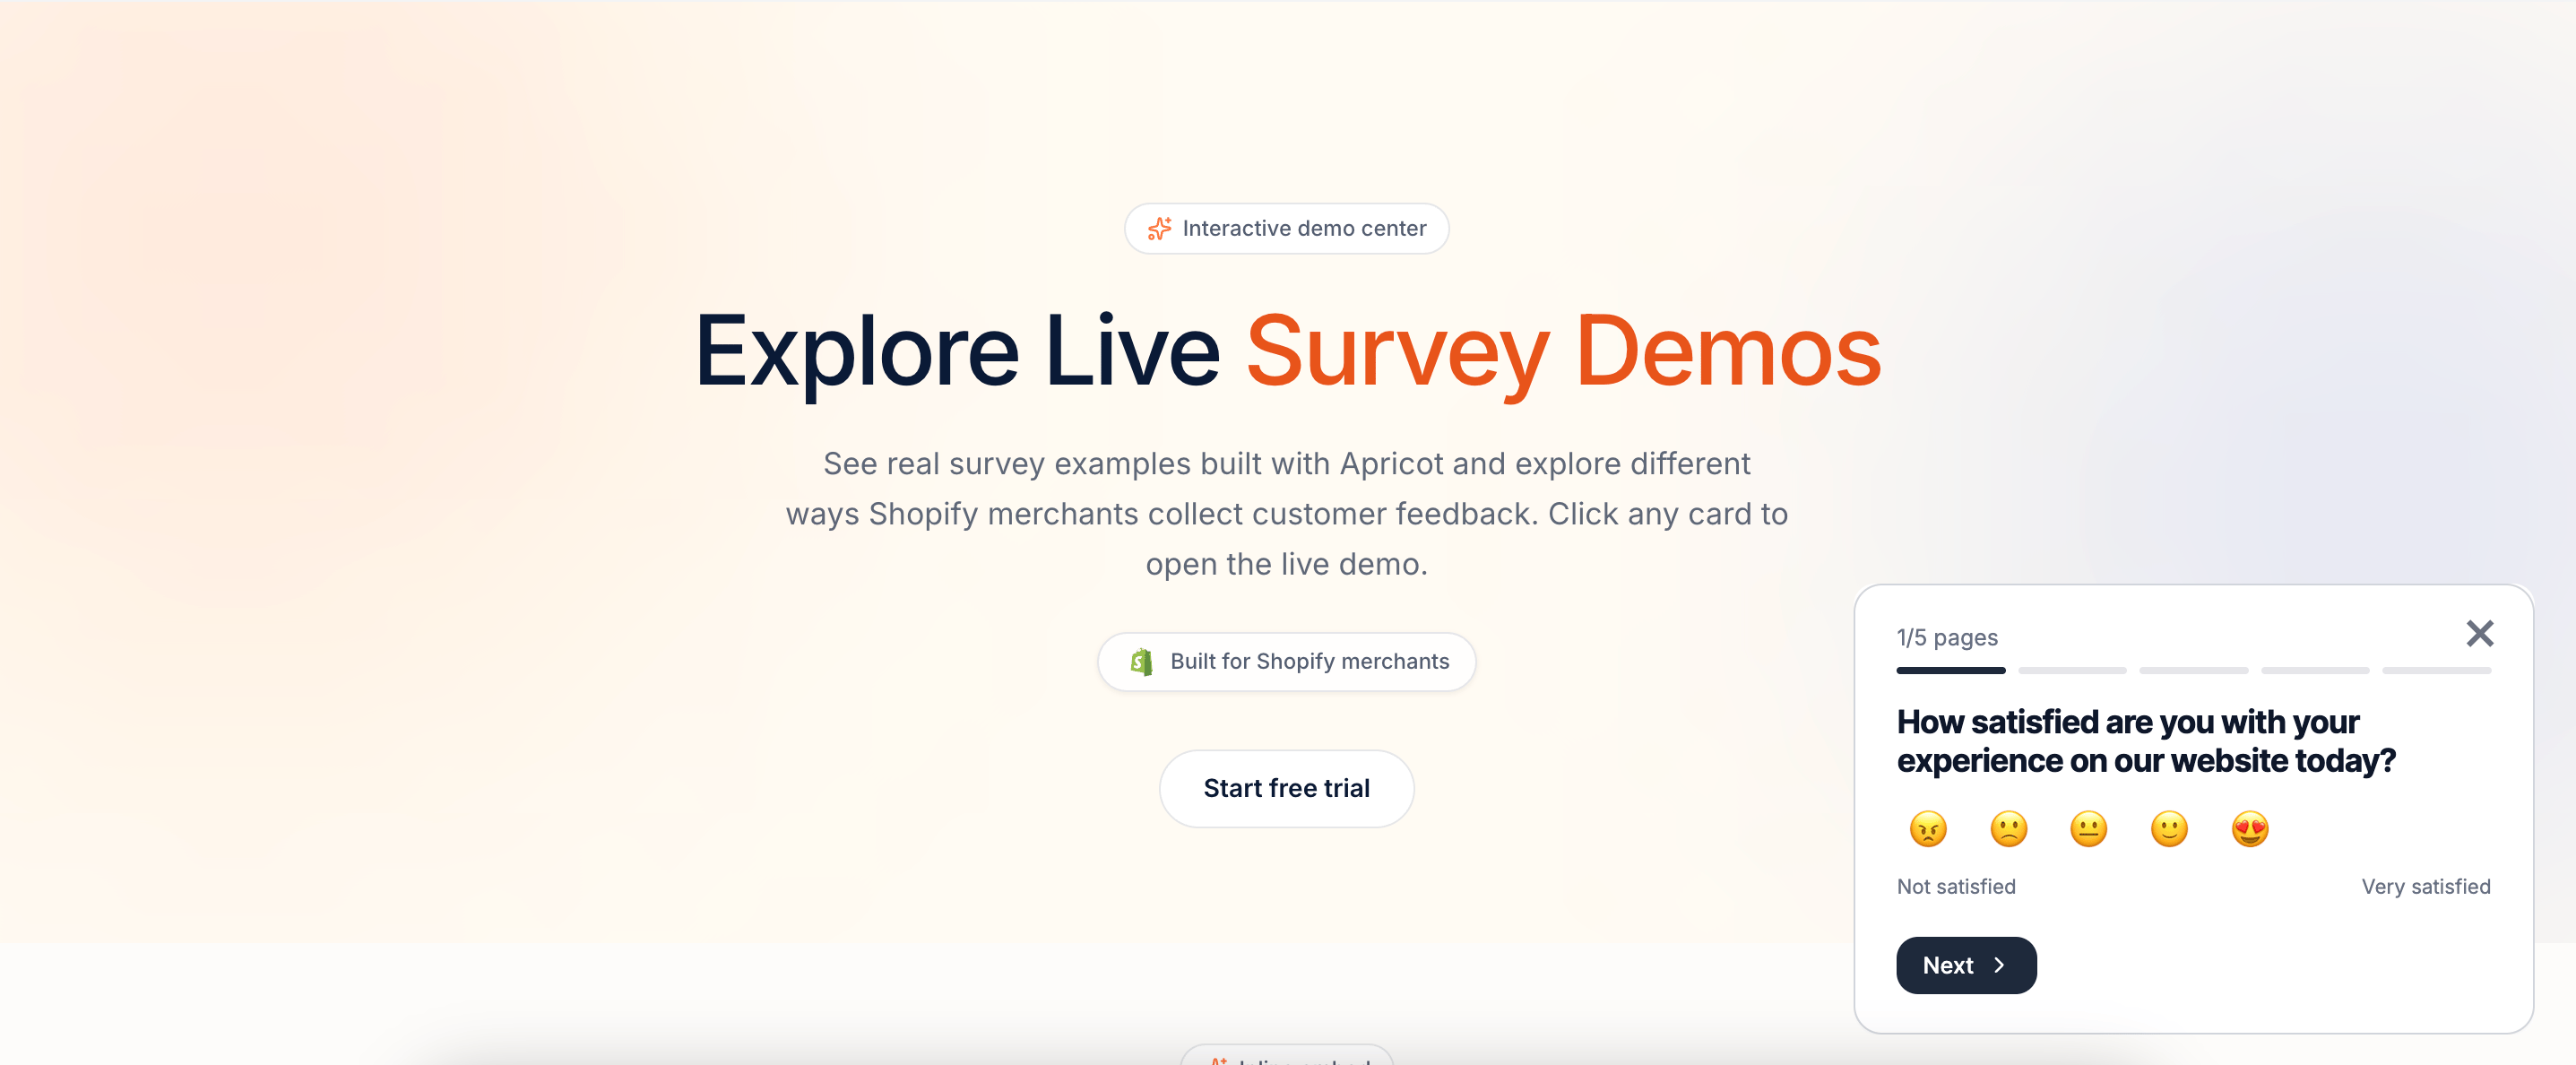
Display your surveys directly on your Shopify store as a popup located in the bottom-right corner of the screen, allowing visitors to share feedback while they browse your website.
The **On-site Surveys** publishing option allows you to show your survey without redirecting customers to another page. Visitors can interact with the survey directly from your storefront while continuing their shopping experience.
This option is ideal for:
* Collecting customer feedback while visitors are browsing your store
* Showing surveys across your storefront or on specific pages
* Running quick feedback campaigns without interrupting the shopping experience
 ## Set Up an On-site Survey Popup
Follow these steps to enable your survey popup:
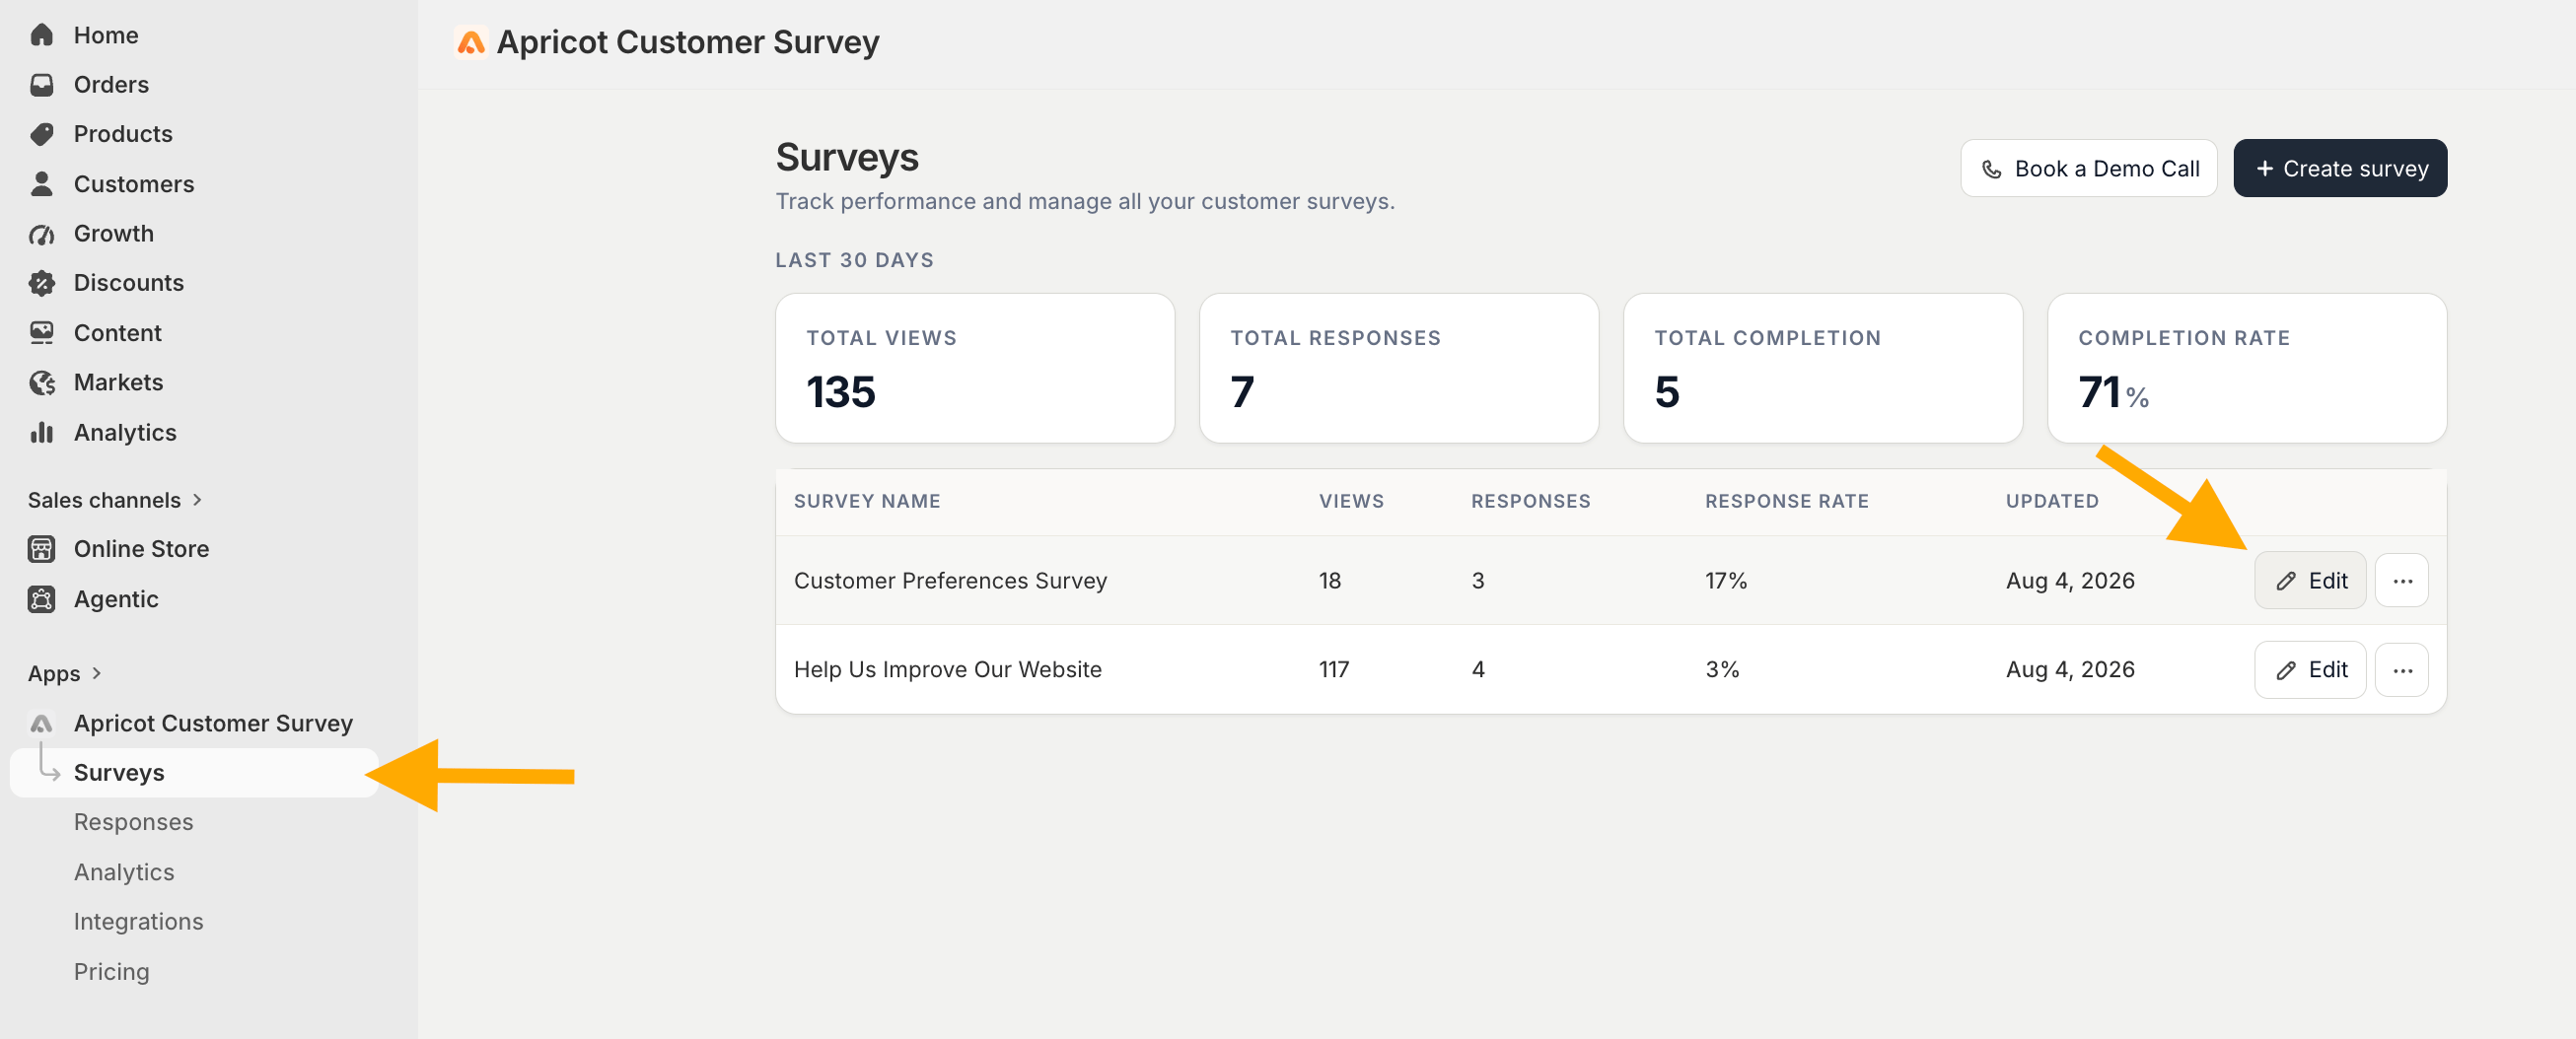
Go to: **Apricot Dashboard → Surveys → Select your survey → Edit**
## Set Up an On-site Survey Popup
Follow these steps to enable your survey popup:
Go to: **Apricot Dashboard → Surveys → Select your survey → Edit**
 From the survey editor, navigate to the Publish Channels section and select\*\* On-site Surveys (Popup). \*\*
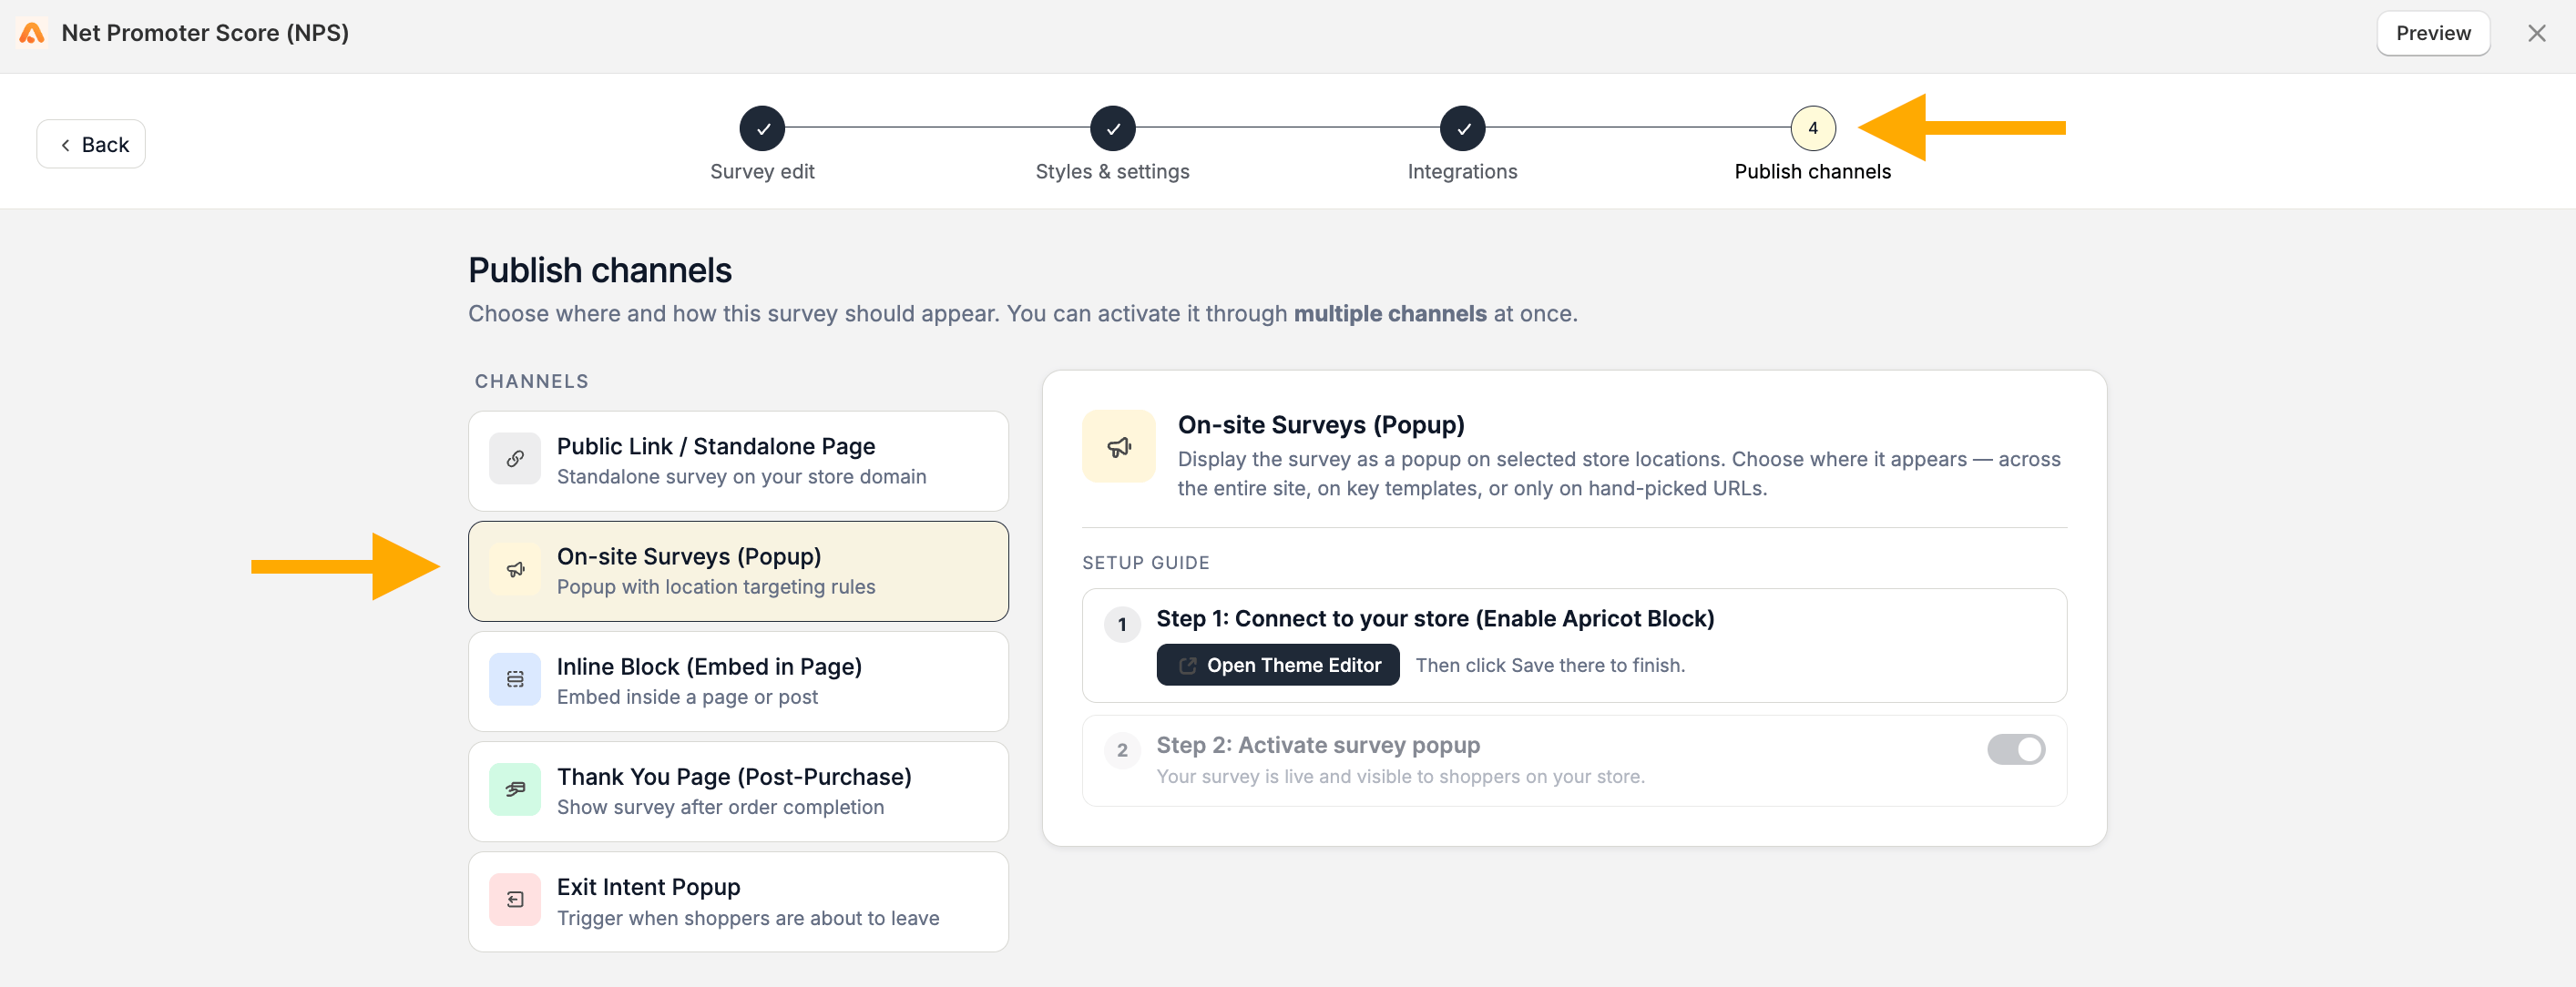 You will see the setup guide with the required steps to activate your popup.
The first step is to enable the **Apricot Block** in your Shopify theme.
The **Apricot Block** must be enabled for Apricot surveys to work correctly. If the block is not activated, your surveys may not appear, and some functionality will not work properly.
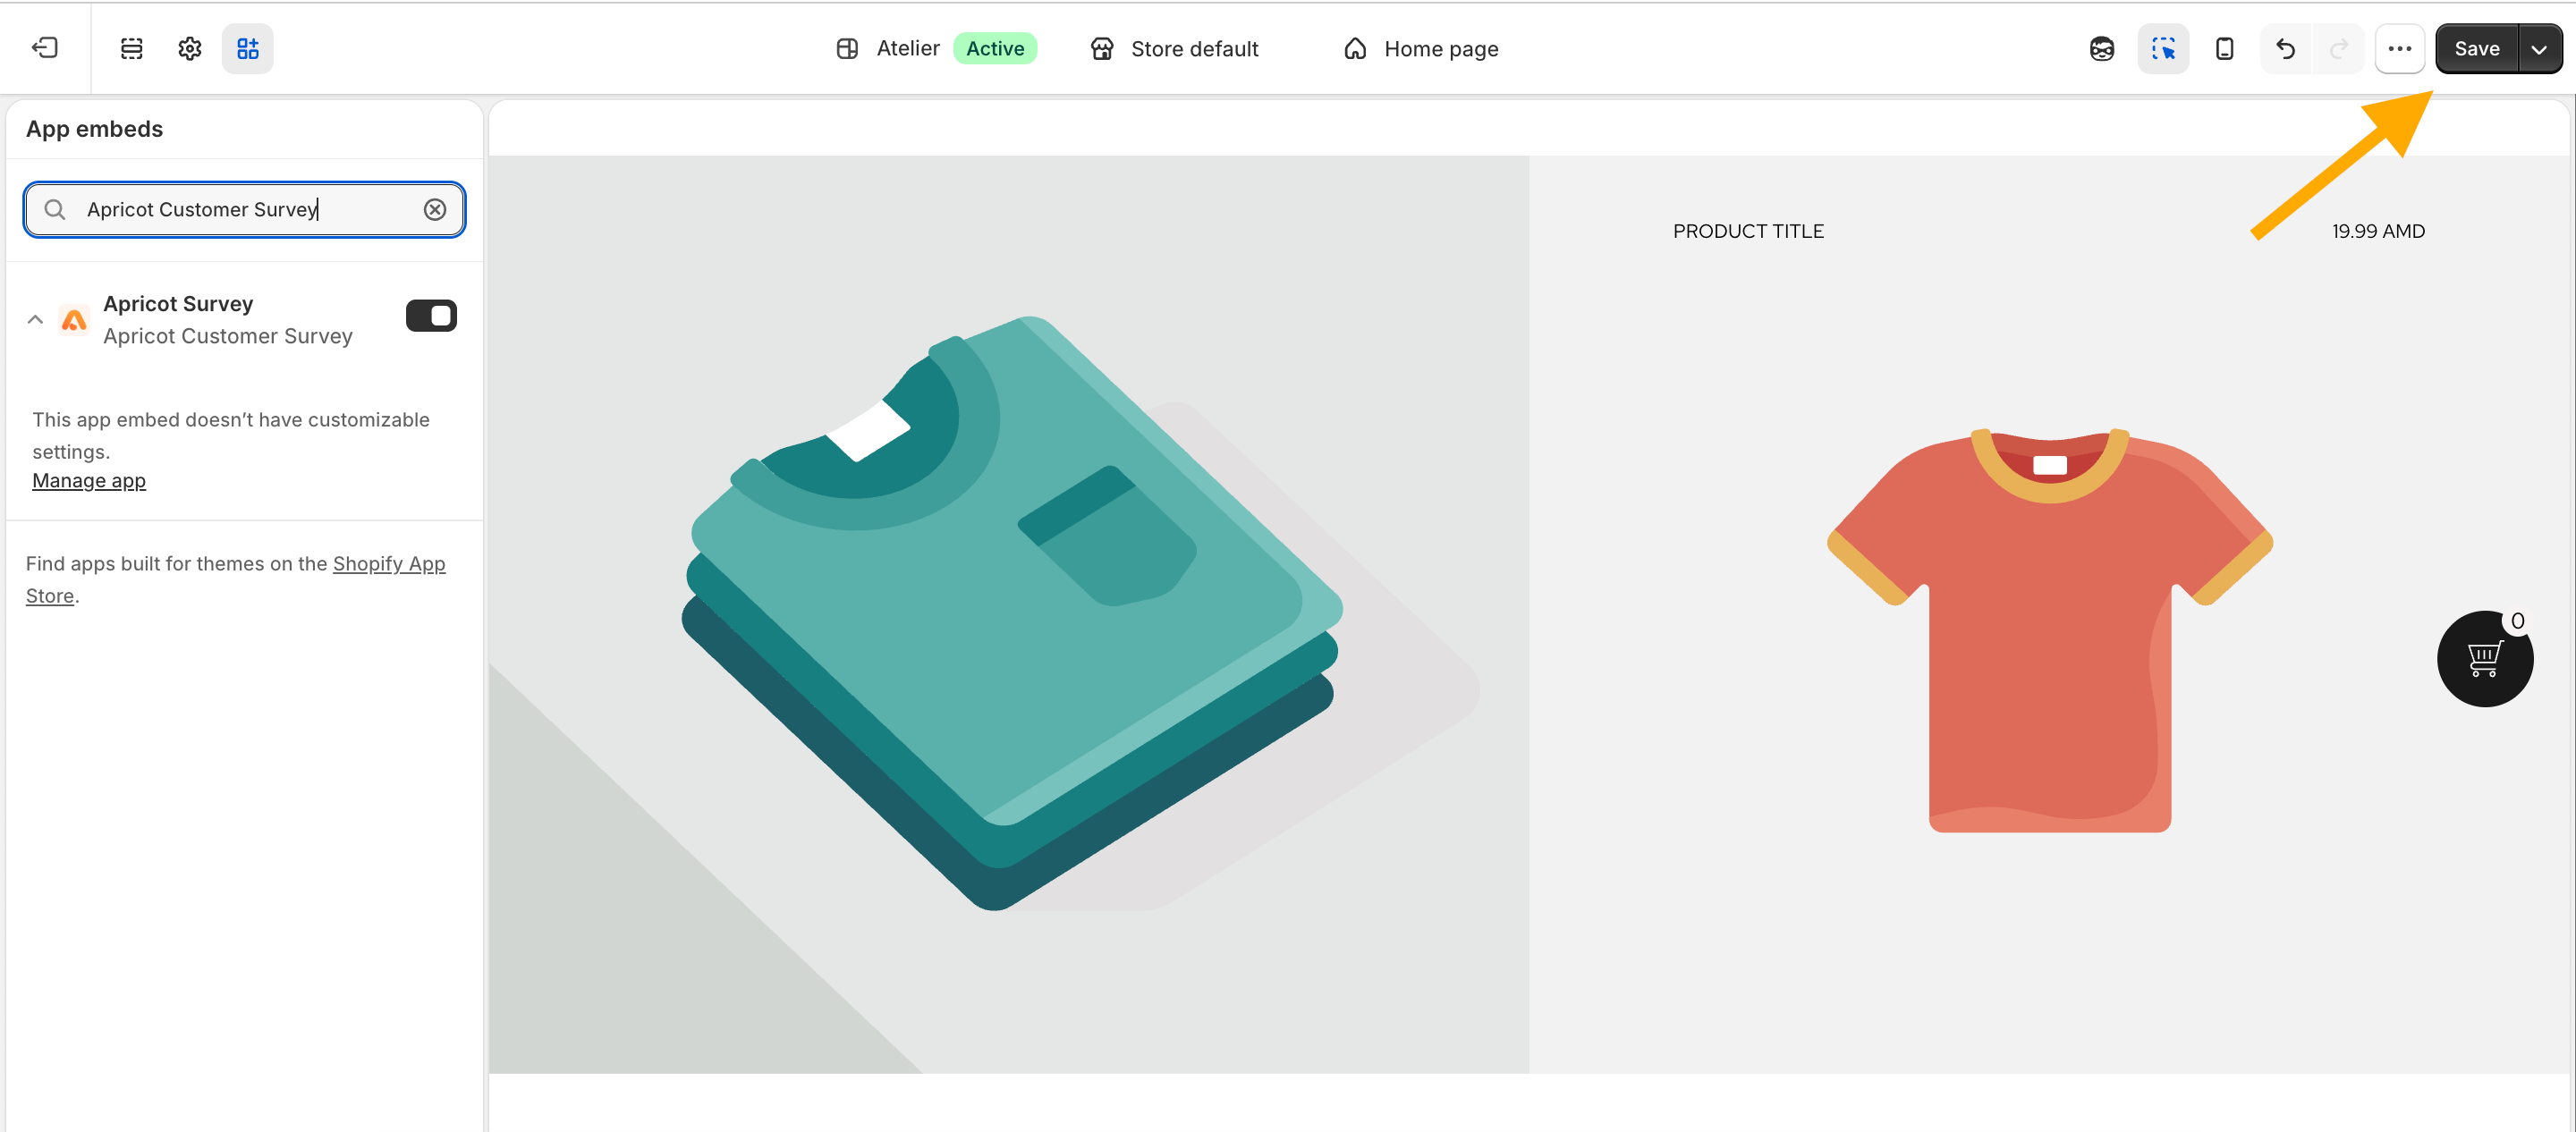
Click on **Open Theme Editor** button and you will be redirected to:
**Shopify Dashboard → Online Store → Customize → App Embeds**
The Shopify theme editor will automatically search for Apricot. Enable the Apricot app embed and click **Save**.
You will see the setup guide with the required steps to activate your popup.
The first step is to enable the **Apricot Block** in your Shopify theme.
The **Apricot Block** must be enabled for Apricot surveys to work correctly. If the block is not activated, your surveys may not appear, and some functionality will not work properly.
Click on **Open Theme Editor** button and you will be redirected to:
**Shopify Dashboard → Online Store → Customize → App Embeds**
The Shopify theme editor will automatically search for Apricot. Enable the Apricot app embed and click **Save**.
 After enabling the Apricot app embed, return to your Apricot Dashboard. The connection step will now be marked as completed.
Continue with **Step 2: Activate survey popup** to enable your popup.
After activating the popup, click **Save** to apply your changes.
After enabling the Apricot app embed, return to your Apricot Dashboard. The connection step will now be marked as completed.
Continue with **Step 2: Activate survey popup** to enable your popup.
After activating the popup, click **Save** to apply your changes.
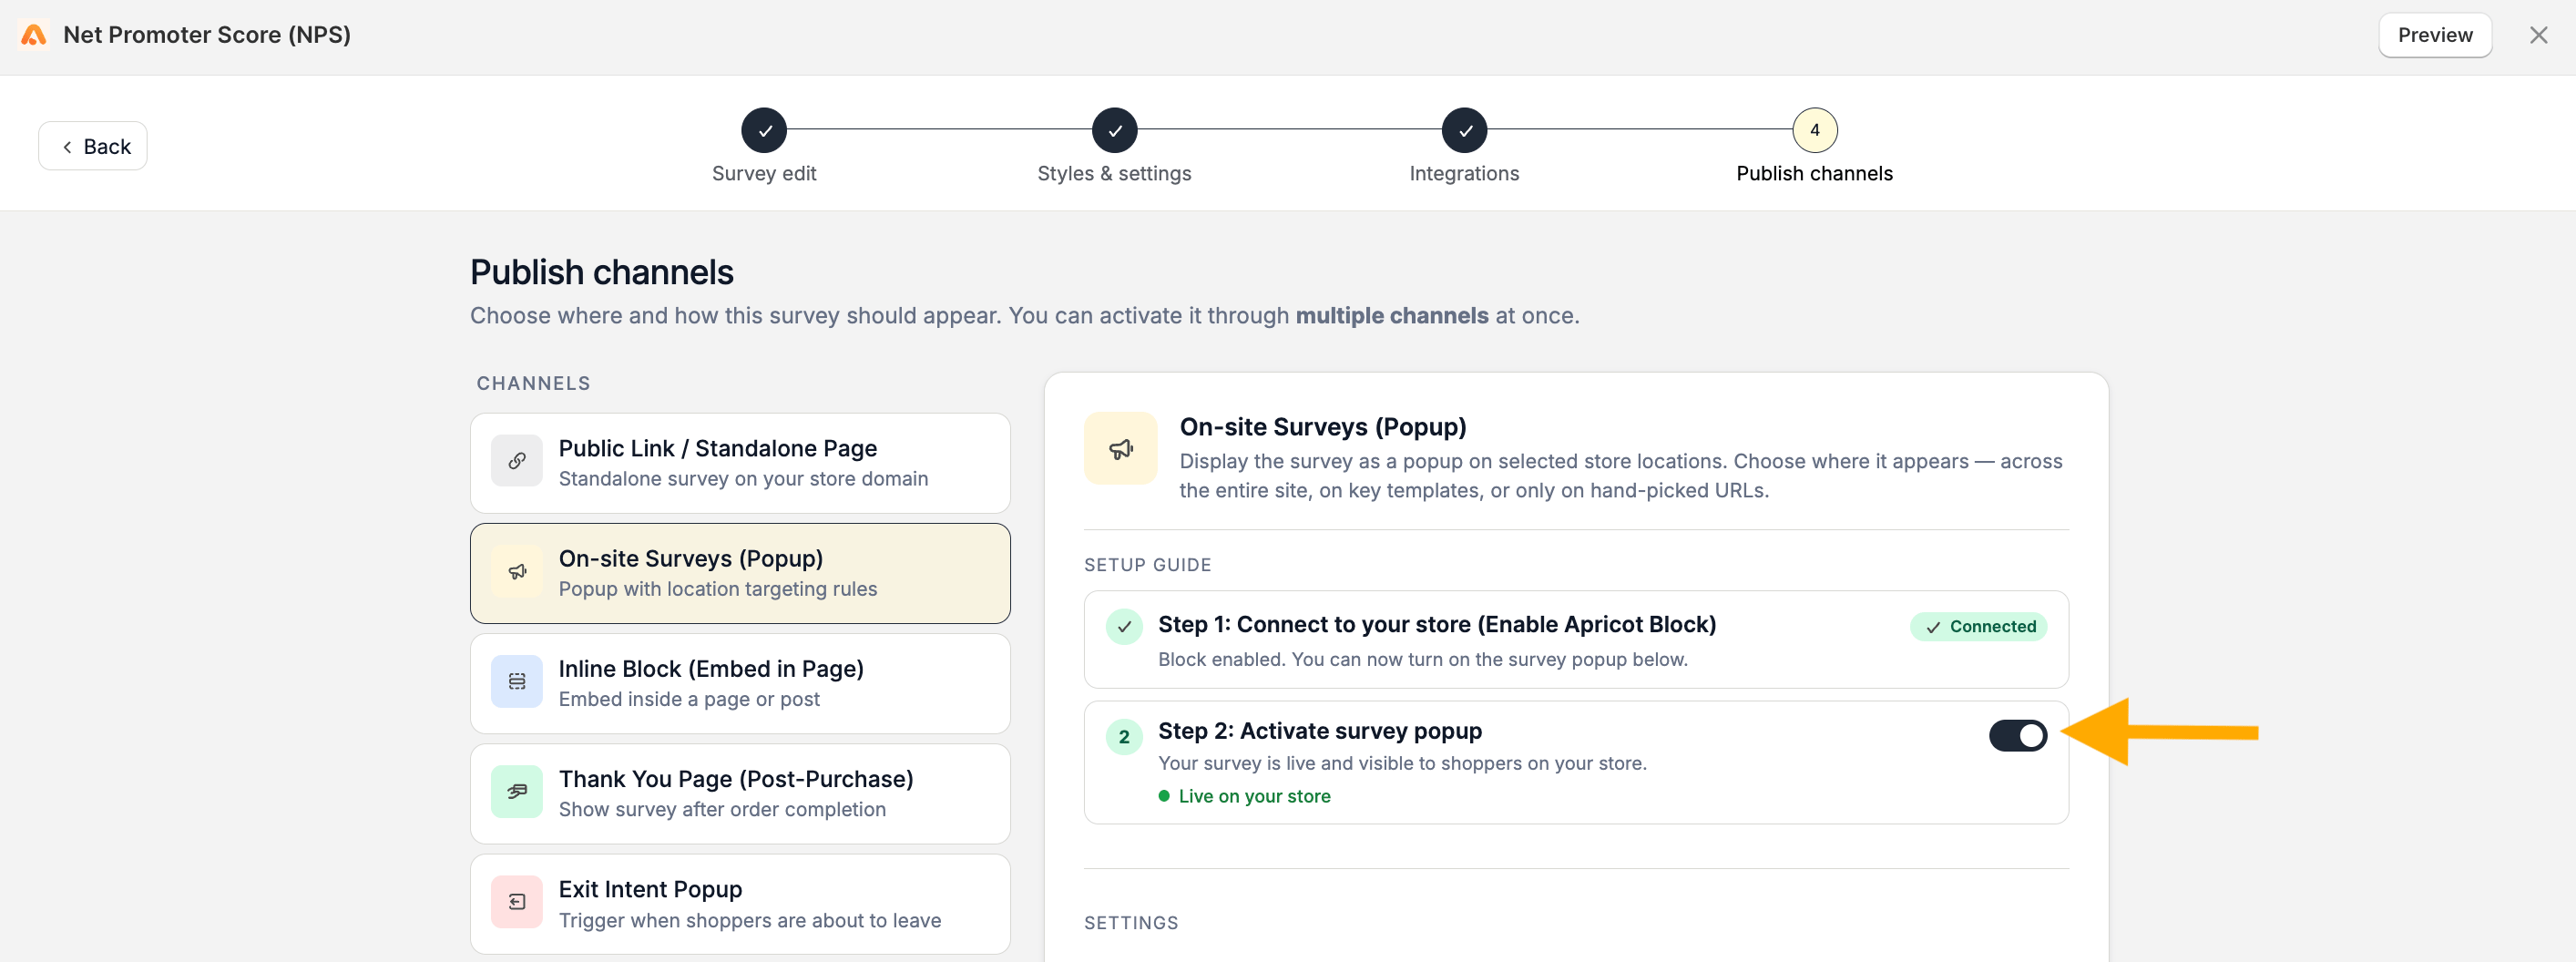 Your survey popup is now active and ready to collect responses from your store visitors.