> ## Documentation Index
> Fetch the complete documentation index at: https://docs.apricotsurvey.com/llms.txt
> Use this file to discover all available pages before exploring further.
# Inline Block (Embed in Page)
Embed your survey directly into any page on your Shopify store and make it a natural part of your website content.
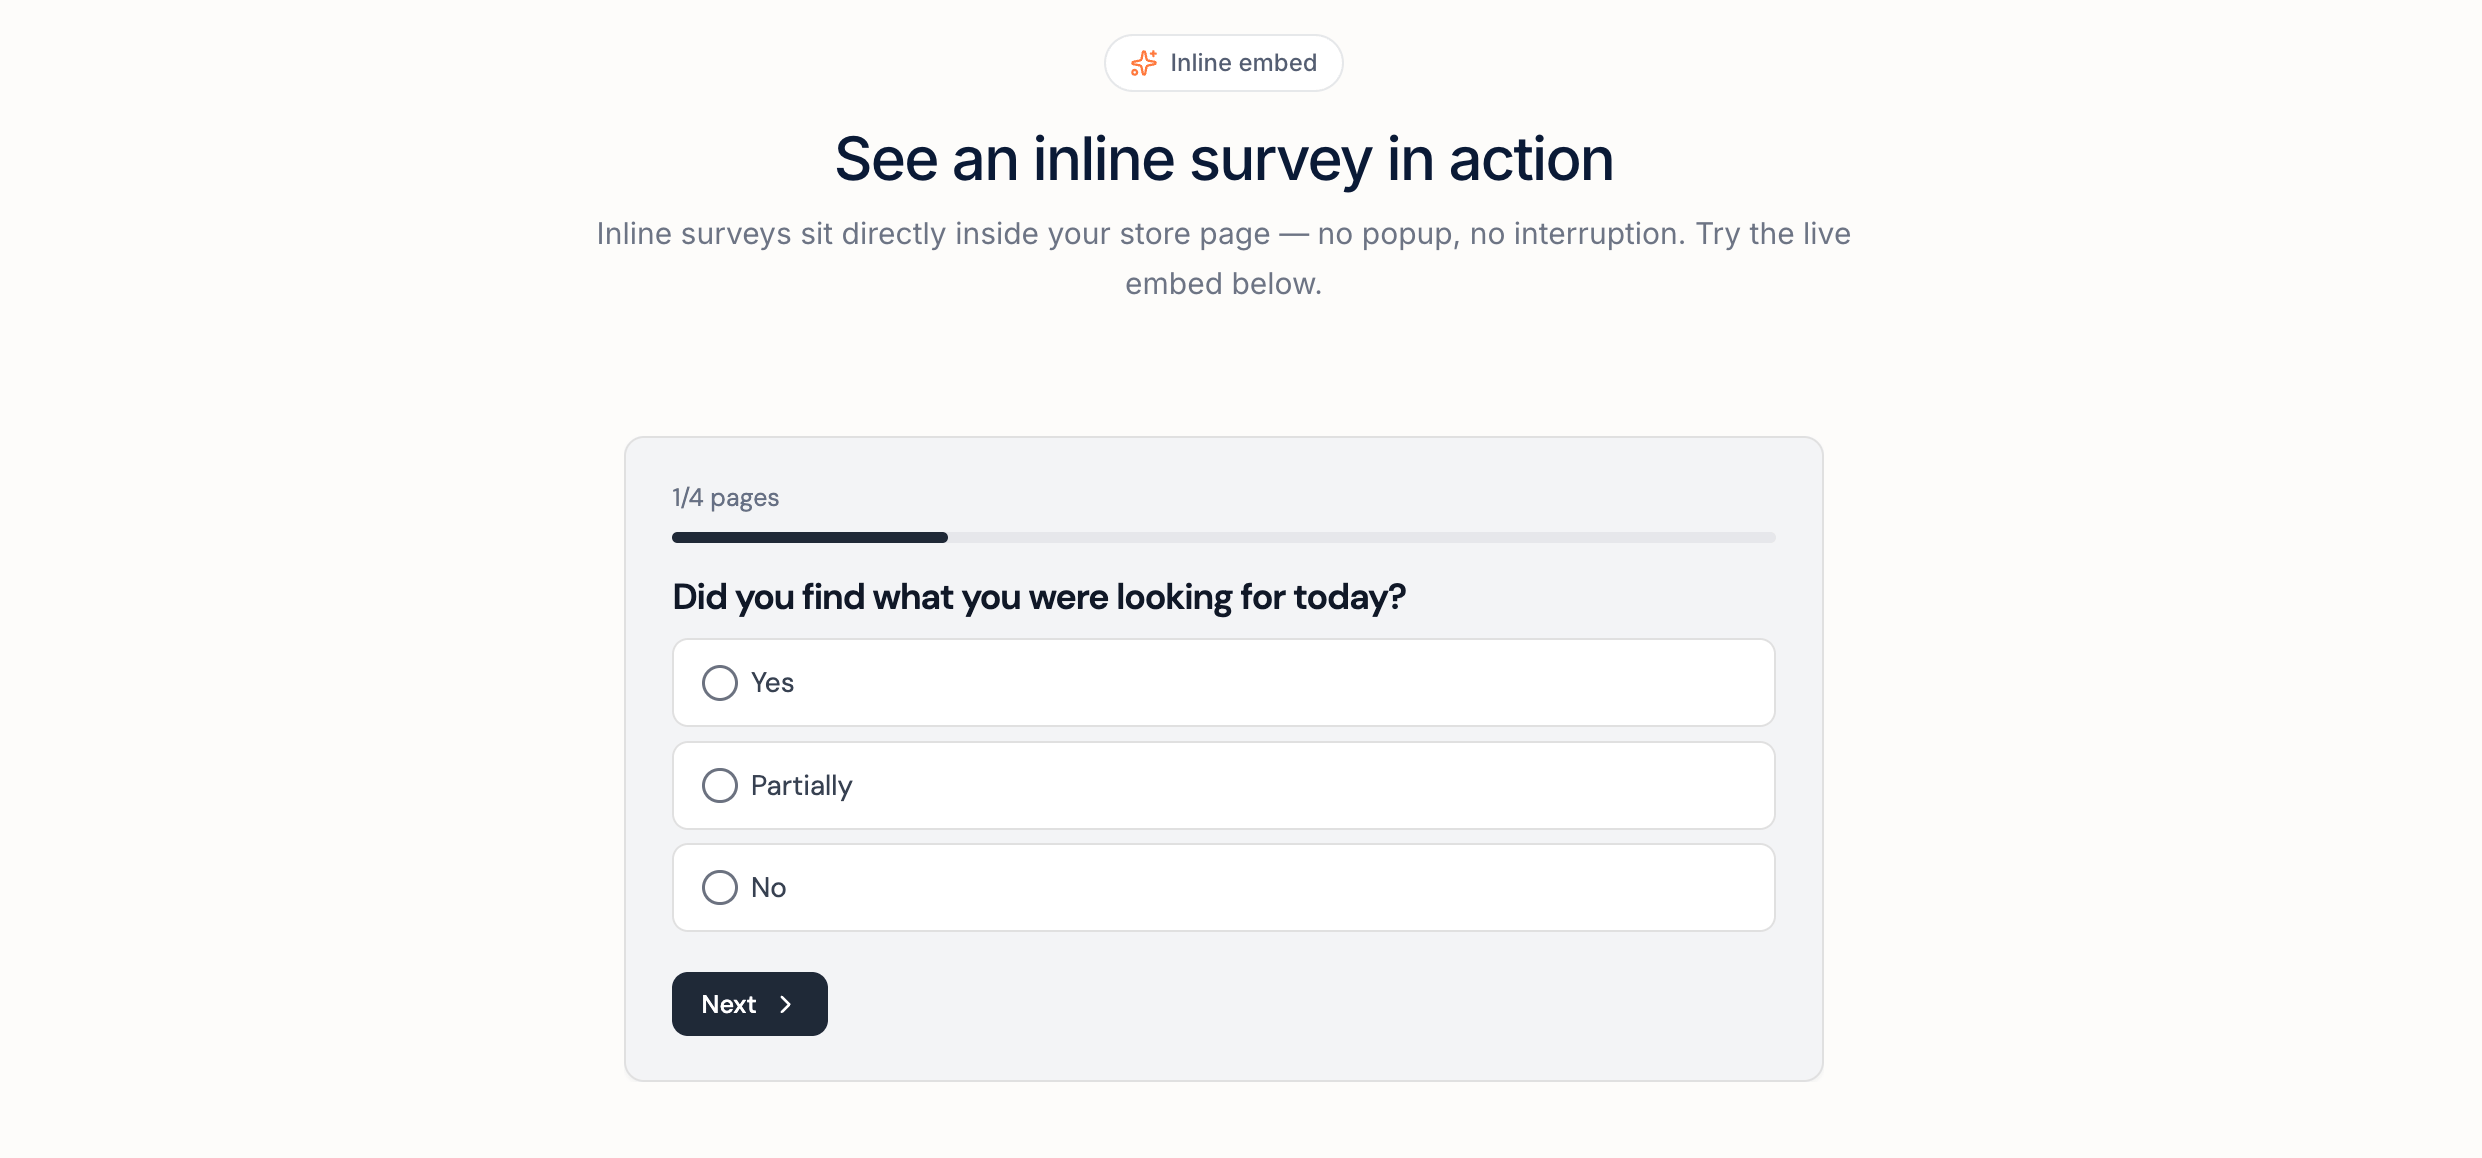
The **Inline Block (Embed in Page)** publishing option allows you to place your survey inside Shopify pages using the **Apricot Survey block**. The survey appears exactly where you add it, giving visitors a seamless experience without popups or redirects.
This option is ideal for:
* Adding feedback surveys to landing pages
* Collecting customer feedback on dedicated pages
* Adding surveys to help pages, blog posts, or other content sections
 ## Set Up an Inline Survey
Follow these steps to embed your survey into a Shopify page:
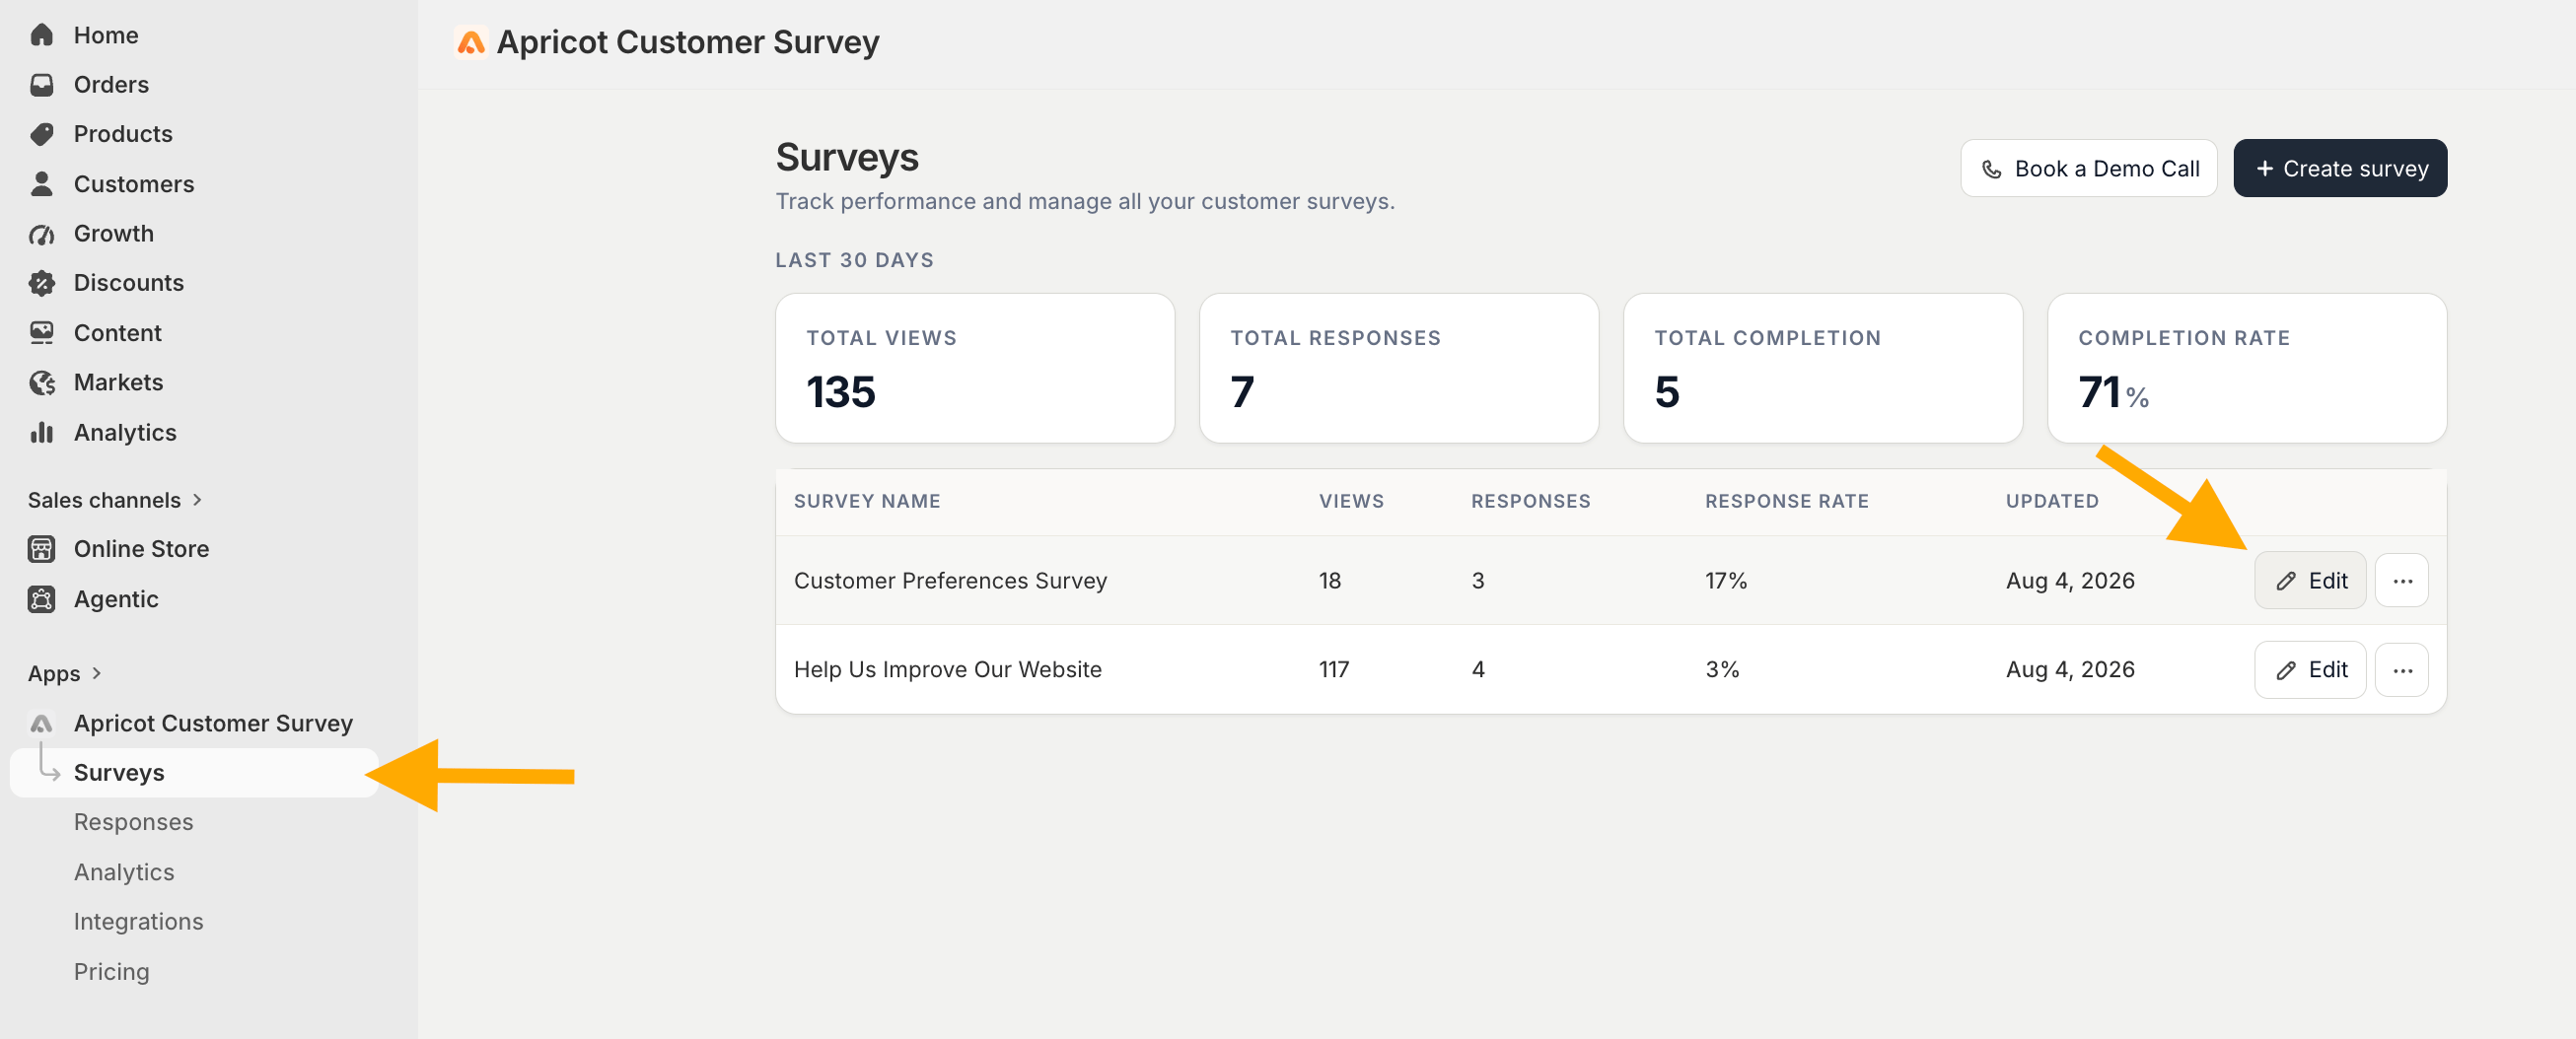
Go to: **Apricot Dashboard → Surveys → Select your survey → Edit**
## Set Up an Inline Survey
Follow these steps to embed your survey into a Shopify page:
Go to: **Apricot Dashboard → Surveys → Select your survey → Edit**
 From the survey editor, navigate to the **Publish Channels** section and select **Inline Block (Embed in Page).**
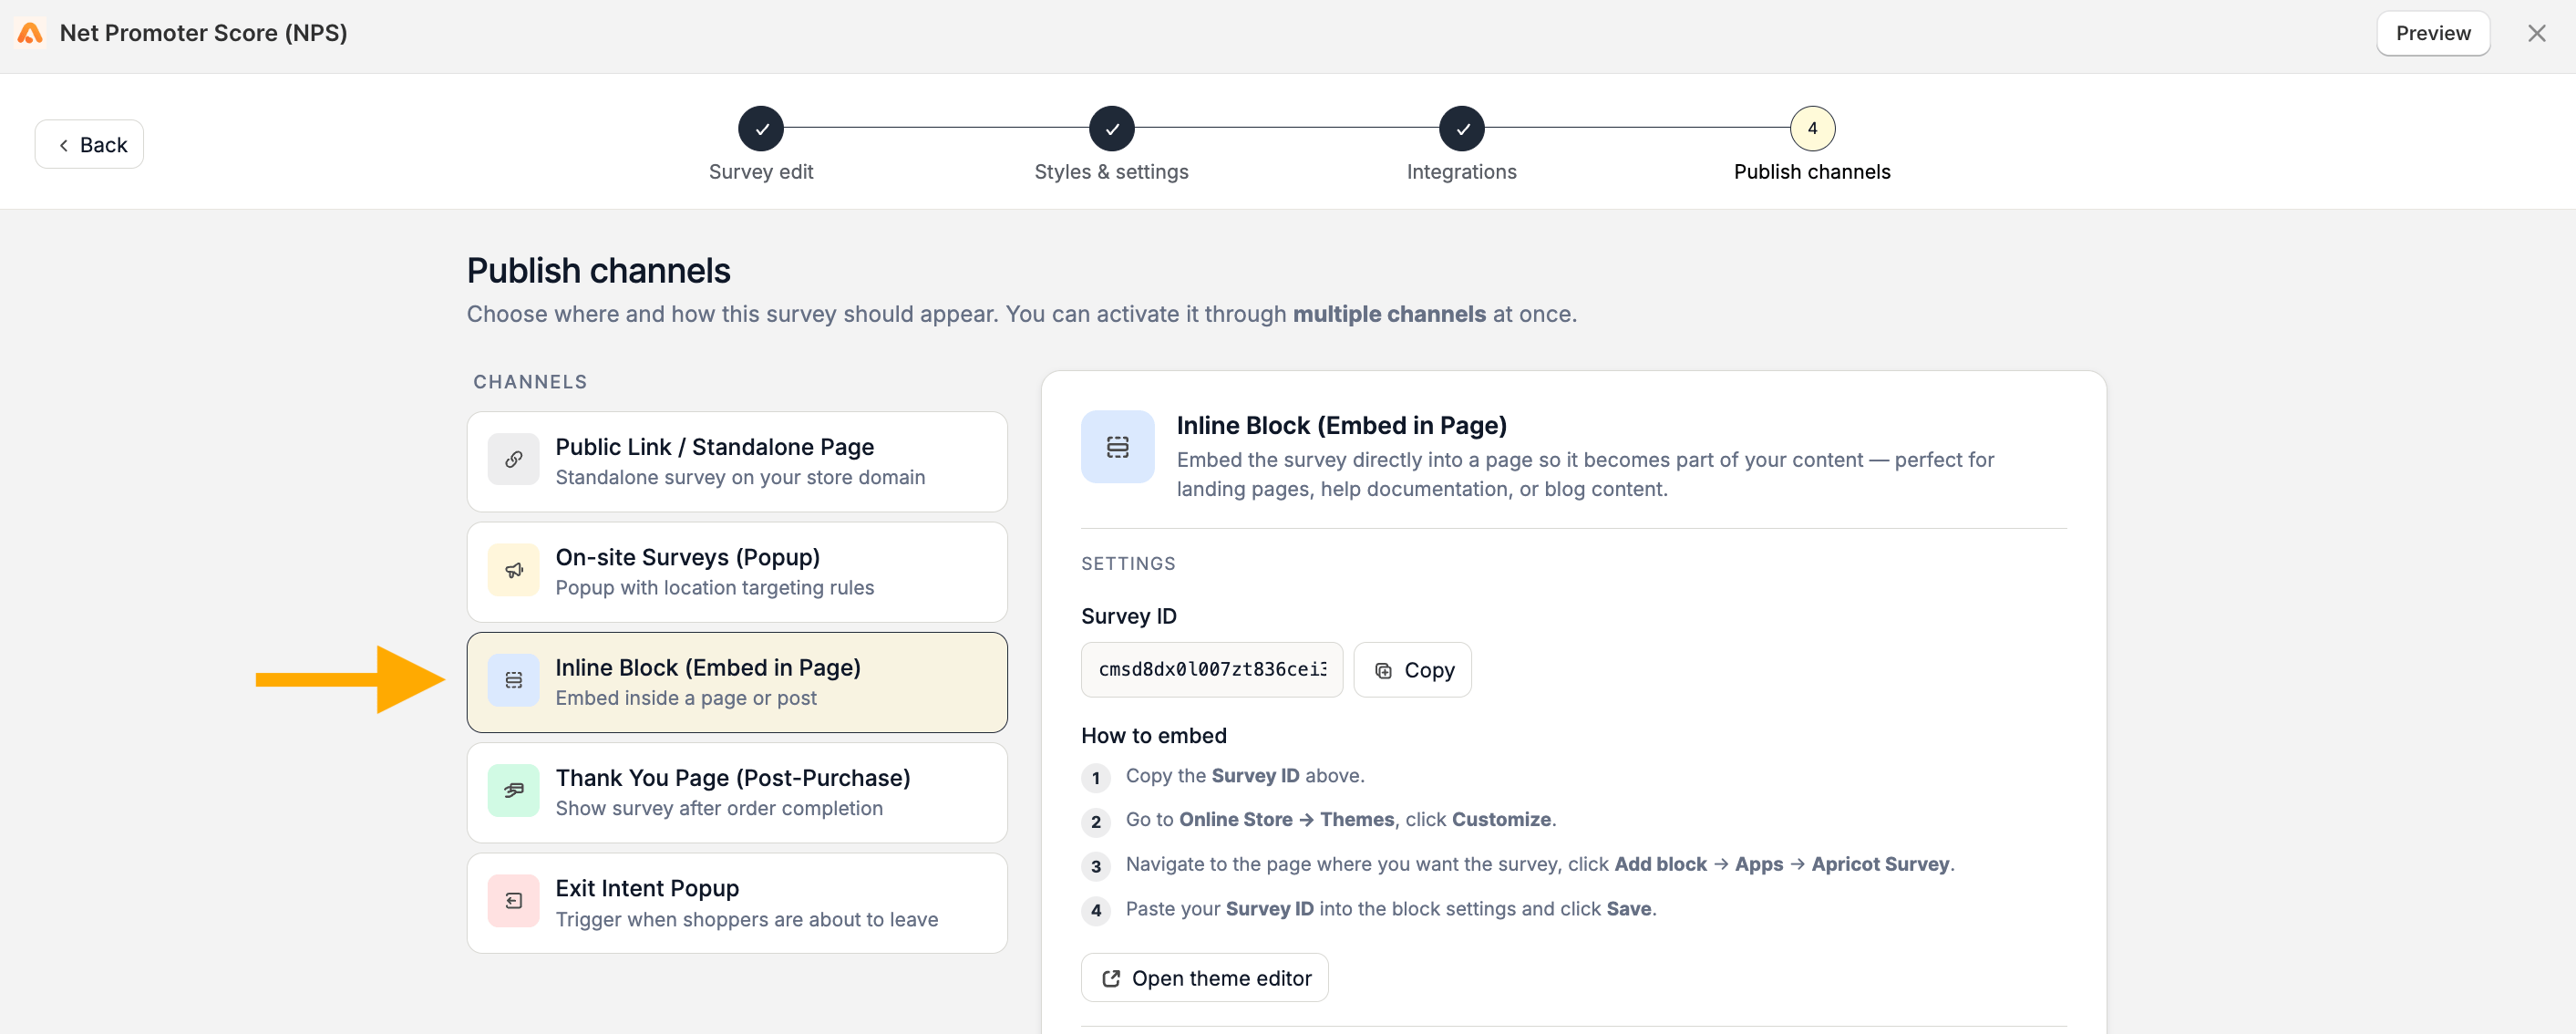 Each Apricot survey has a unique **Survey ID** that is required to add the survey to your Shopify page.
Copy the Survey ID displayed in the setup guide.
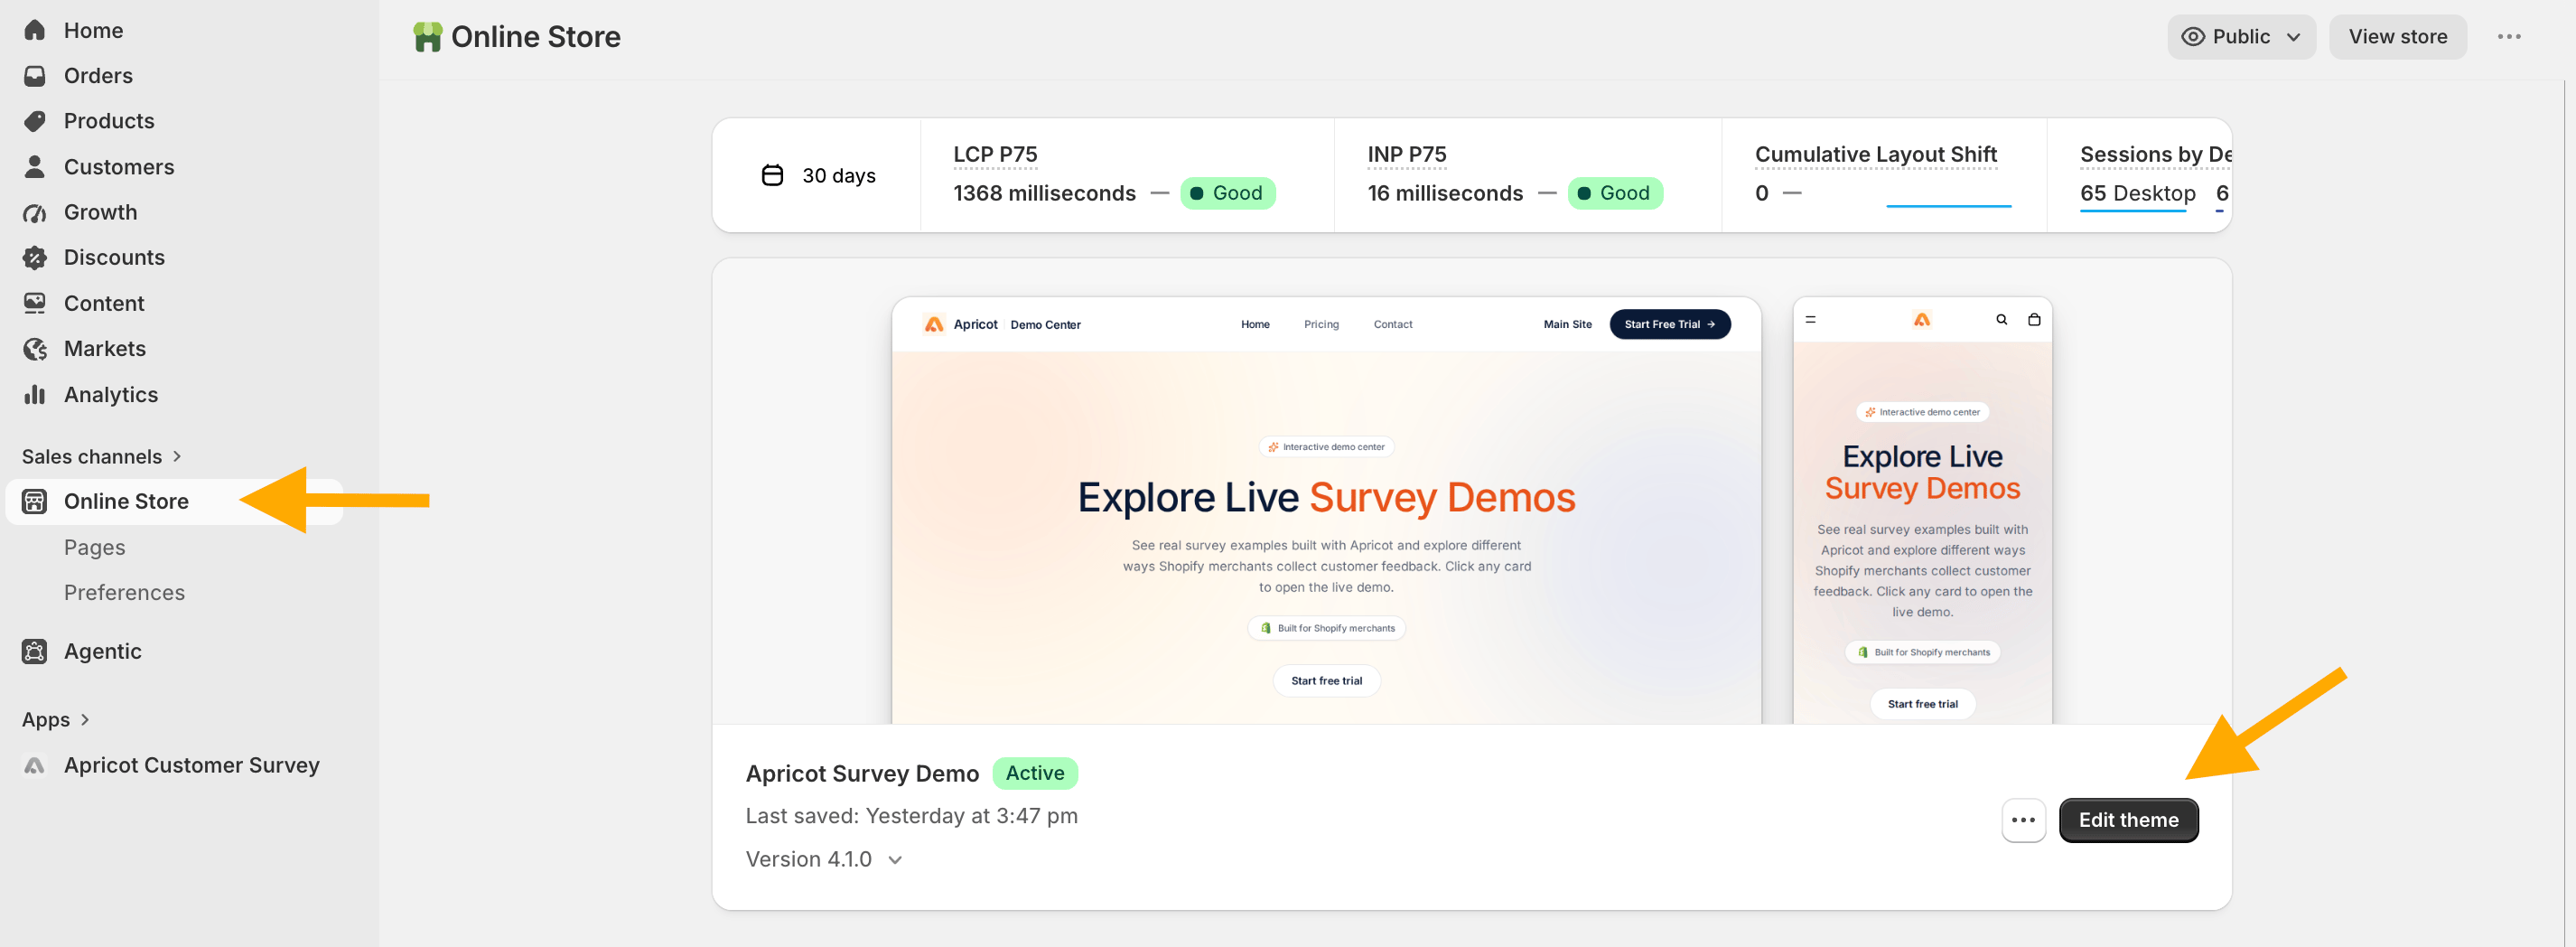
Go to **Shopify Dashboard → Online Store** and click **Edit Theme** to open the Shopify theme editor.
You can also click **Open Theme Editor** from Apricot's setup guide to go directly there.
Each Apricot survey has a unique **Survey ID** that is required to add the survey to your Shopify page.
Copy the Survey ID displayed in the setup guide.
Go to **Shopify Dashboard → Online Store** and click **Edit Theme** to open the Shopify theme editor.
You can also click **Open Theme Editor** from Apricot's setup guide to go directly there.
 Navigate to the page where you want to display your survey.
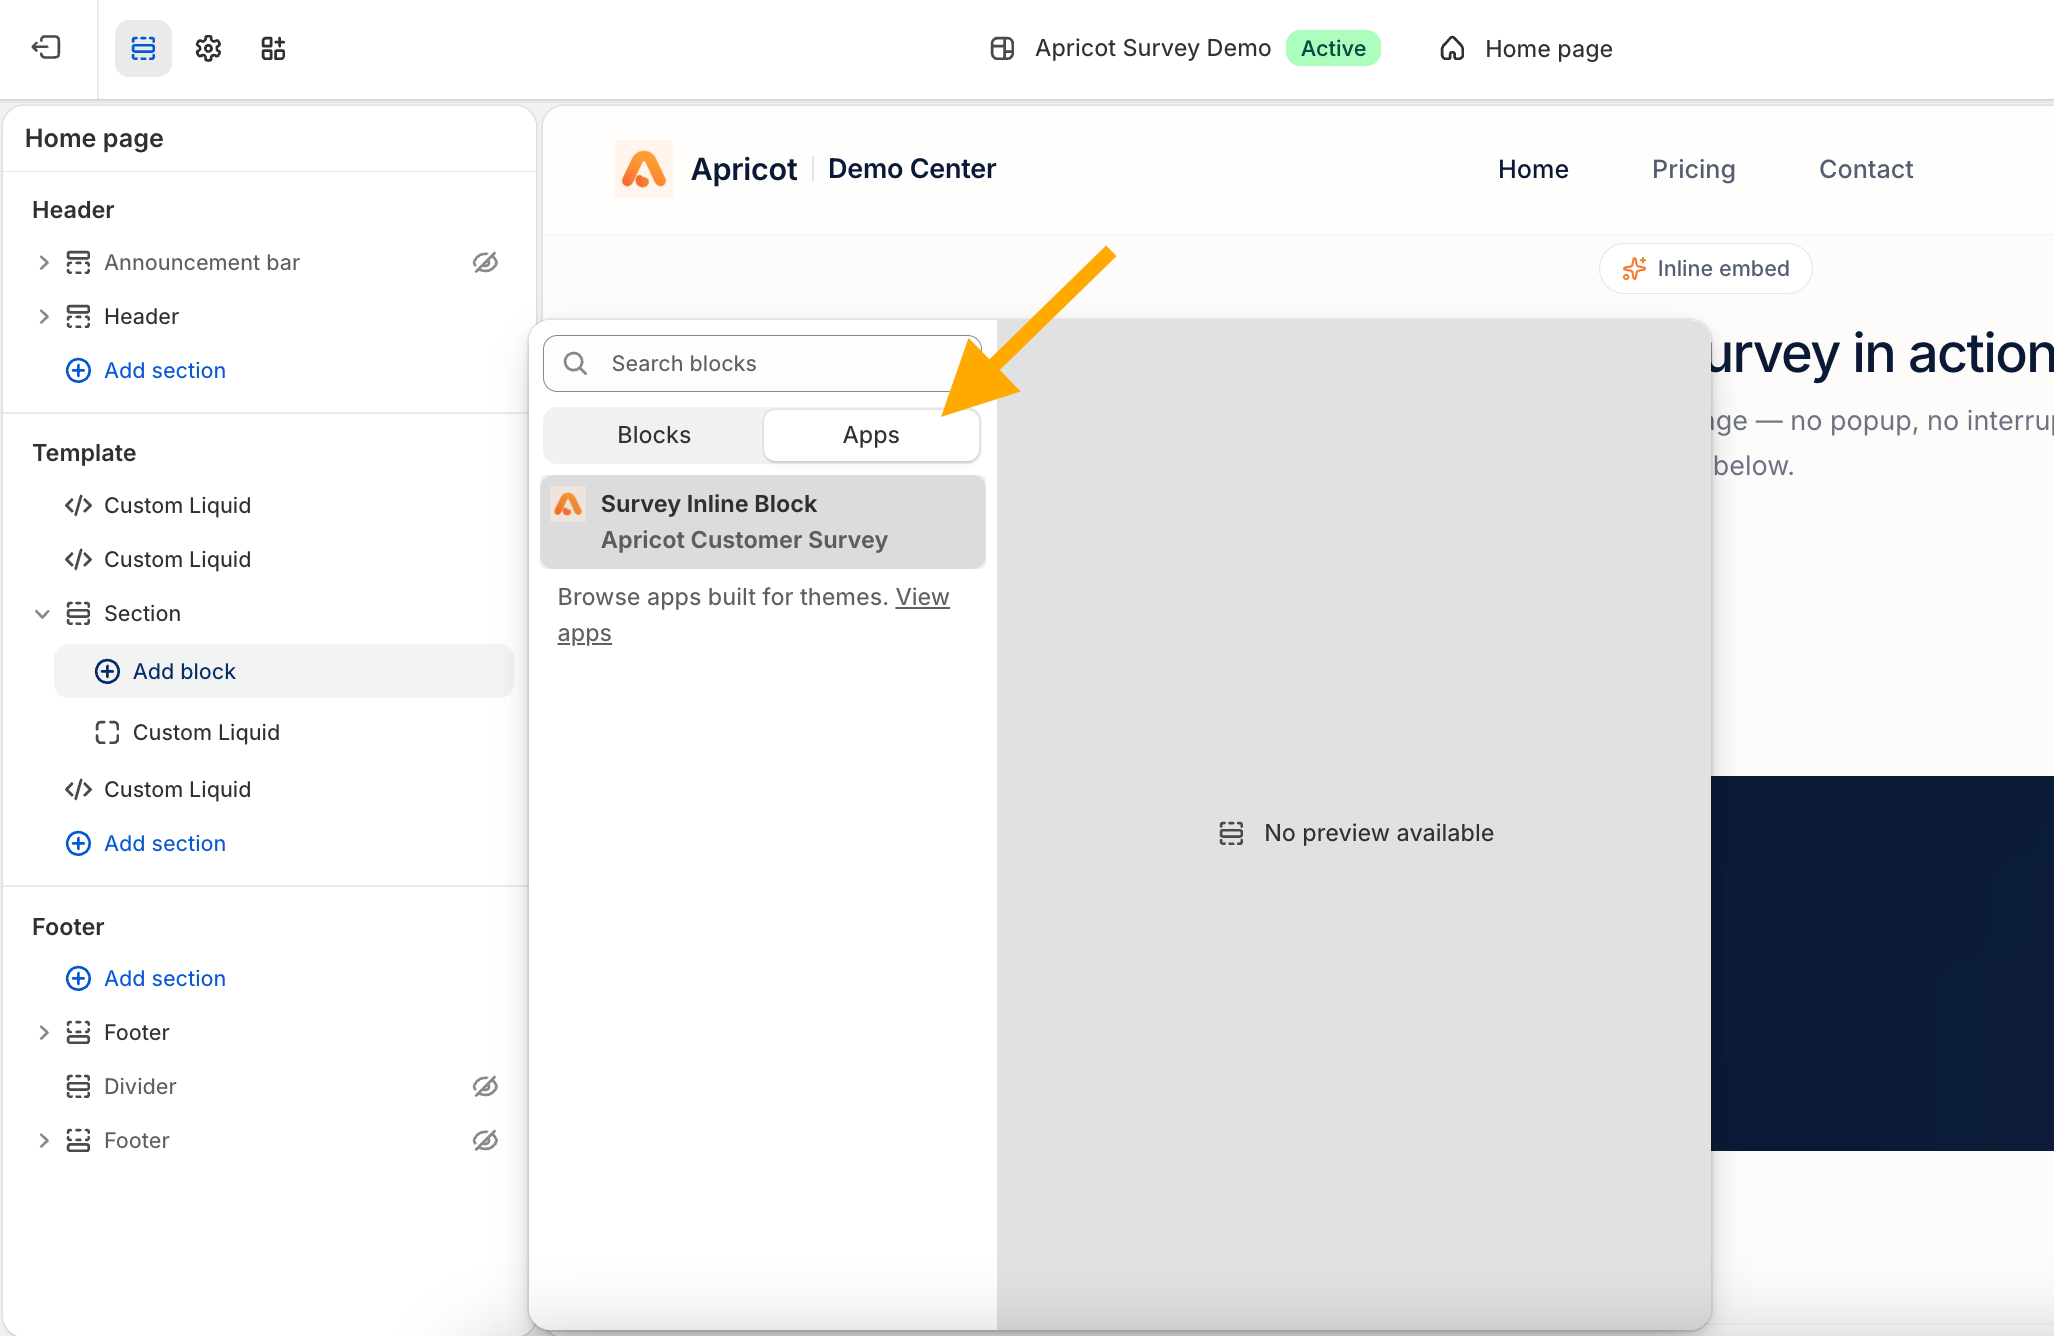
Click: **Add block → Apps → Apricot Survey**
Navigate to the page where you want to display your survey.
Click: **Add block → Apps → Apricot Survey**
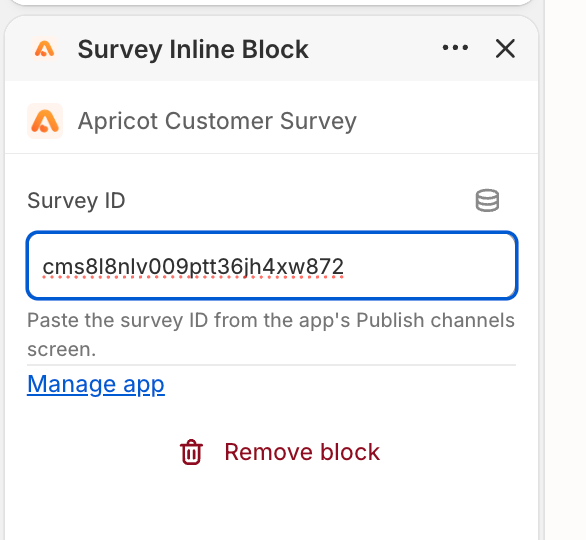
 Paste your copied **Survey ID** into the Apricot Survey block settings.
 Click **Save** to publish your changes.
Your survey is now embedded directly into your Shopify page.
Click **Save** to publish your changes.
Your survey is now embedded directly into your Shopify page.