> ## Documentation Index
> Fetch the complete documentation index at: https://docs.apricotsurvey.com/llms.txt
> Use this file to discover all available pages before exploring further.
# Thank You Page (Post-Purchase)
Collect customer feedback immediately after checkout by displaying your survey directly on Shopify's **Thank You Page**.
The **Thank You Page (Post-Purchase)** publishing option displays your survey inline after a customer completes their purchase. There's no popup and no redirect, so customers can share feedback as part of their post-purchase experience.
This option is ideal for:
* Collecting post-purchase feedback
* Measuring customer satisfaction after an order
* Asking customers about their shopping or checkout experience
* Getting feedback while the purchase experience is still fresh
Due to **Shopify's Thank You Page limitations**, **some styling and layout customizations may not be available.** Rich text formatting, including certain HTML tags, may be stripped, and custom CSS is not supported. As a result, **your survey may appear slightly different** from the preview.
## Set Up a Thank You Page Survey
Follow these steps to add your survey to Shopify's Thank You Page:
Go to: **Apricot Dashboard → Surveys → Select the survey you want to publish → Edit**
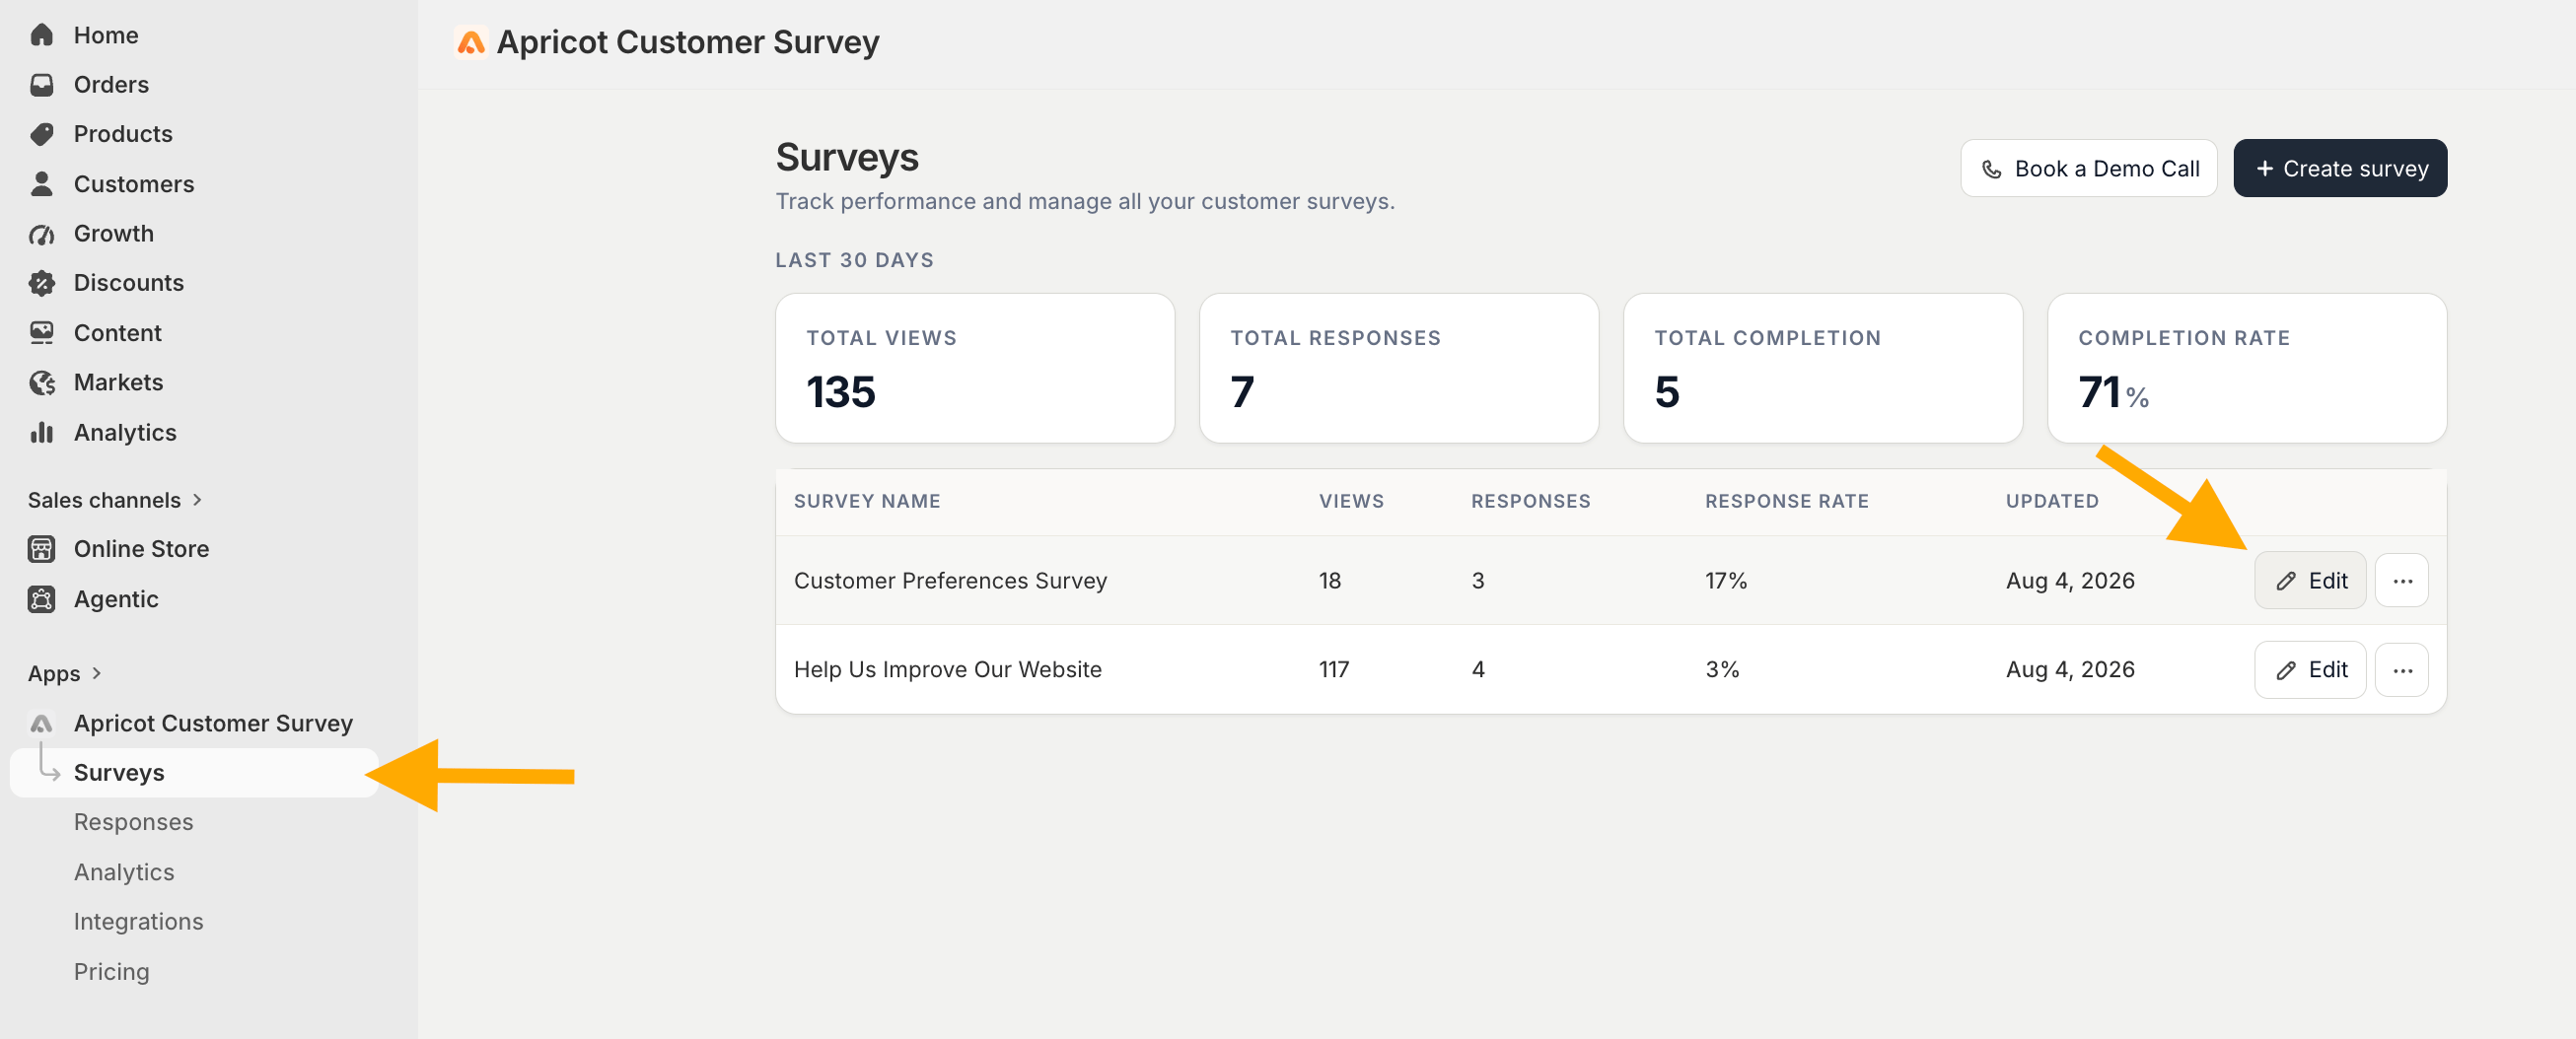 From the survey editor, navigate to the Publish Channels section and select **Thank You Page (Post-Purchase)**.\*\* \*\*
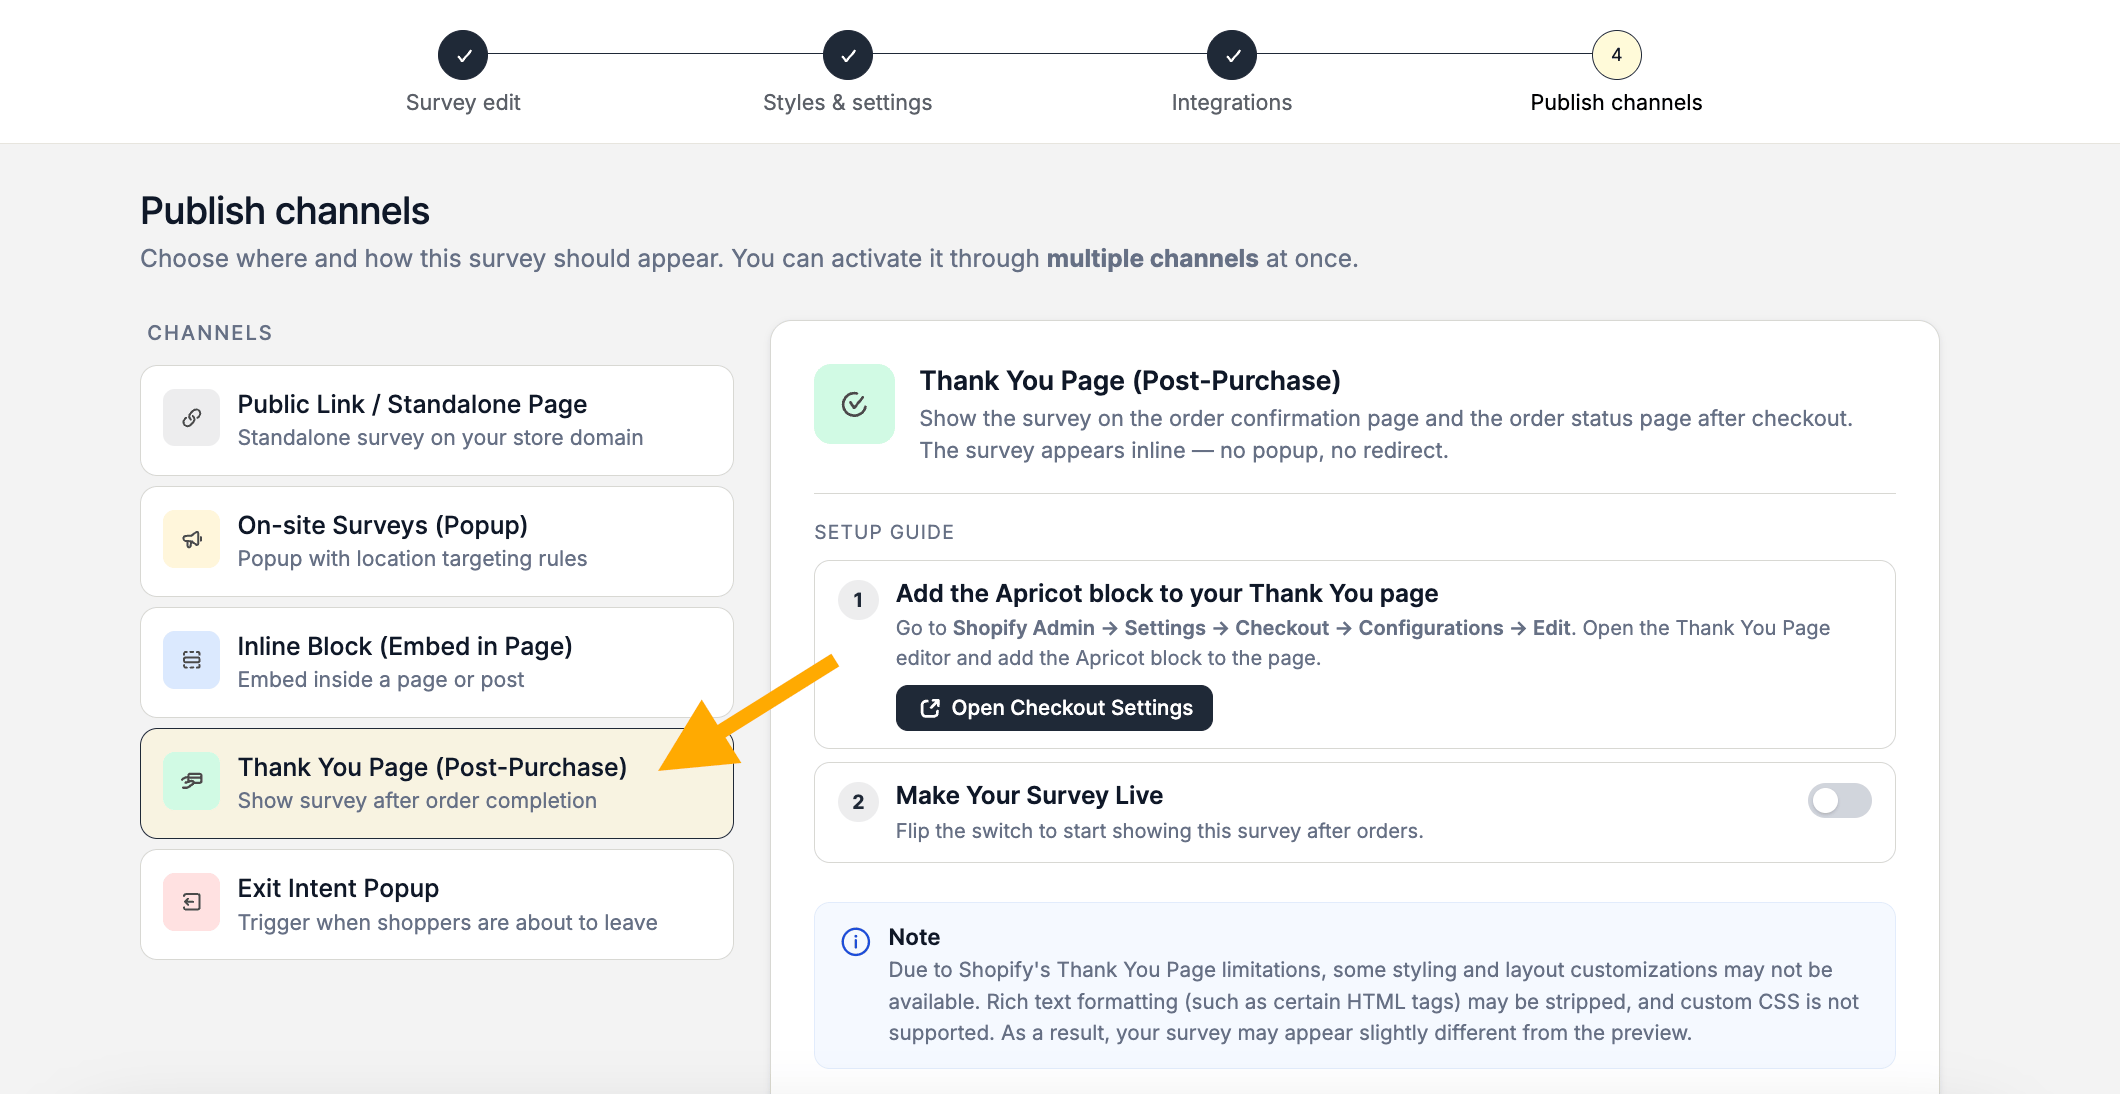 You will see the setup guide with the required steps to add your survey to Shopify's Thank You Page.
Go to: **Shopify Admin → Settings → Checkout → Configurations → Edit**
You can also click **Open Checkout Settings** button in the Apricot dashboard to go directly to your Shopify Checkout settings.
Open the **Thank You** page editor and click **Add block** to add the **Apricot block** to your page.
You will see the setup guide with the required steps to add your survey to Shopify's Thank You Page.
Go to: **Shopify Admin → Settings → Checkout → Configurations → Edit**
You can also click **Open Checkout Settings** button in the Apricot dashboard to go directly to your Shopify Checkout settings.
Open the **Thank You** page editor and click **Add block** to add the **Apricot block** to your page.
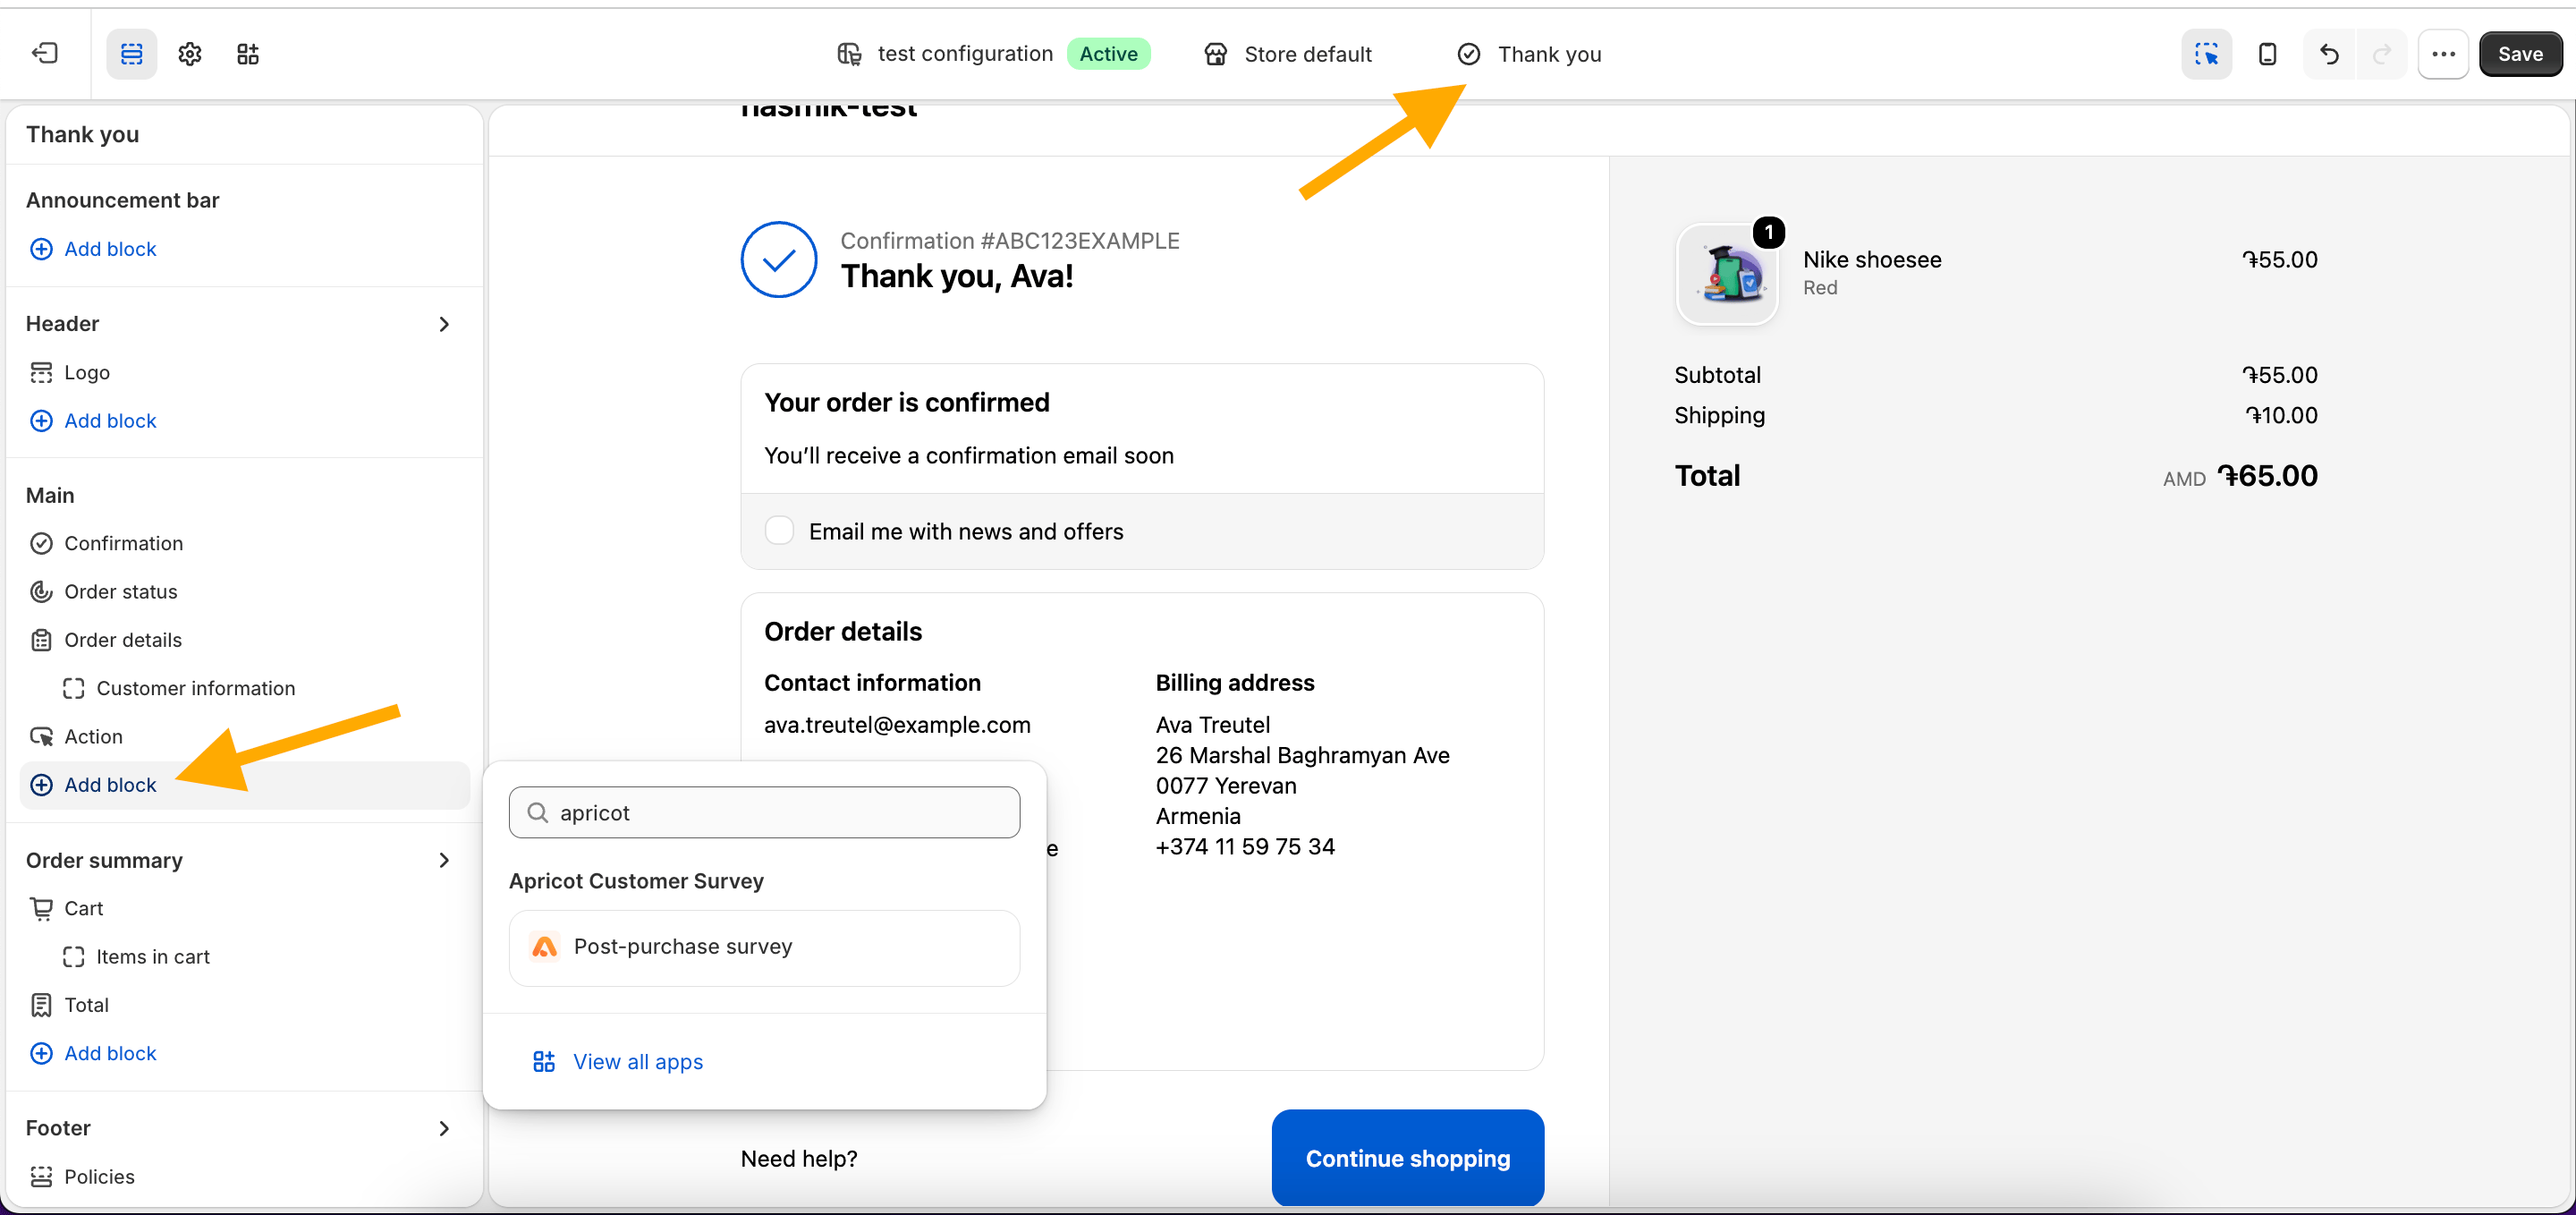 Place the Apricot block where you want your survey to appear on the Thank You Page.
After adding the Apricot block to your Thank You Page, return to the Apricot Dashboard.
Enable **Make Your Survey Live** to activate the survey.
Place the Apricot block where you want your survey to appear on the Thank You Page.
After adding the Apricot block to your Thank You Page, return to the Apricot Dashboard.
Enable **Make Your Survey Live** to activate the survey.
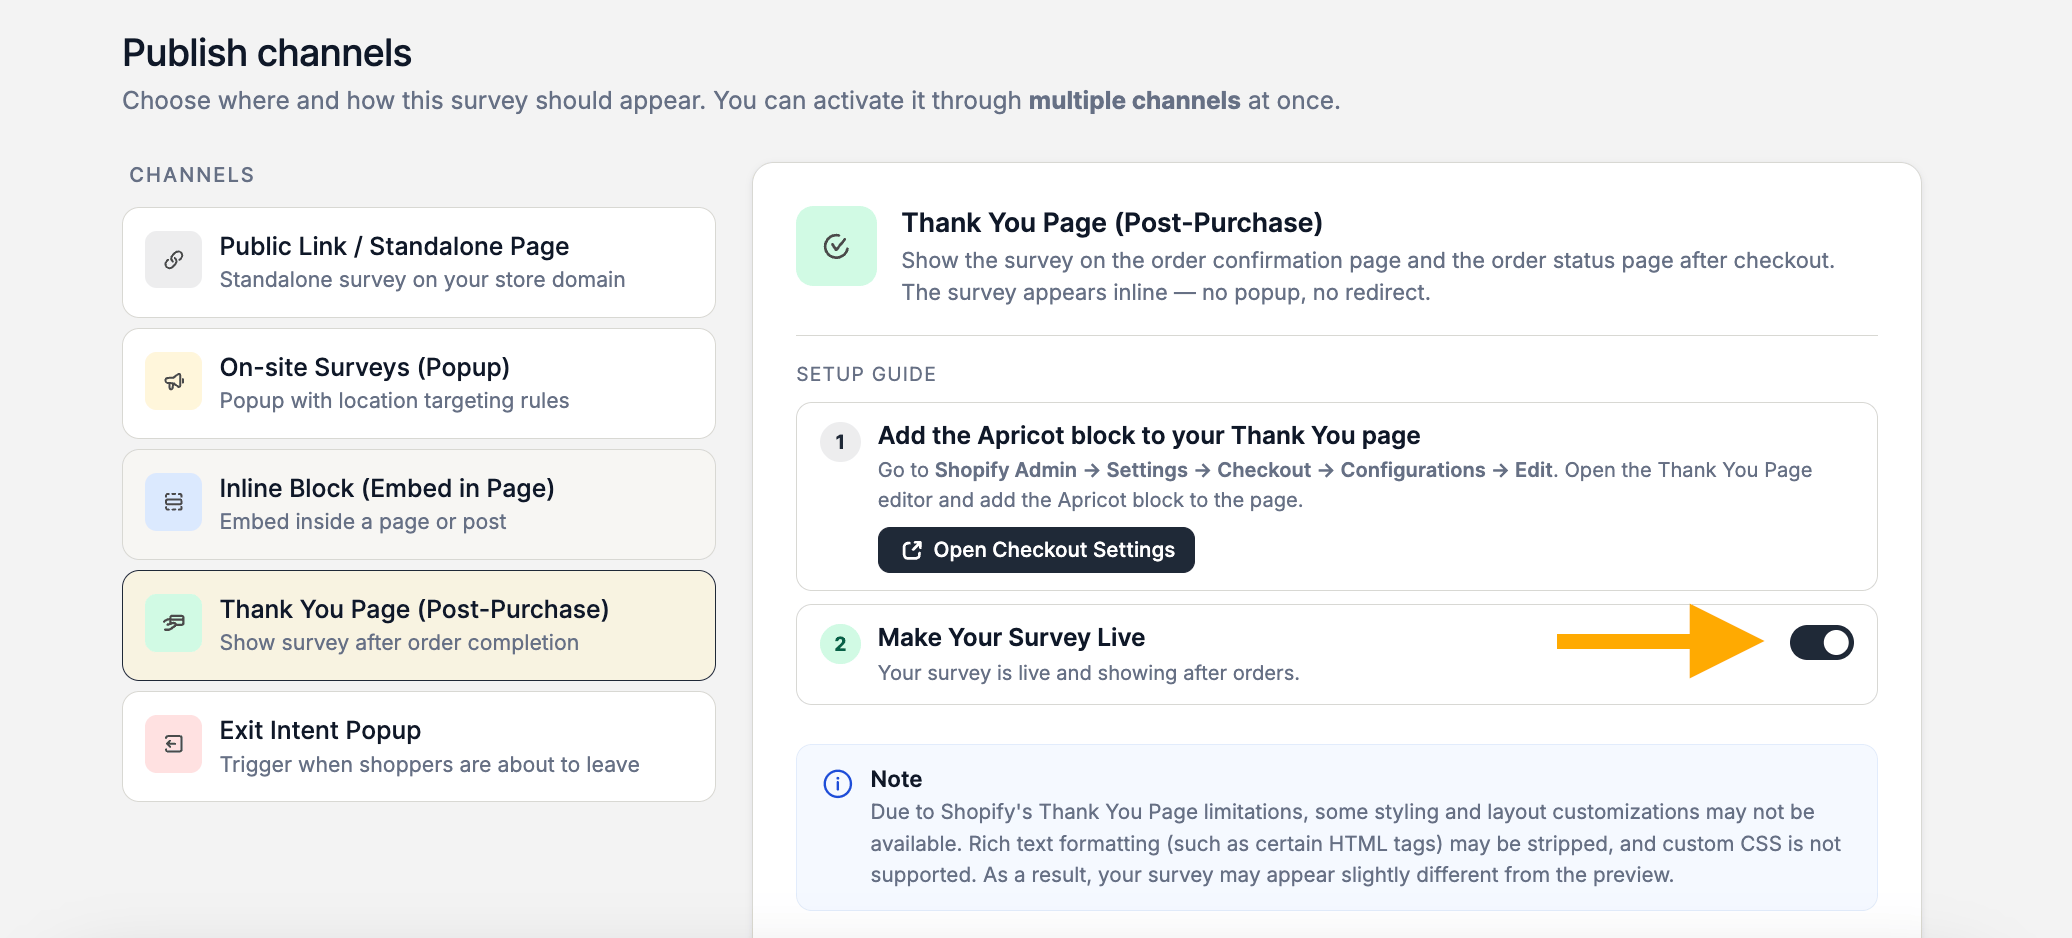 Your survey is now ready to collect post-purchase feedback from customers.