Automatically organize your Shopify customers by adding tags based on their survey responses. With Add Customer Tags, you can use Branching Logic to automatically apply specific tags when a customer meets a condition. Apricot identifies the customer by their email address. If no Shopify customer exists with that email address, Apricot creates a new customer and adds the specified tag. If a customer with that email already exists, the tag is added to the existing customer. For example, you can tag customers based on their preferences, interests, satisfaction level, or any other response collected through your survey.
Before setting up customer tags, make sure the Shopify Customers integration is connected and enabled for the survey. See Connect Shopify Customers Integration for setup instructions.

Set Up Customer Tags

1

Step 1: Open Survey Branching

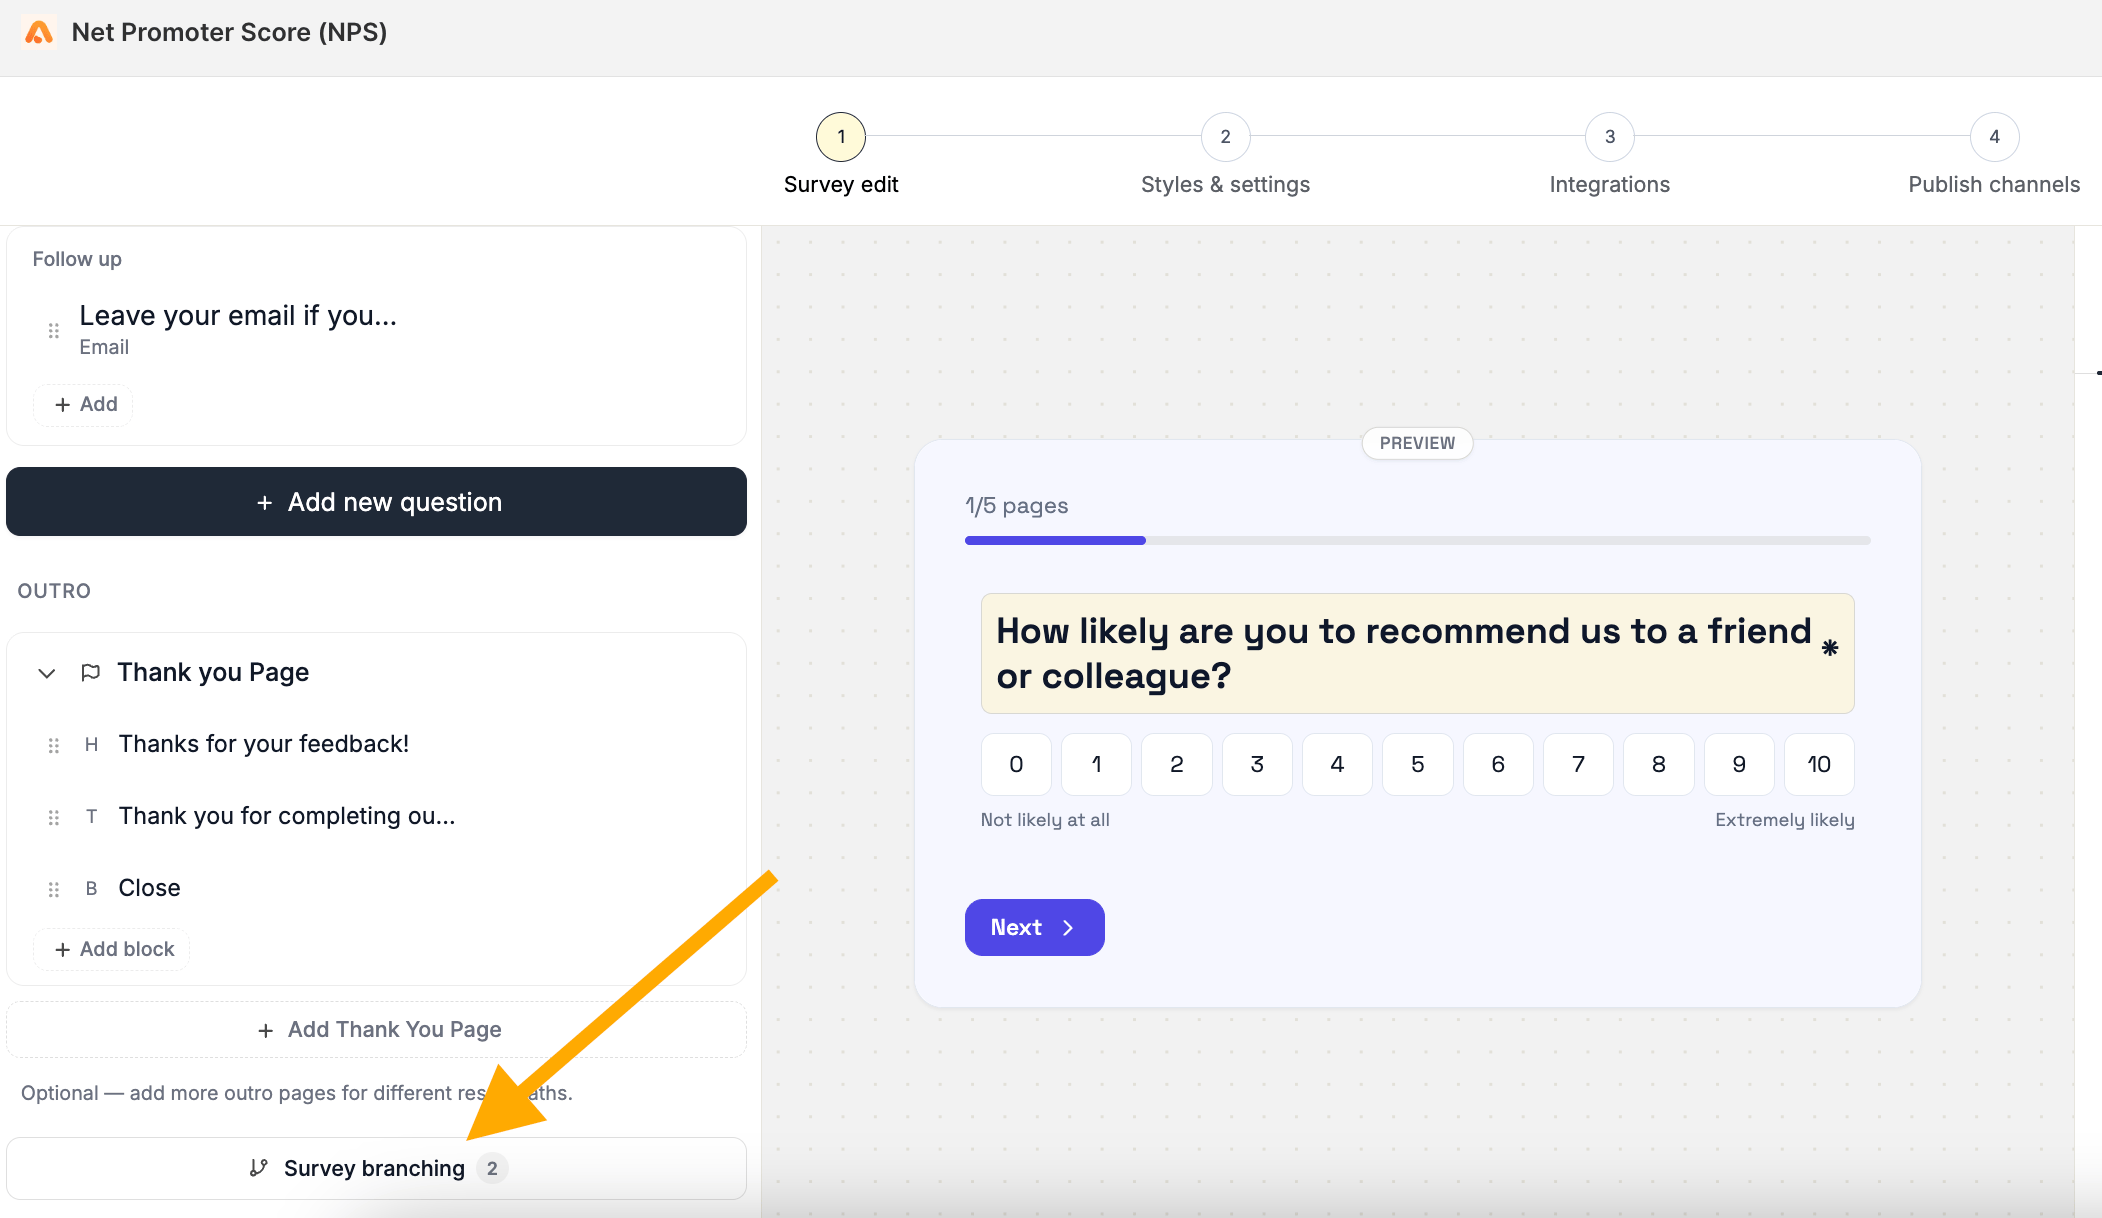
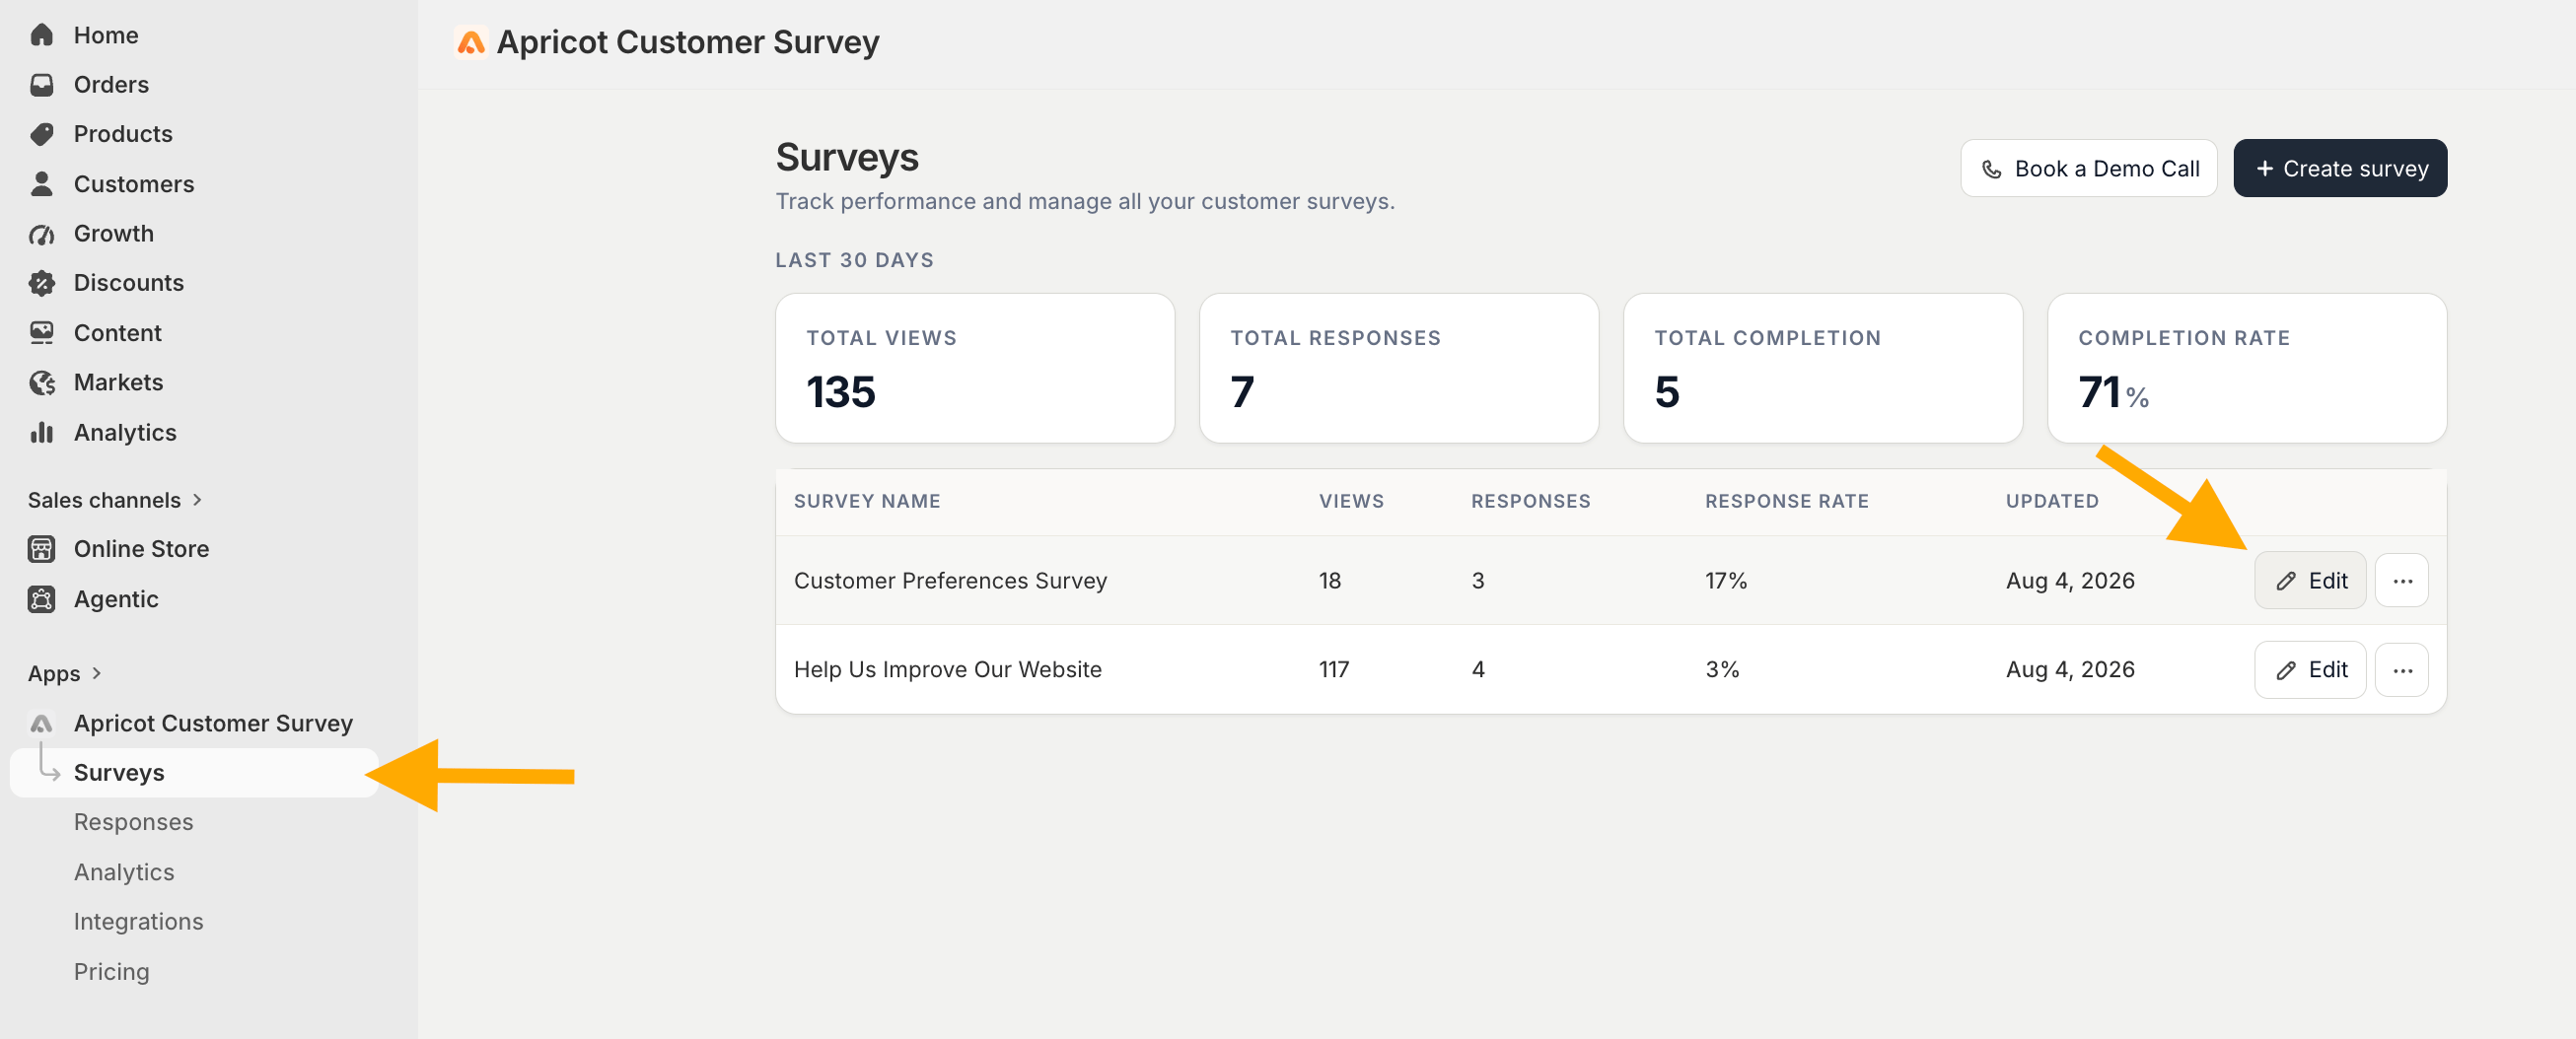
Open the survey where you want to add customer tags.All Surveys PageFrom the survey editor, click Survey Branching.Branching Survey Button
2

Step 2: Select the question

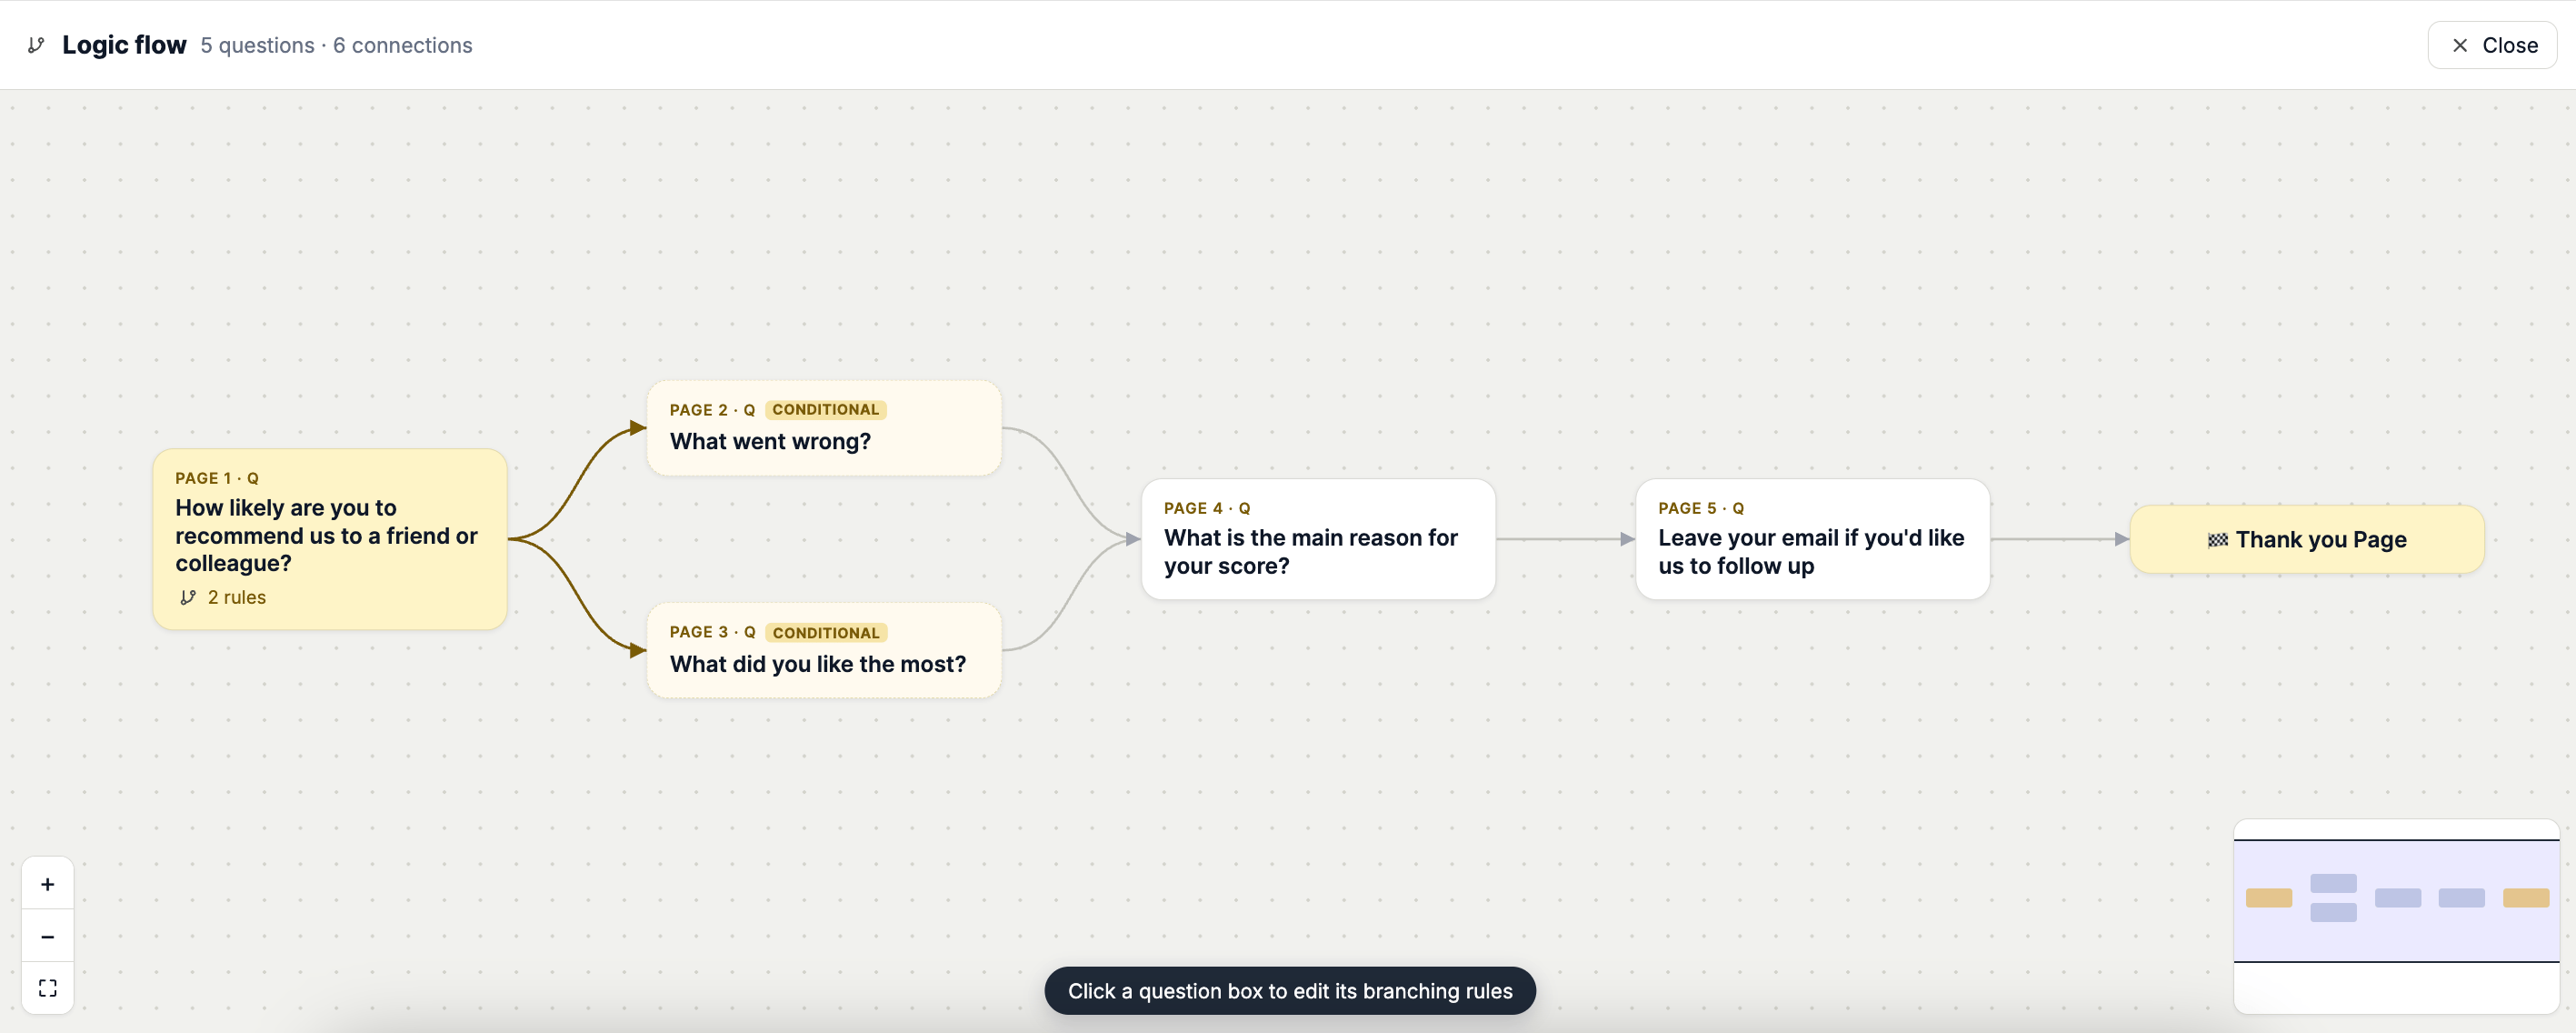
Click the question block containing the response you want to use to assign a customer tag.Branching Logic Survey 1
3

Step 3: Create your condition

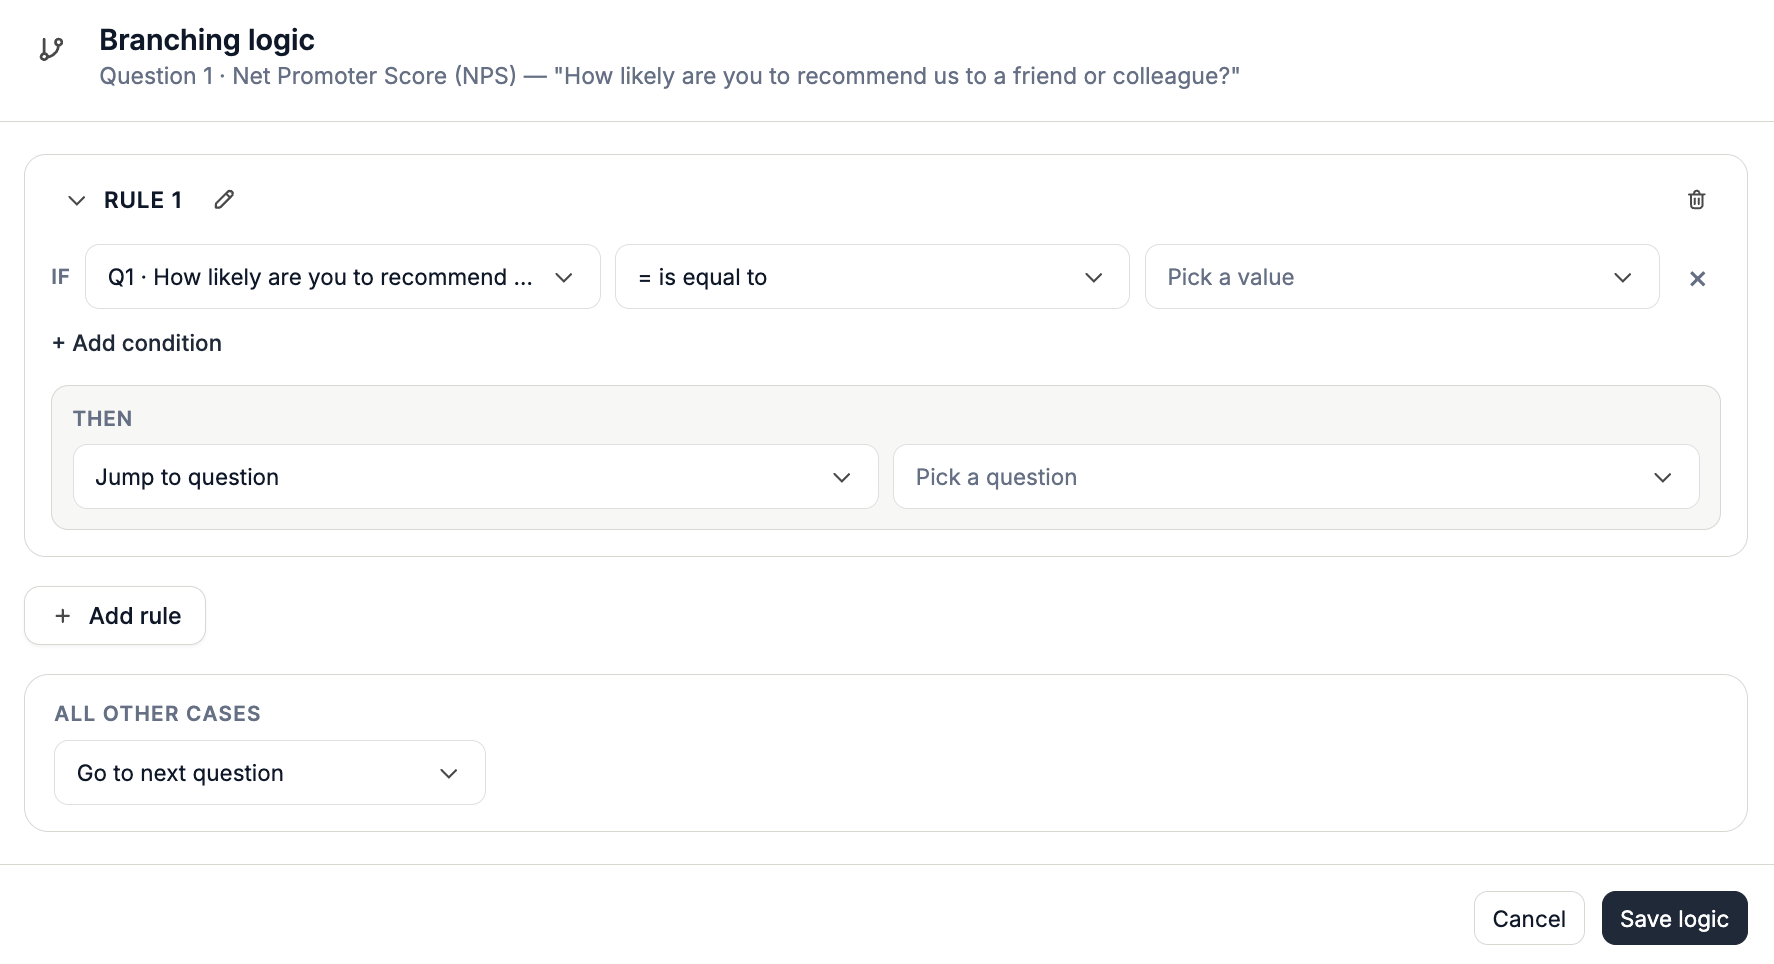
Click Add Rule and configure the IF condition.Select the question, operator, and value that should trigger the tag.For example:IF Question 1 → Is equal to → “Yes”Survey Rule Page
4

Step 4: Choose Add Customer Tags

Under THEN, select Add Customer Tags.Enter the customer tag you want to add when the condition is met.For example:THEN → Add Customer Tags → InstagramCustomer Tag Shopify
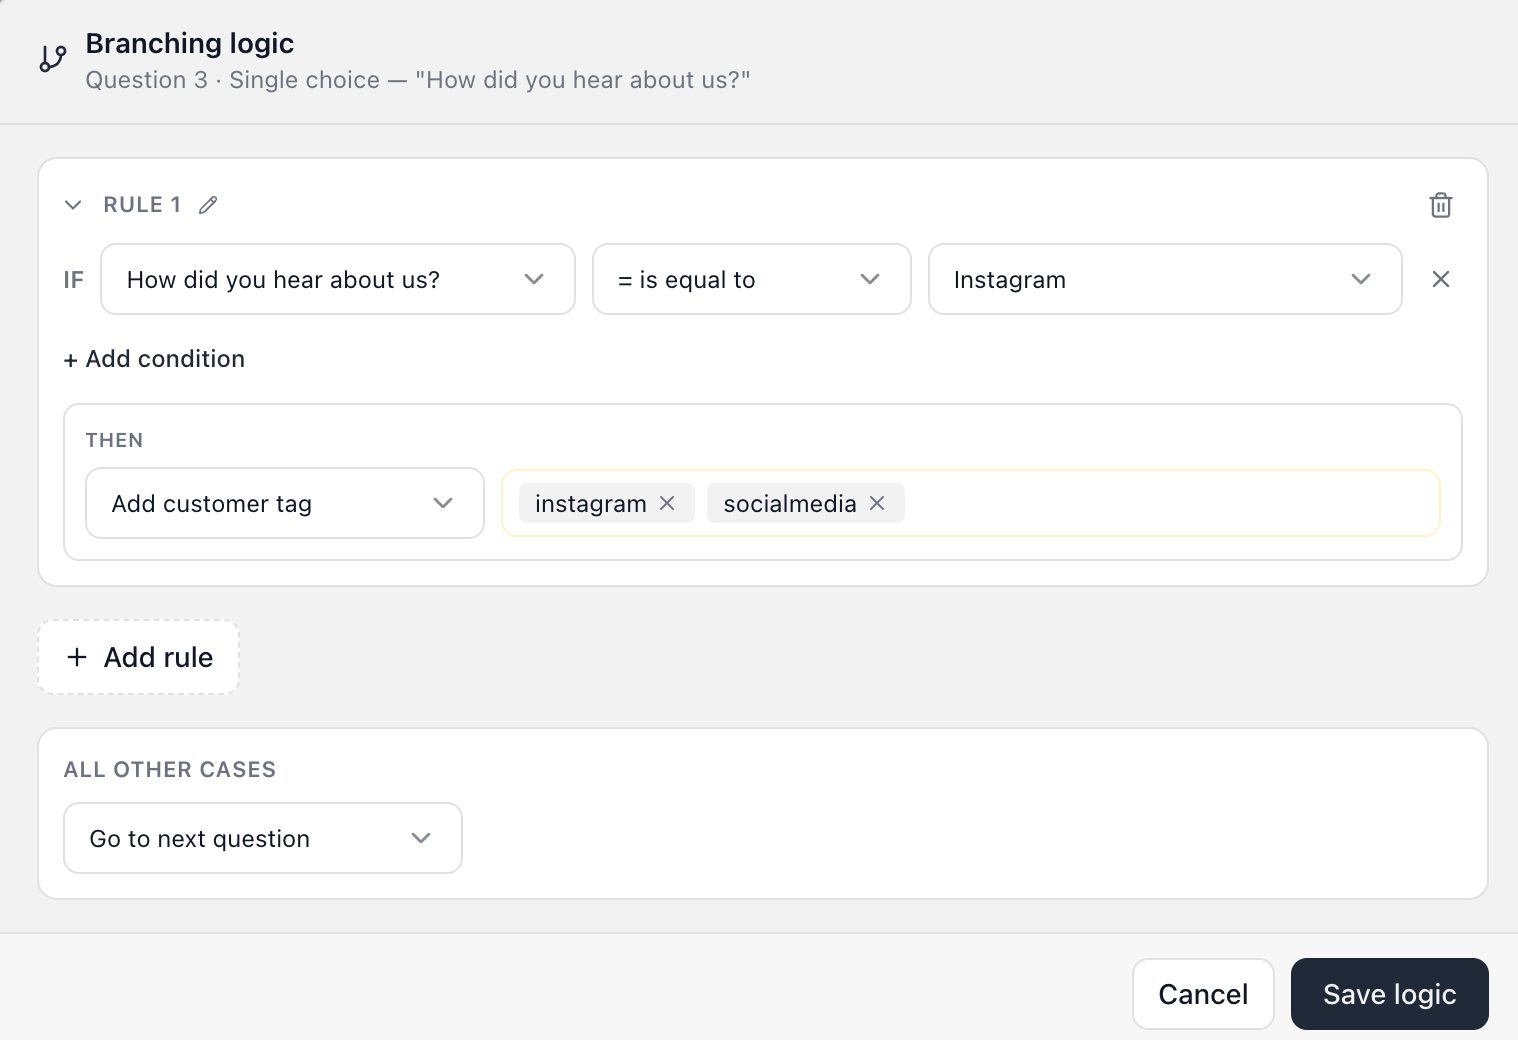
Customers who select Instagram will automatically receive the instagram and socialmedia tags in Shopify. You can create additional rules for the other answers and assign different tags to each customer segment.