
Quick Start: Create Your First Survey in 5 Simple Steps
Create your first survey with Apricot by following a simple workflow:1
Create your survey
Start with a template or build a survey from scratch.
2
Add questions
Choose from 15+ question types and customize each question.
3
Customize your Thank You Page
Create a personalized post-submission experience.
4
Style your survey
Adjust colors, fonts, themes, and overall survey appearance.
5
Publish your survey
Choose the publishing method that works best for your store.
Detailed Guide: Create Your First Survey
1
Step 1: Open the survey builder
From the Apricot Dashboard, go to Surveys and click Create Survey.You can start creating a survey in two ways: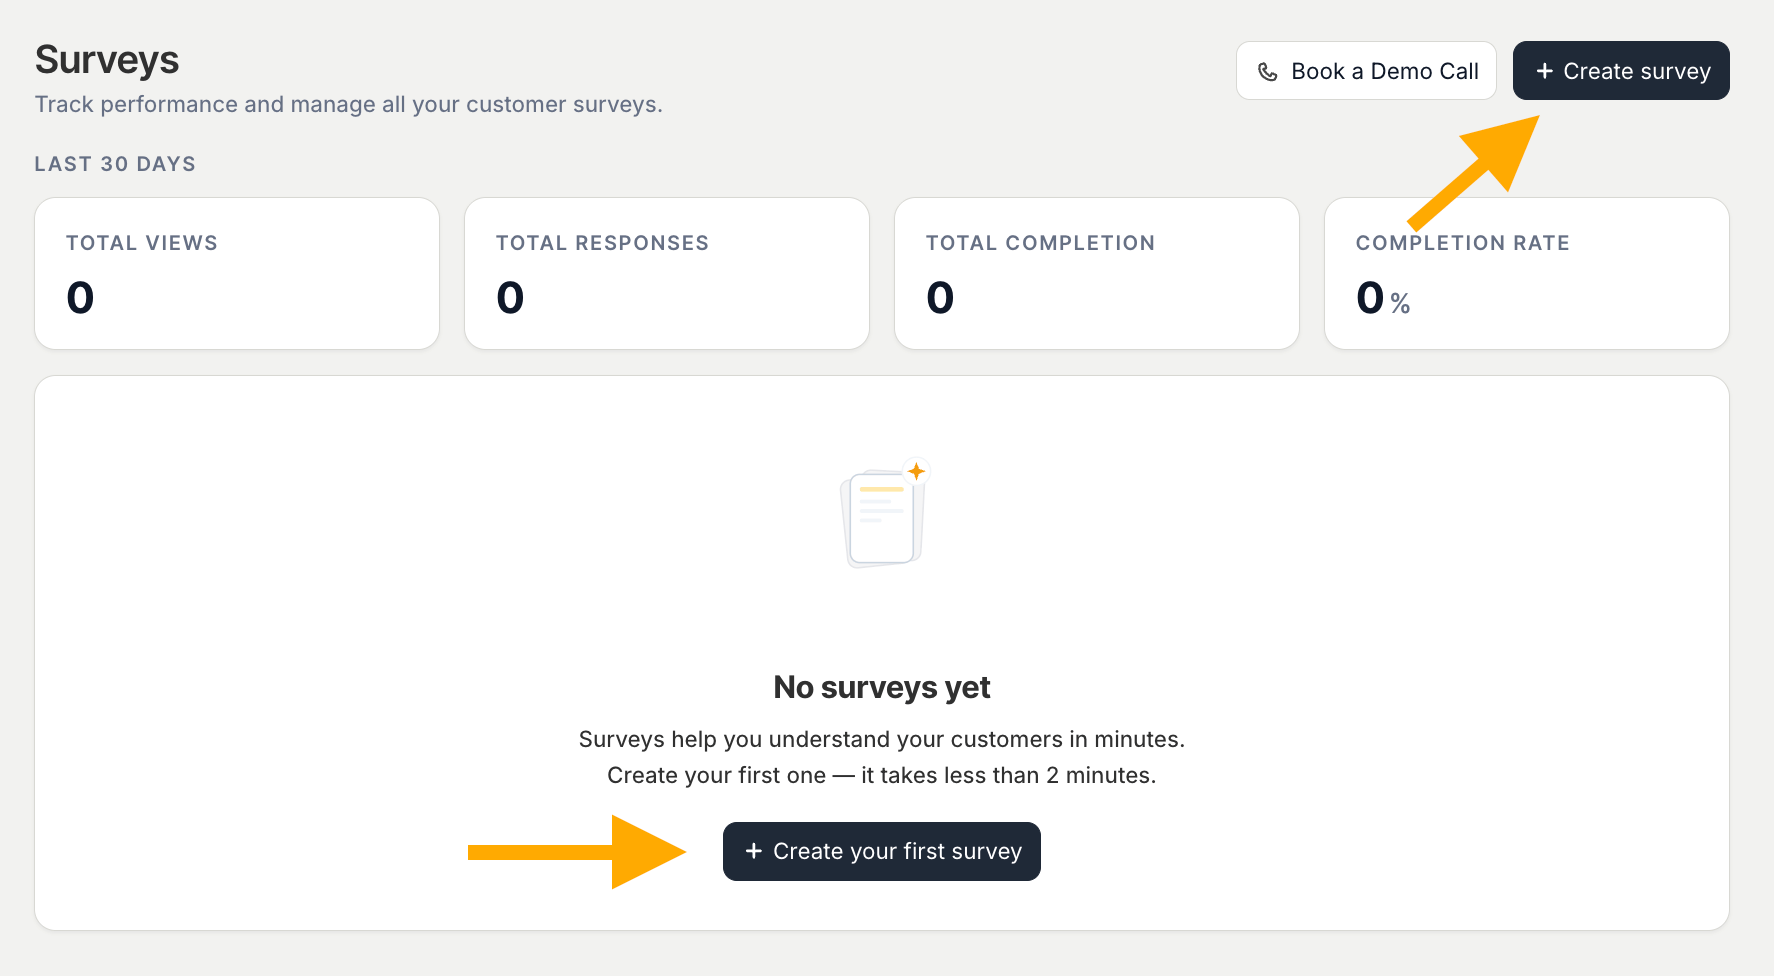
- Click the Create Survey button located in the top-right corner
- Click the Create your first survey button in the middle of the screen
2
Step 2: Choose how to start building your survey
On the Start building your survey screen, you can choose between: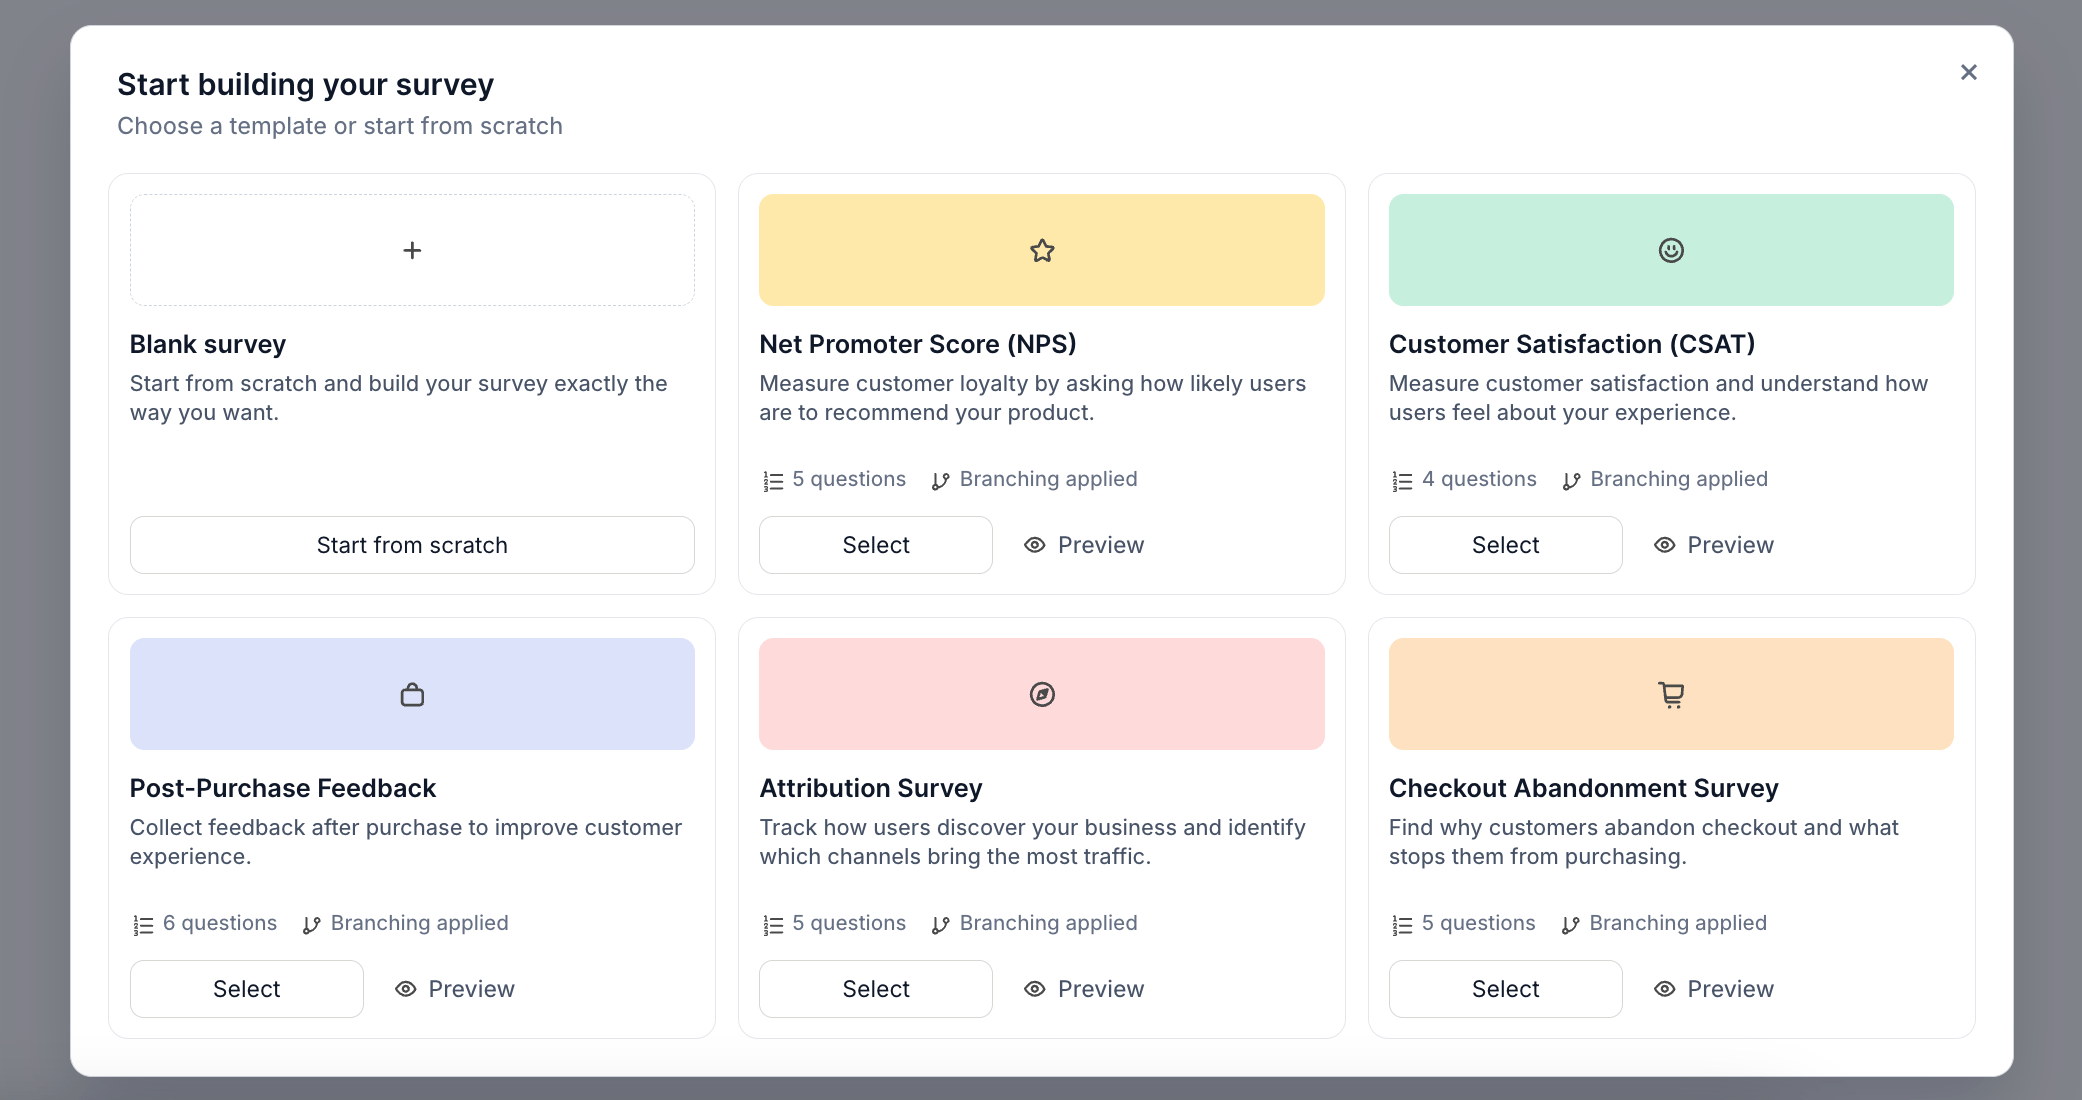
- Use a template — Start with a pre-built survey
- Blank Survey — Create a survey from scratch
Using a template
When you select a template, Apricot will automatically import the template content into your survey, including:- Survey questions
- Survey title based on the selected template
- Branching logic (if available)
Creating a blank survey
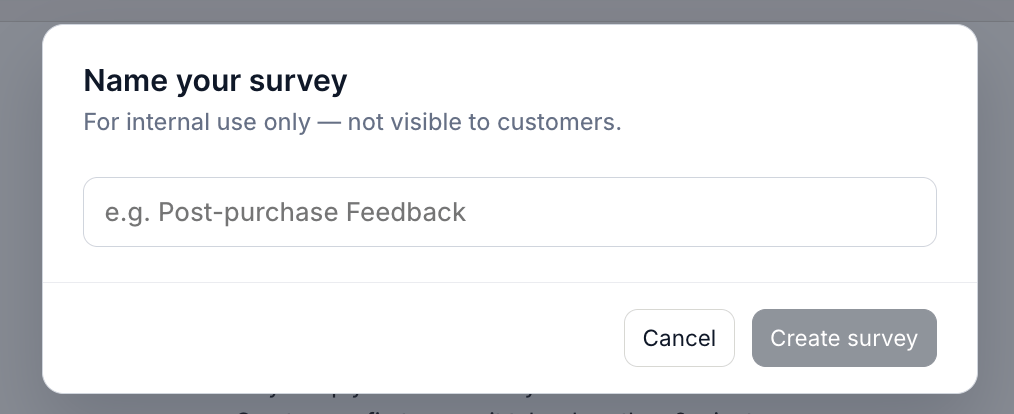
If you select Blank Survey, a popup will appear asking you to name your survey.Enter your survey title in the Name your survey field.The survey name is for internal use only and will not be visible to customers.
3
Step 3: Add questions to your survey
After creating your survey, you will be redirected to the survey editor.The builder is divided into four main areas: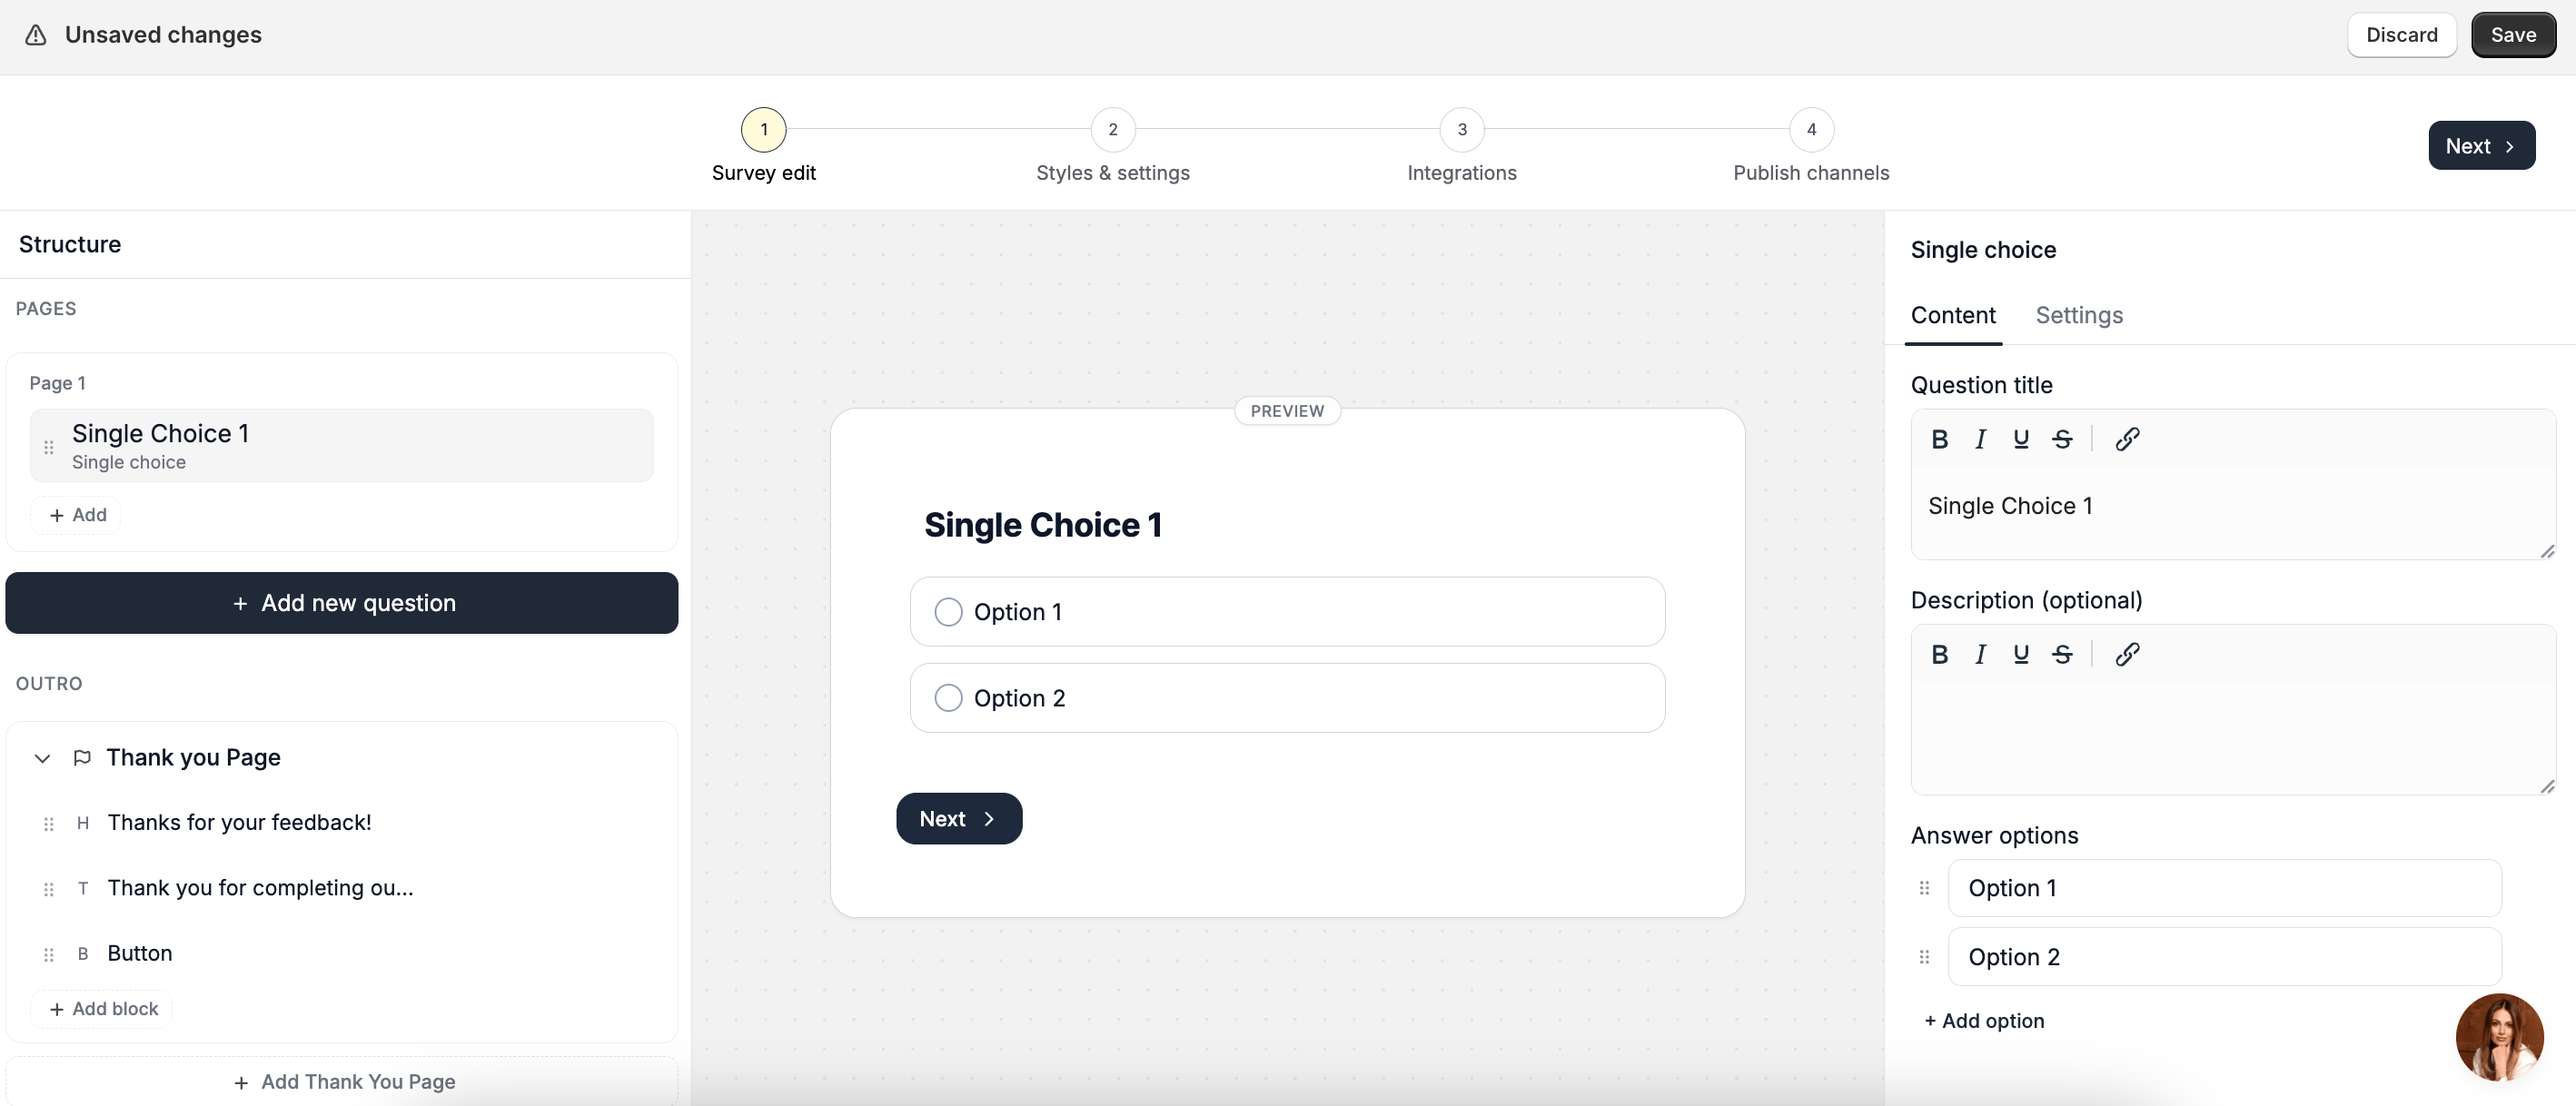
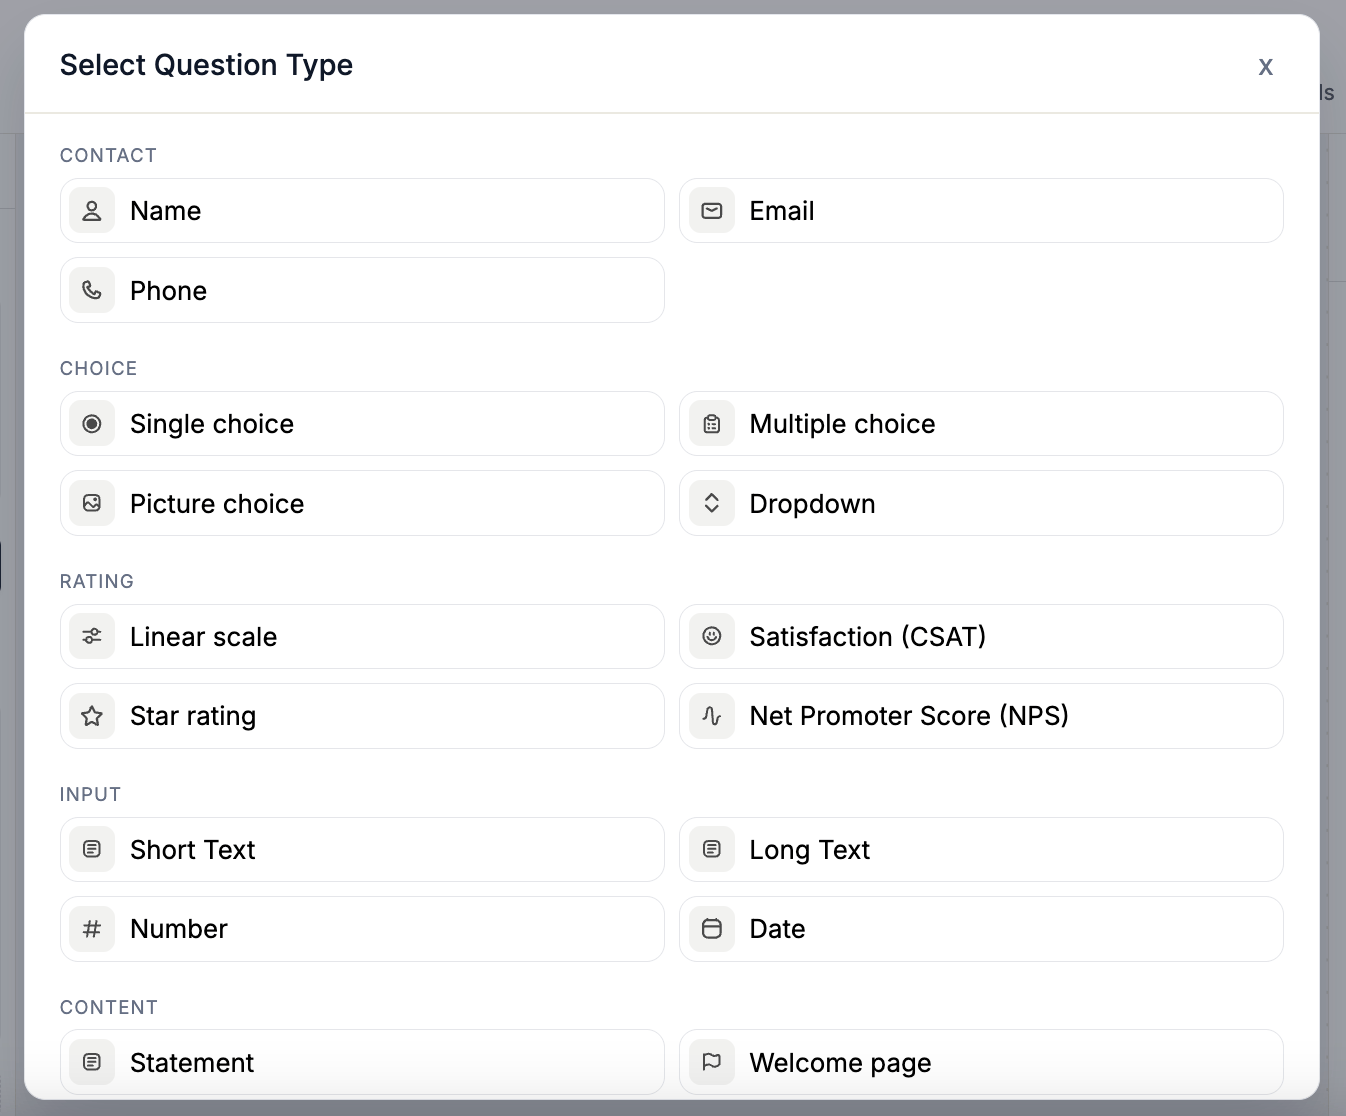
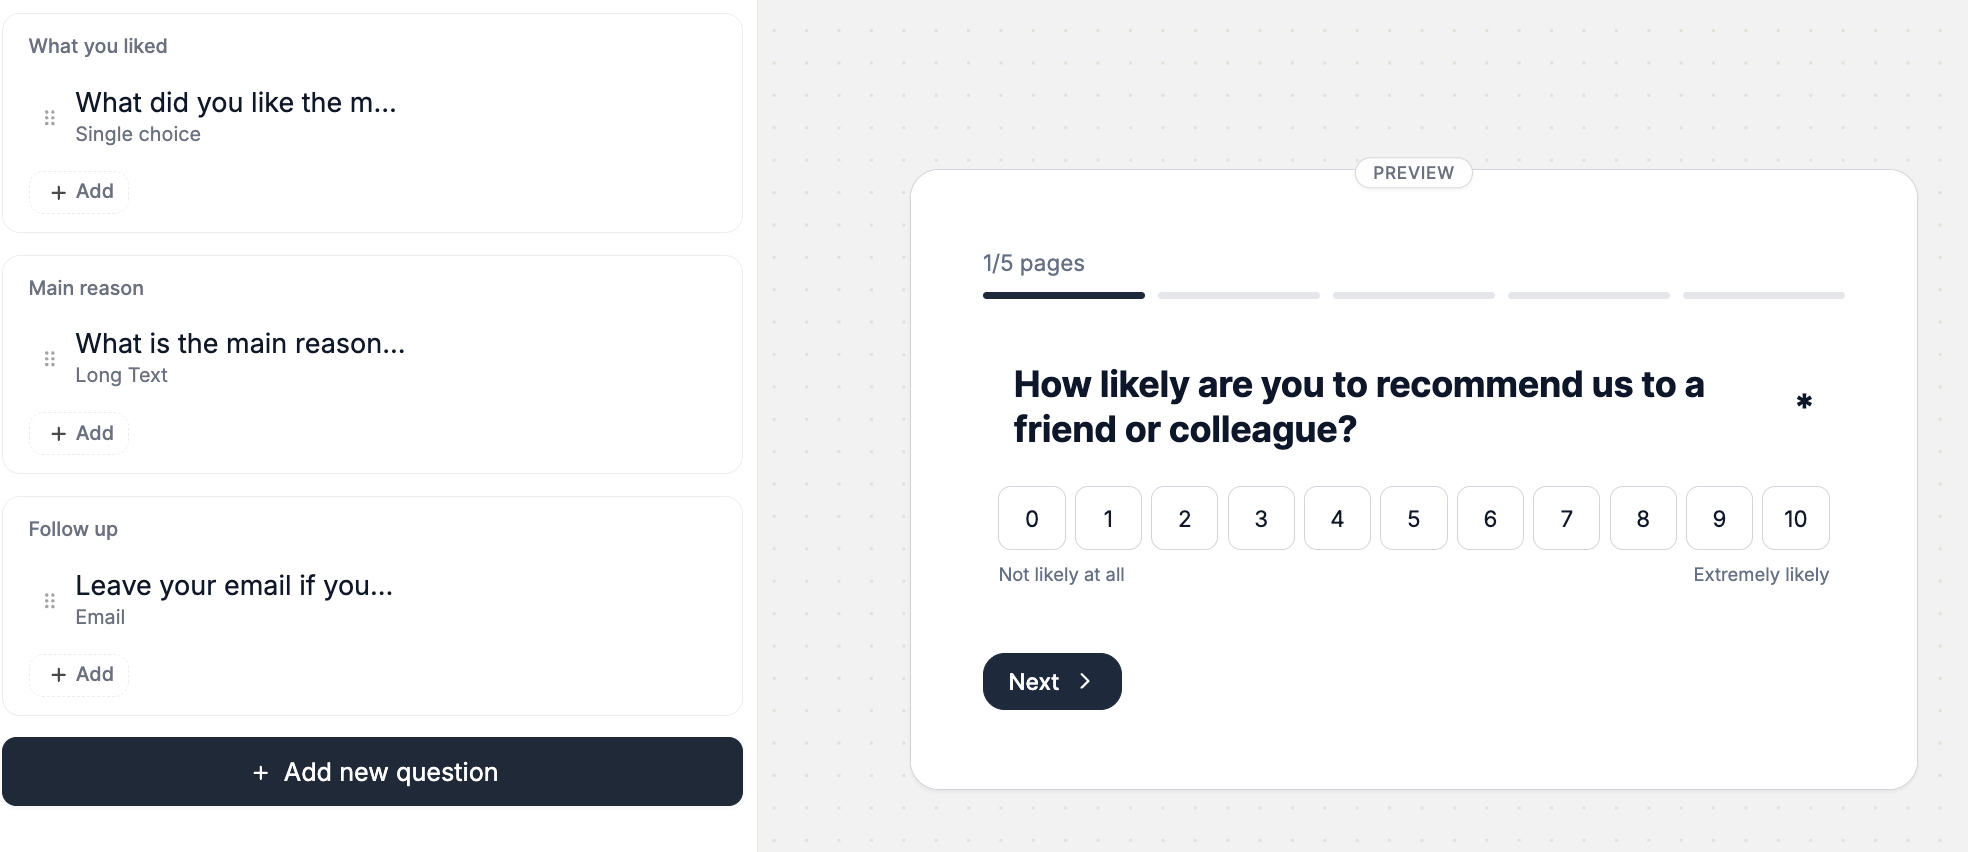
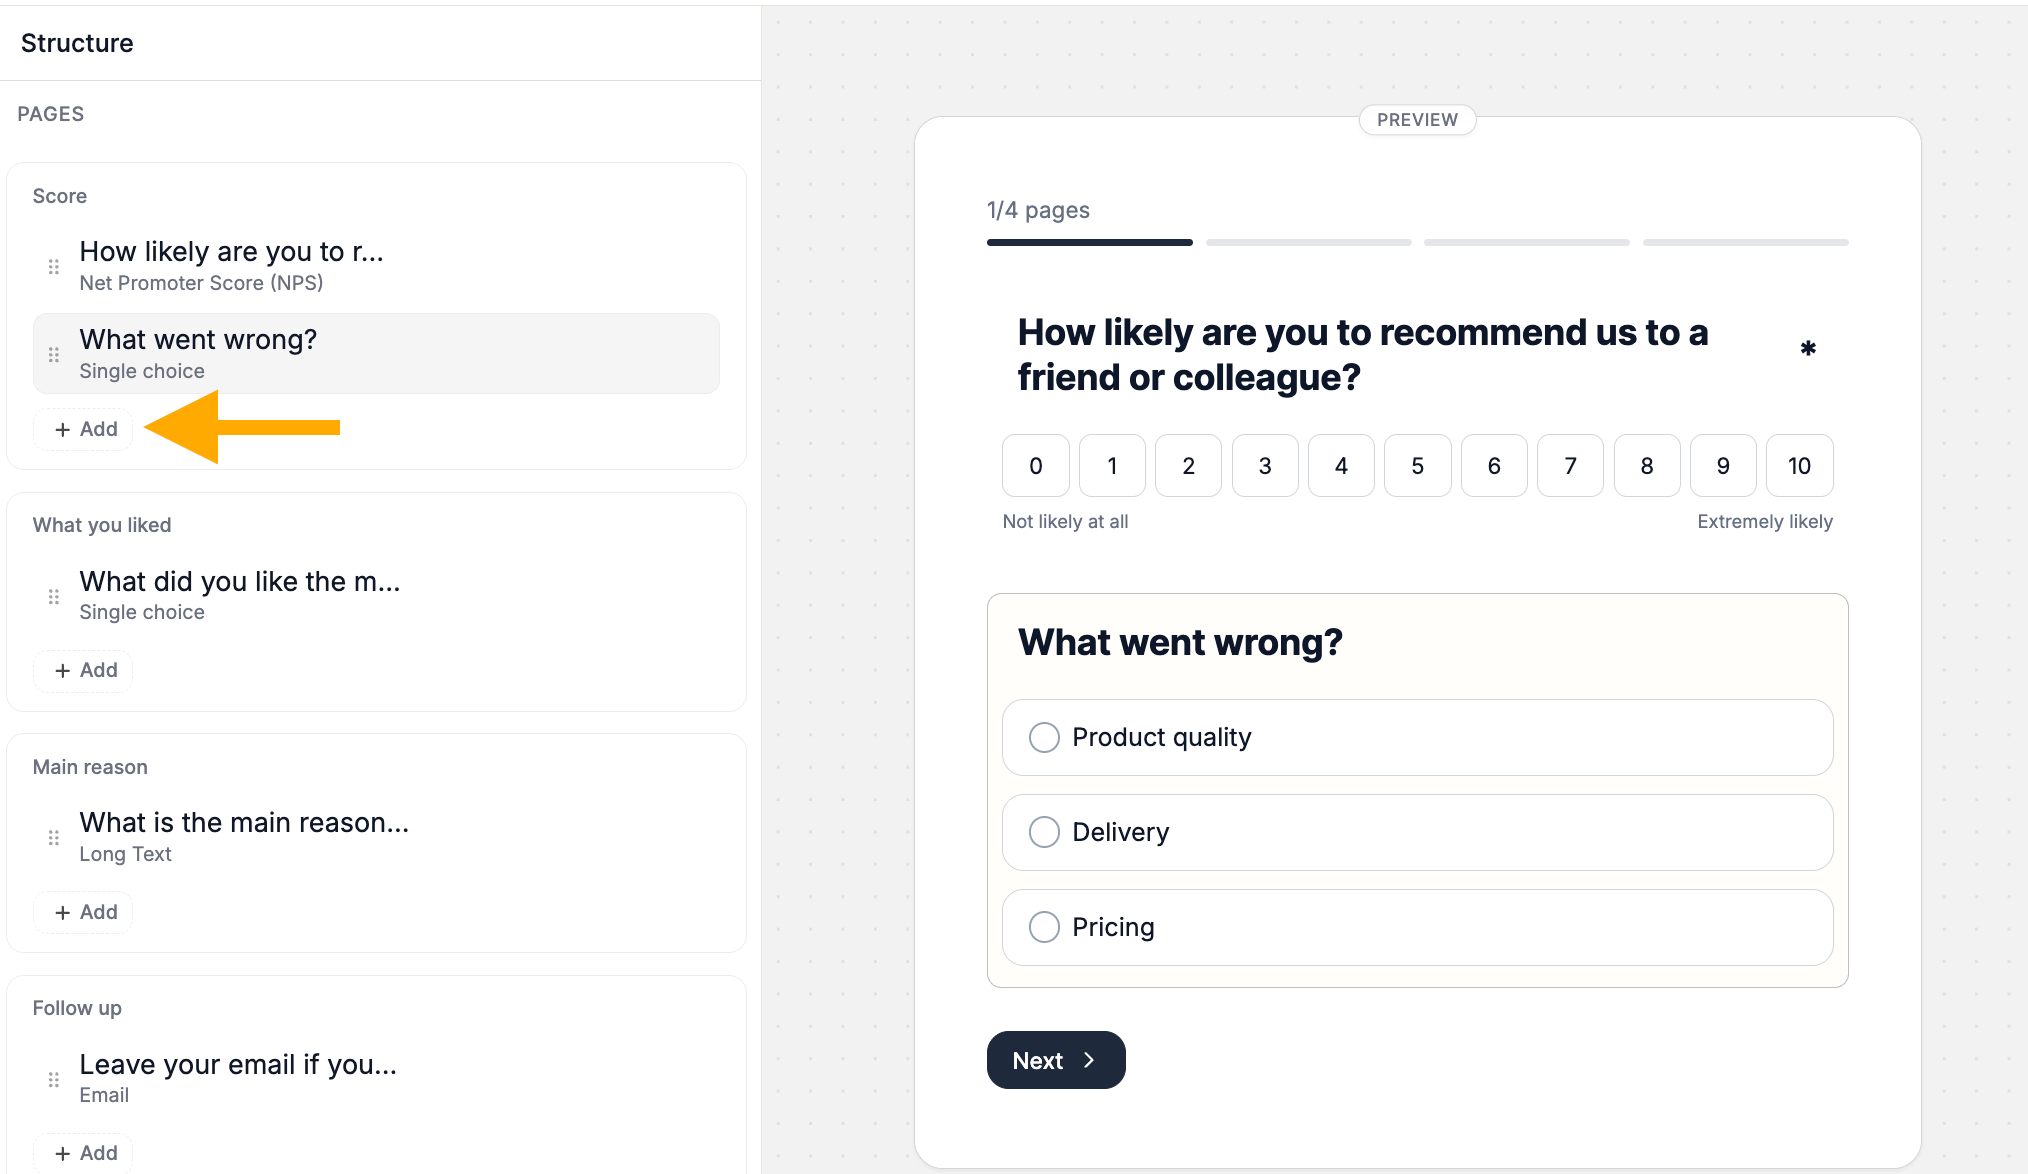
- Left panel — Survey structure and page navigation
- Center panel — Live survey preview
- Right panel — Question and survey settings
- Top navigation bar — Access different survey sections
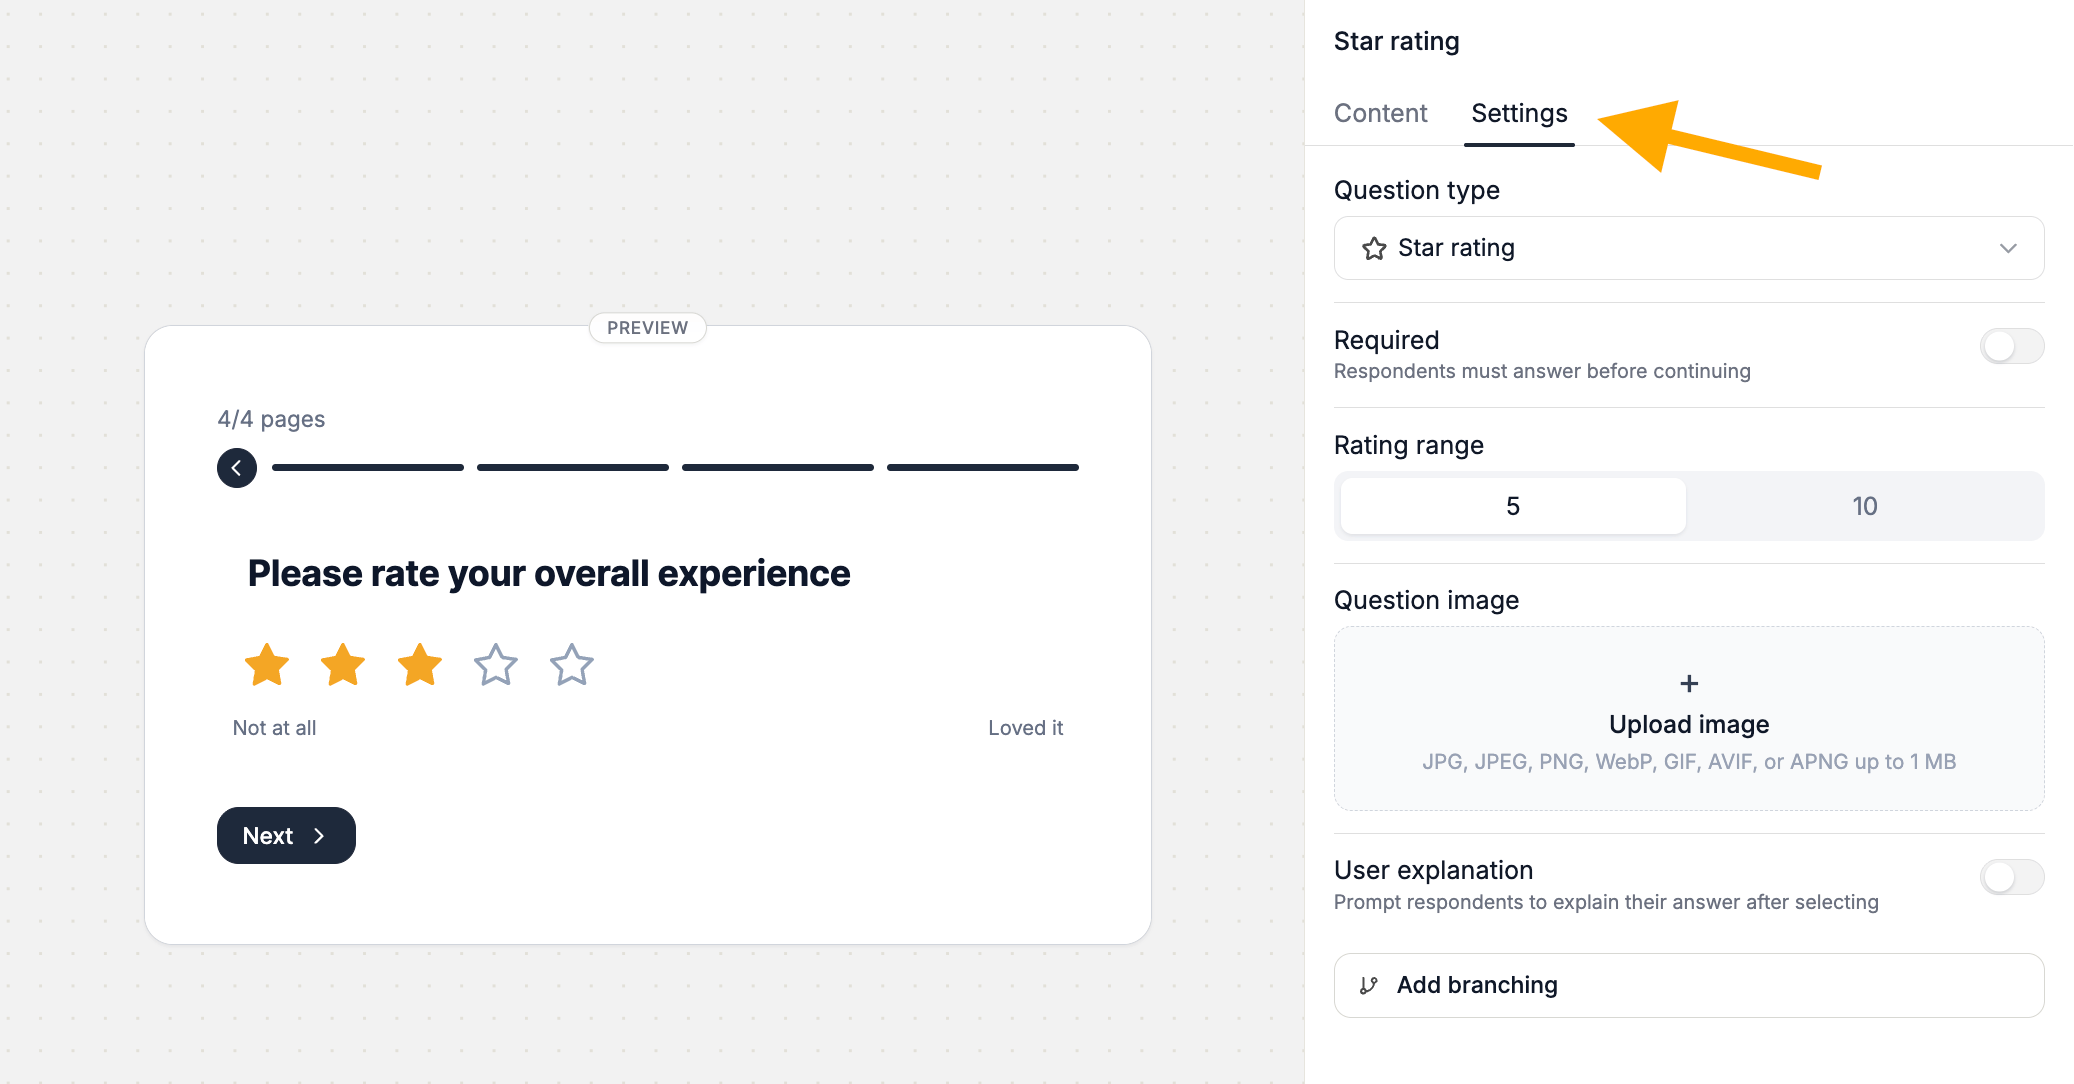
Customize your questions
After selecting a question, use the right panel to configure its content and settings.From the Content tab, you can customize:- Question title
- Description (optional)
- Answer choices
- Placeholder text
- Labels
- Change the question type
- Make the question required
- Configure question-specific settings (available options vary depending on the selected question type)
- Add a question image
- Add user explanation
- Set up branching logic
4
Step 4: Customize your Thank You Page
After adding your questions, customize the page customers see after completing your survey.The Thank You Page uses a block-based editor, allowing you to create a personalized completion experience.You can add blocks such as: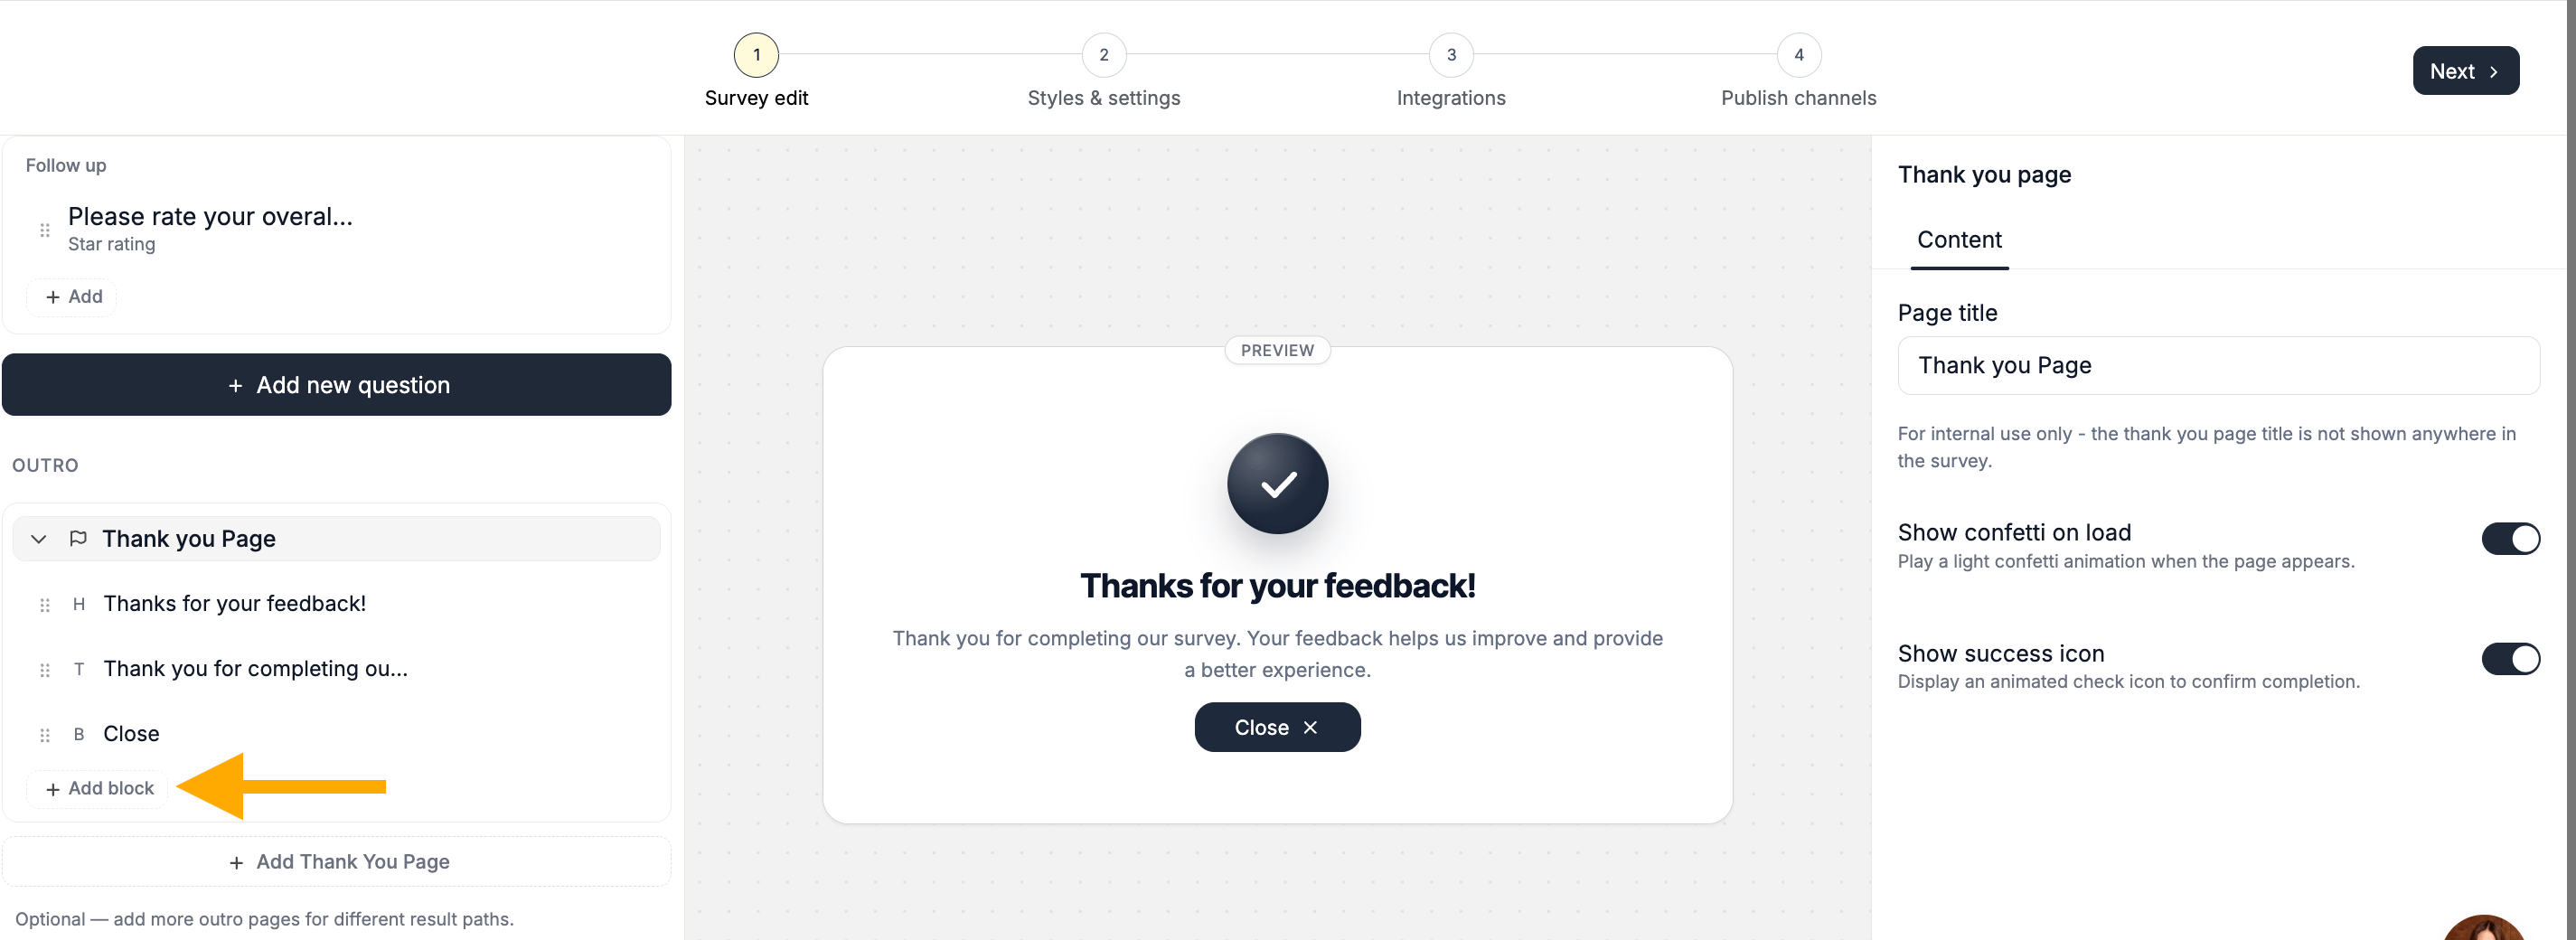
- Heading
- Text
- Button
- Image
- Custom HTML
5
Step 5: Style your survey
Use the Styles & Settings section to customize the overall look and behavior of your survey. You can configure options like survey theme, colors, font families, general survey settings, etc.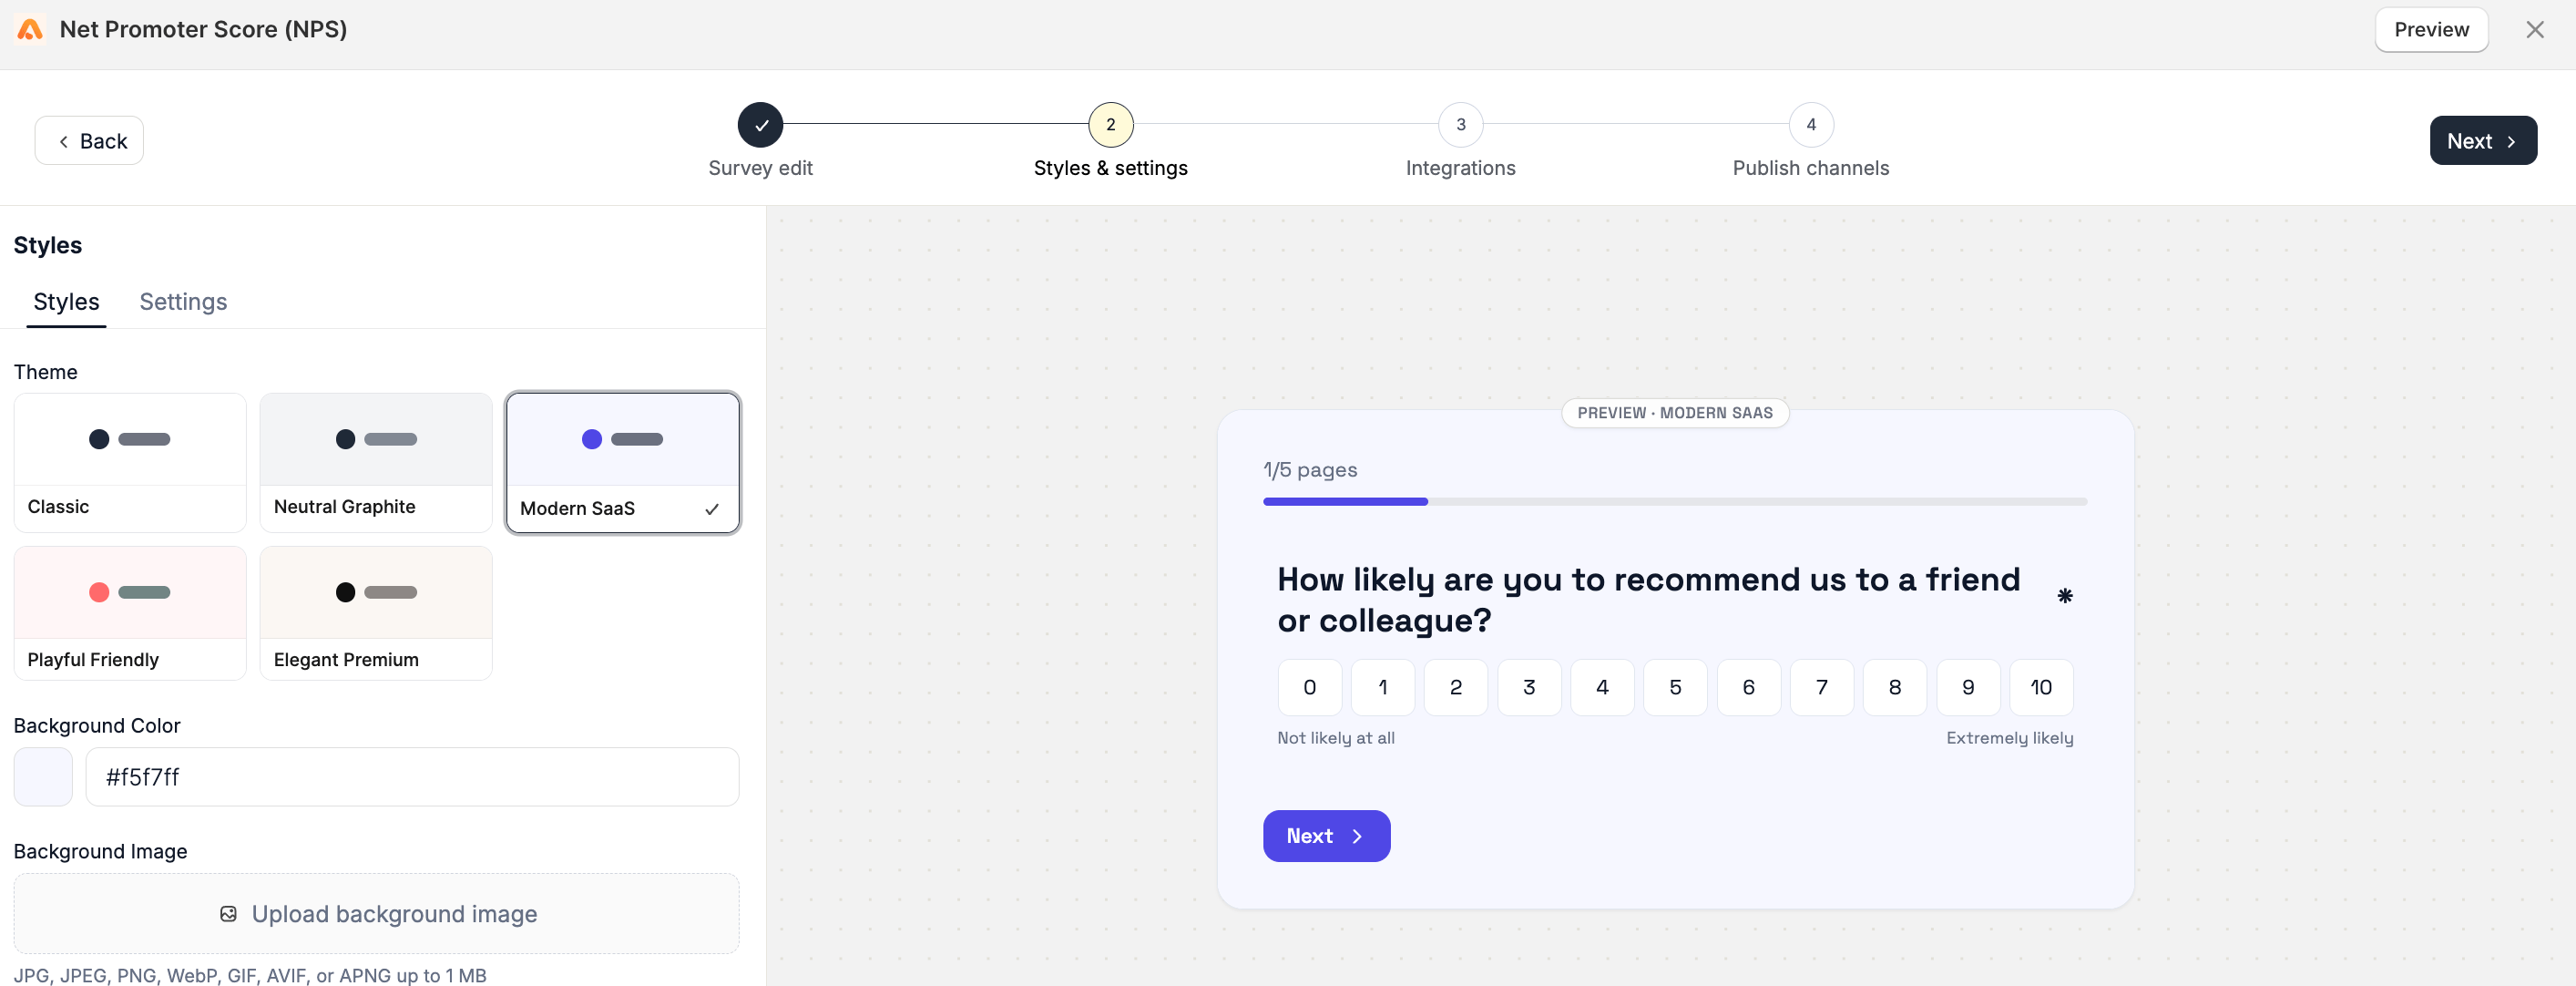
6
Step 6: Connect integrations
If you want to send survey data to third-party tools, configure your integrations from the Integrations section.Connect Apricot with supported apps to automate your workflow and sync collected responses.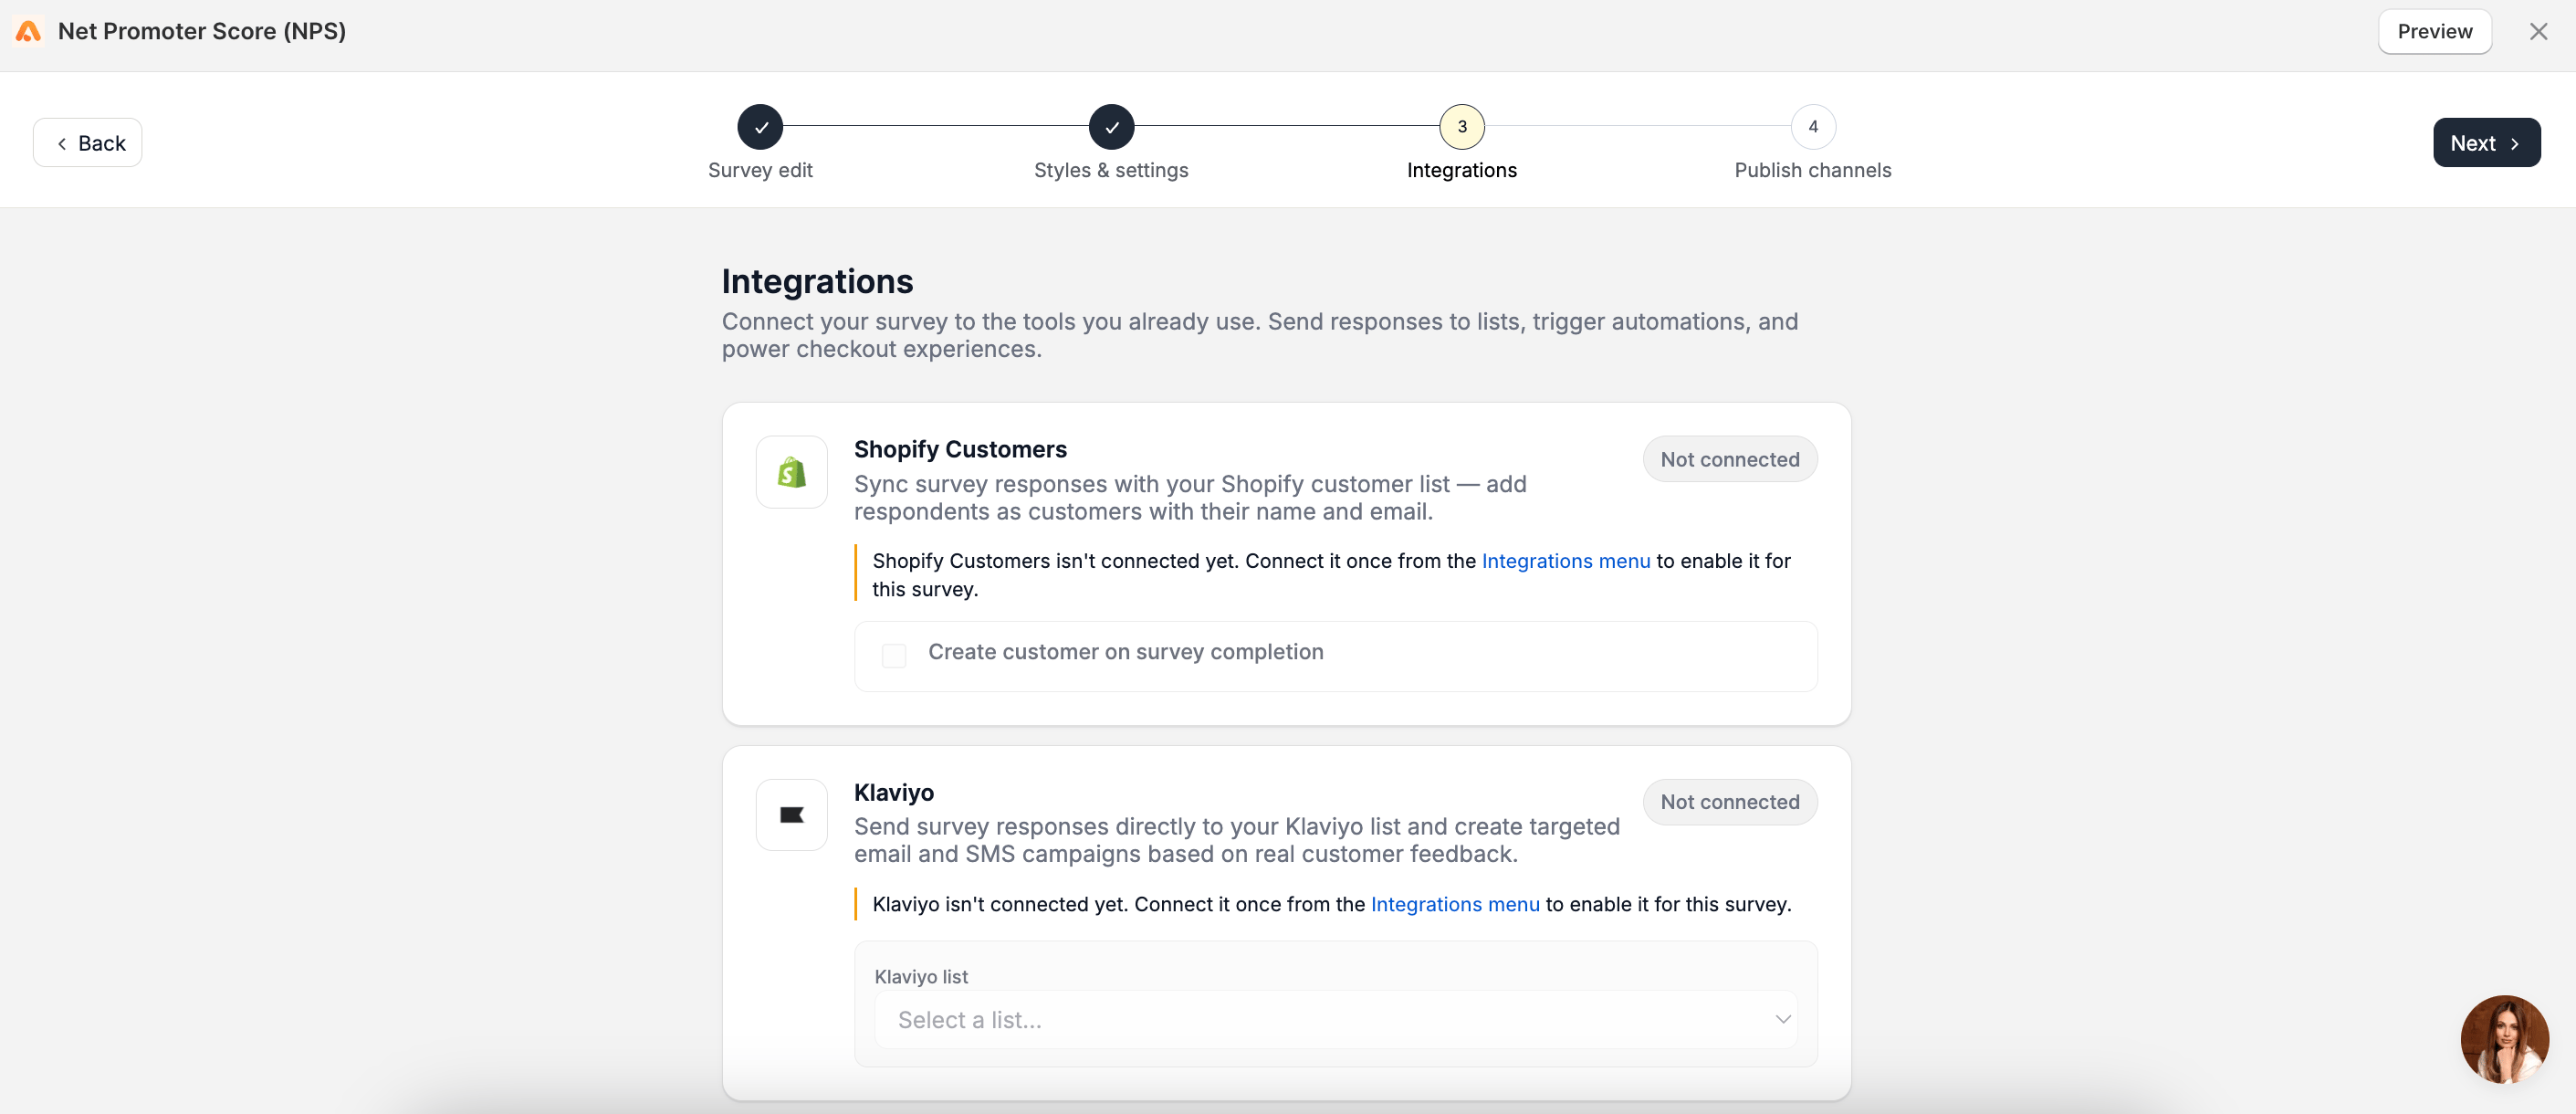
7
Step 7: Publish your survey
Once your survey is ready, choose how you want to display it on your store.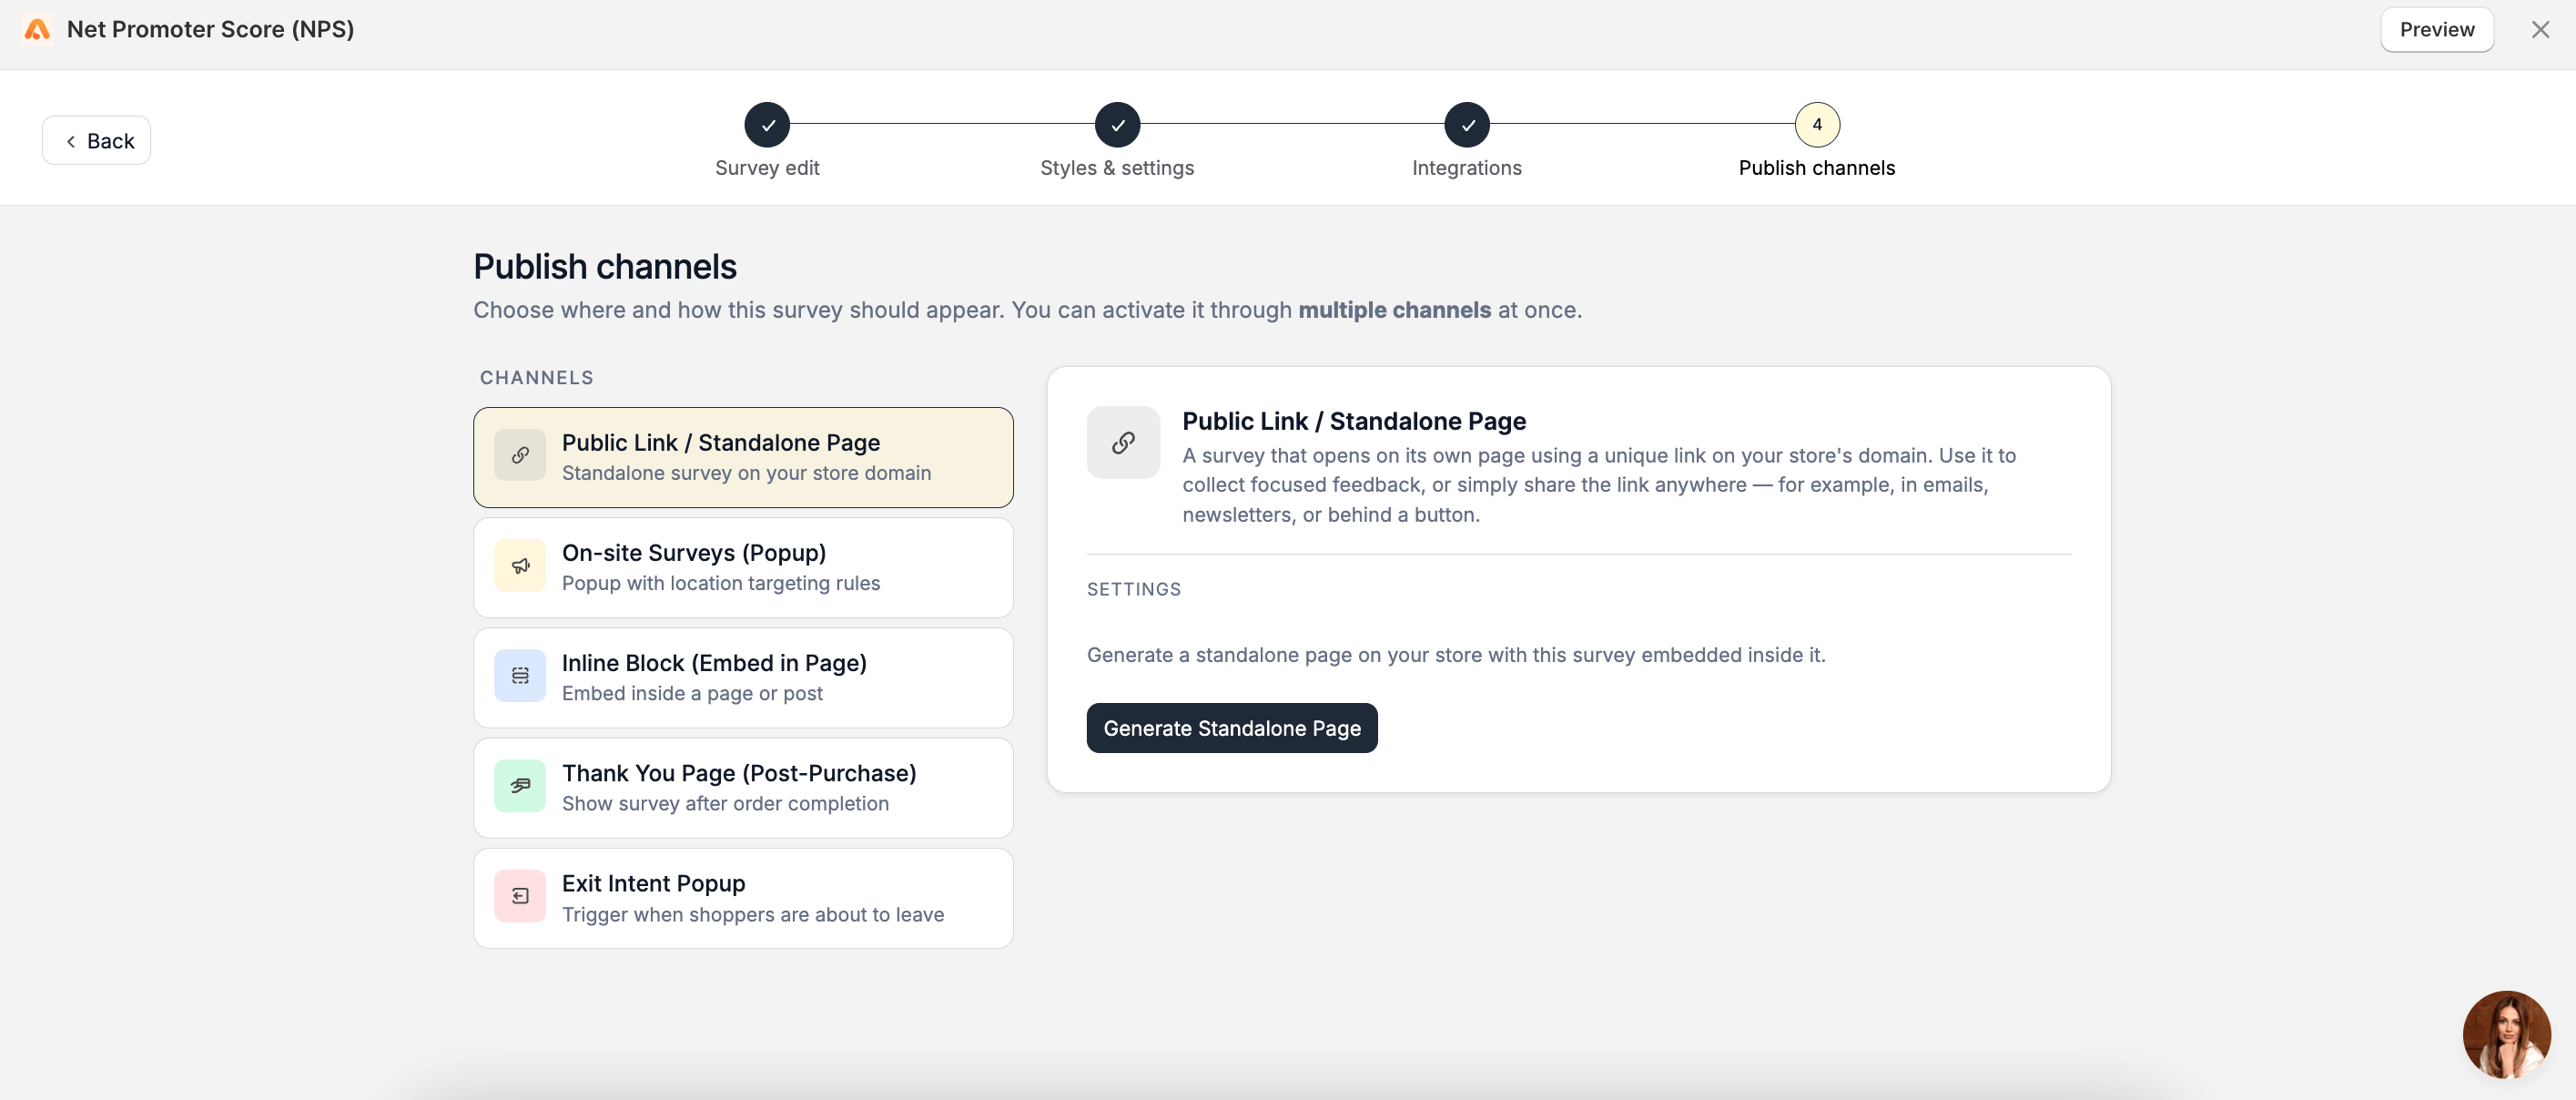
- Public Link / Standalone Page
- On-site Surveys (Popup)
- Inline Block
- Thank You Page
- Exit Intent Popup