- Collecting post-purchase feedback
- Measuring customer satisfaction after an order
- Asking customers about their shopping or checkout experience
- Getting feedback while the purchase experience is still fresh
Due to Shopify’s Thank You Page limitations, some styling and layout customizations may not be available. Rich text formatting, including certain HTML tags, may be stripped, and custom CSS is not supported. As a result, your survey may appear slightly different from the preview.
Set Up a Thank You Page Survey
Follow these steps to add your survey to Shopify’s Thank You Page:1
Step 1: Open your survey settings
Go to: Apricot Dashboard → Surveys → Select the survey you want to publish → Edit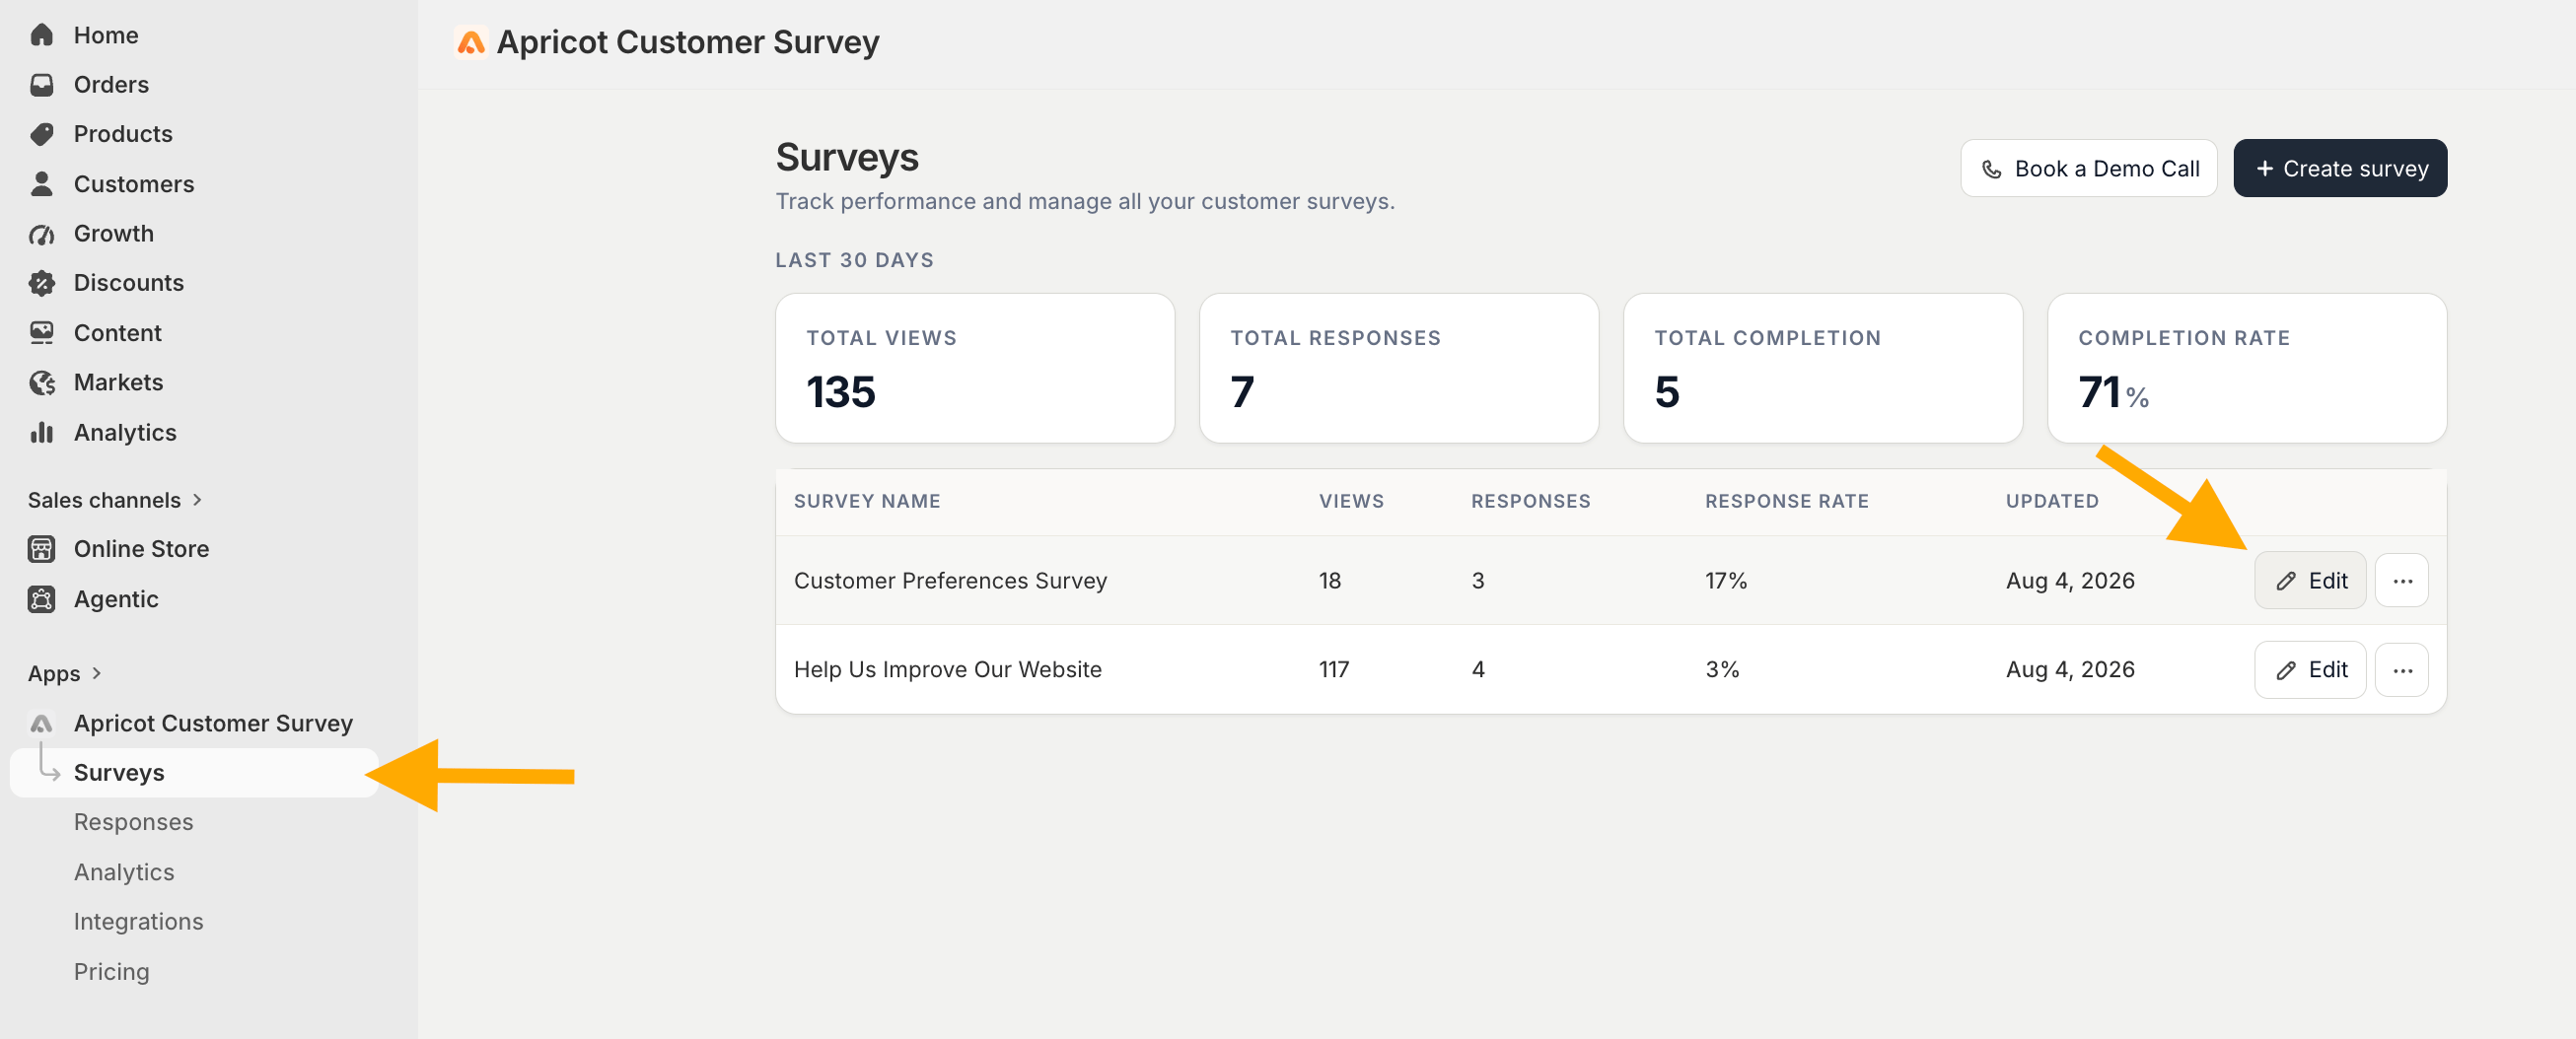
2
Step 2: Select Thank You Page
From the survey editor, navigate to the Publish Channels section and select Thank You Page (Post-Purchase).** **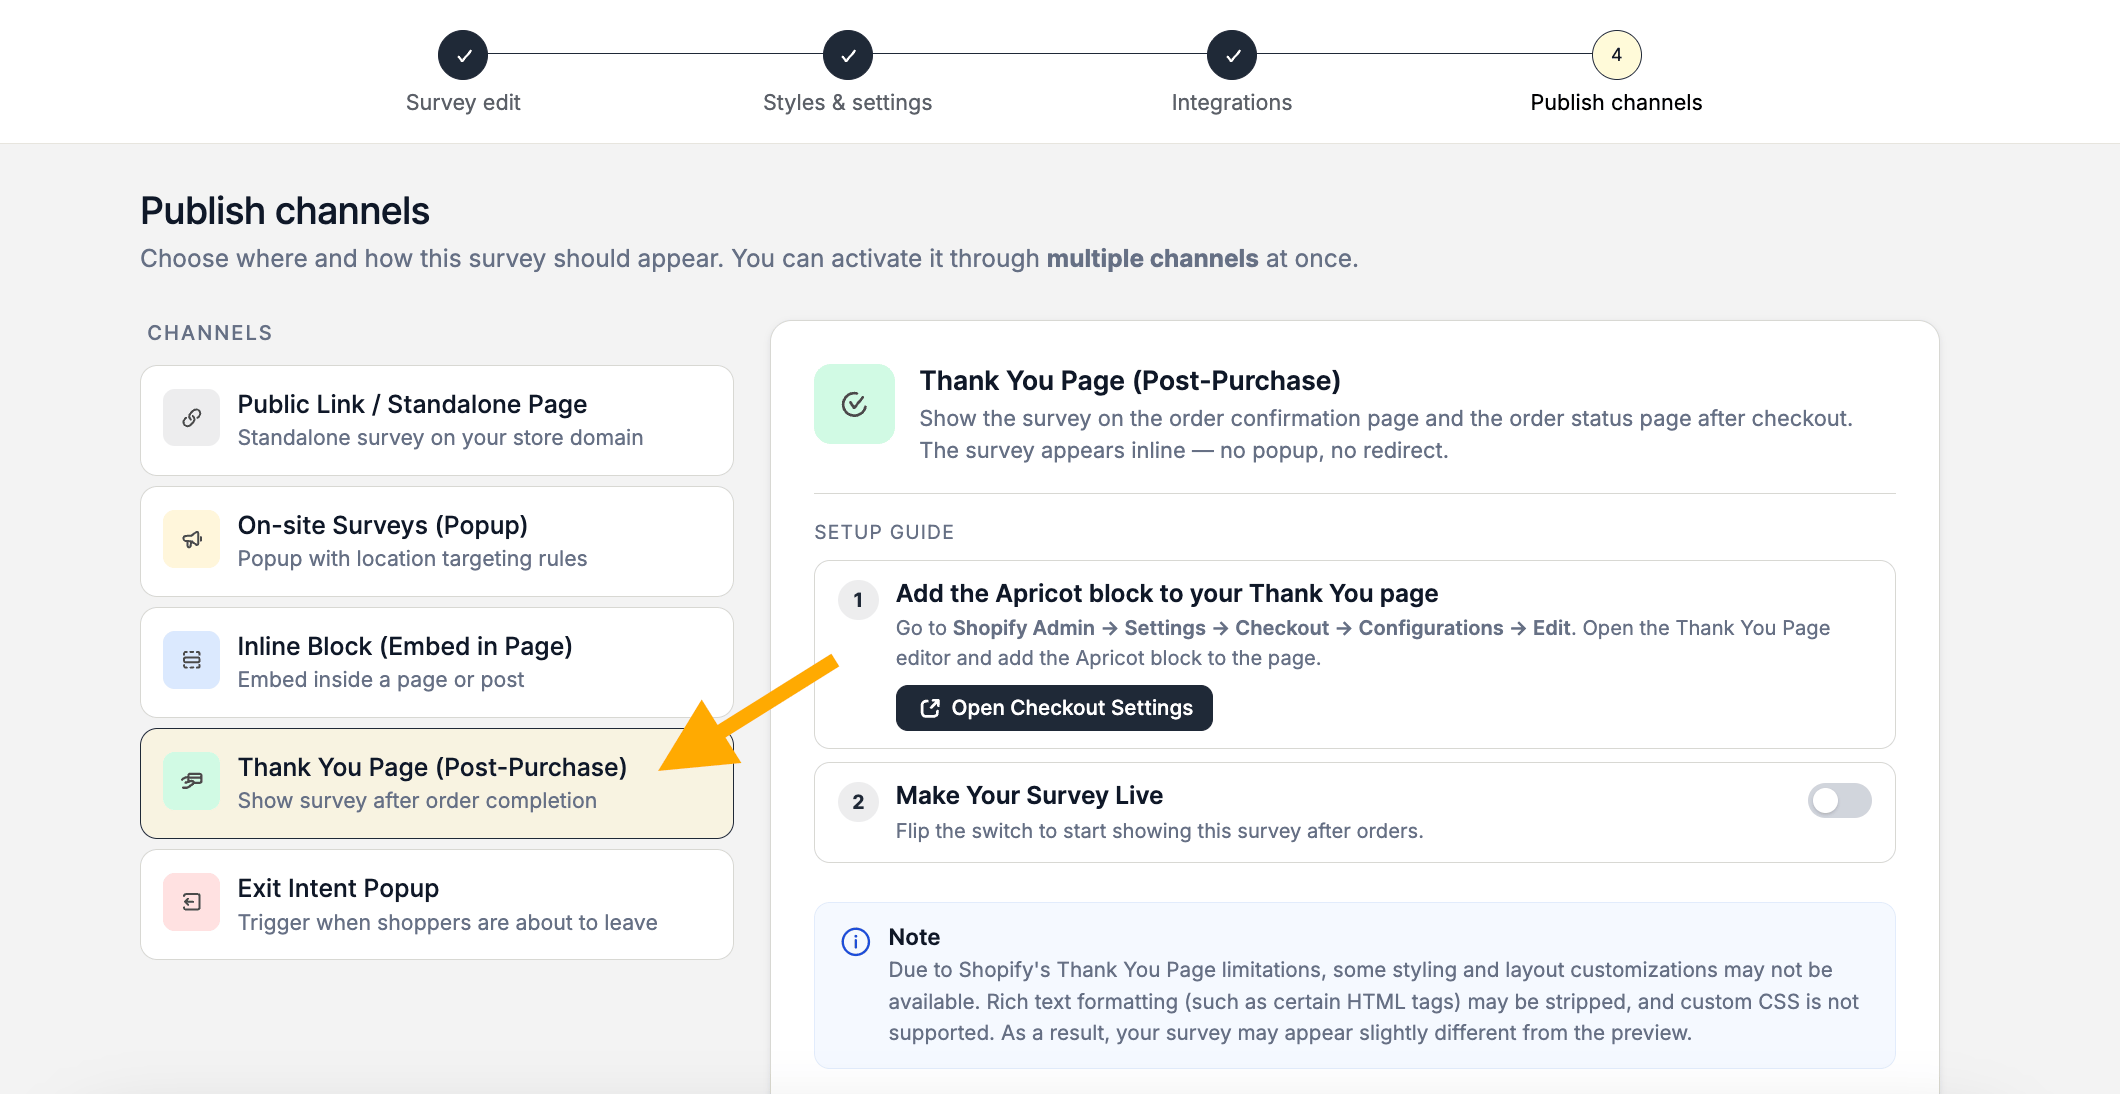
3
Step 3: Add the Apricot block to your Thank You Page
Go to: Shopify Admin → Settings → Checkout → Configurations → Edit You can also click Open Checkout Settings button in the Apricot dashboard to go directly to your Shopify Checkout settings.Open the Thank You page editor and click Add block to add the Apricot block to your page.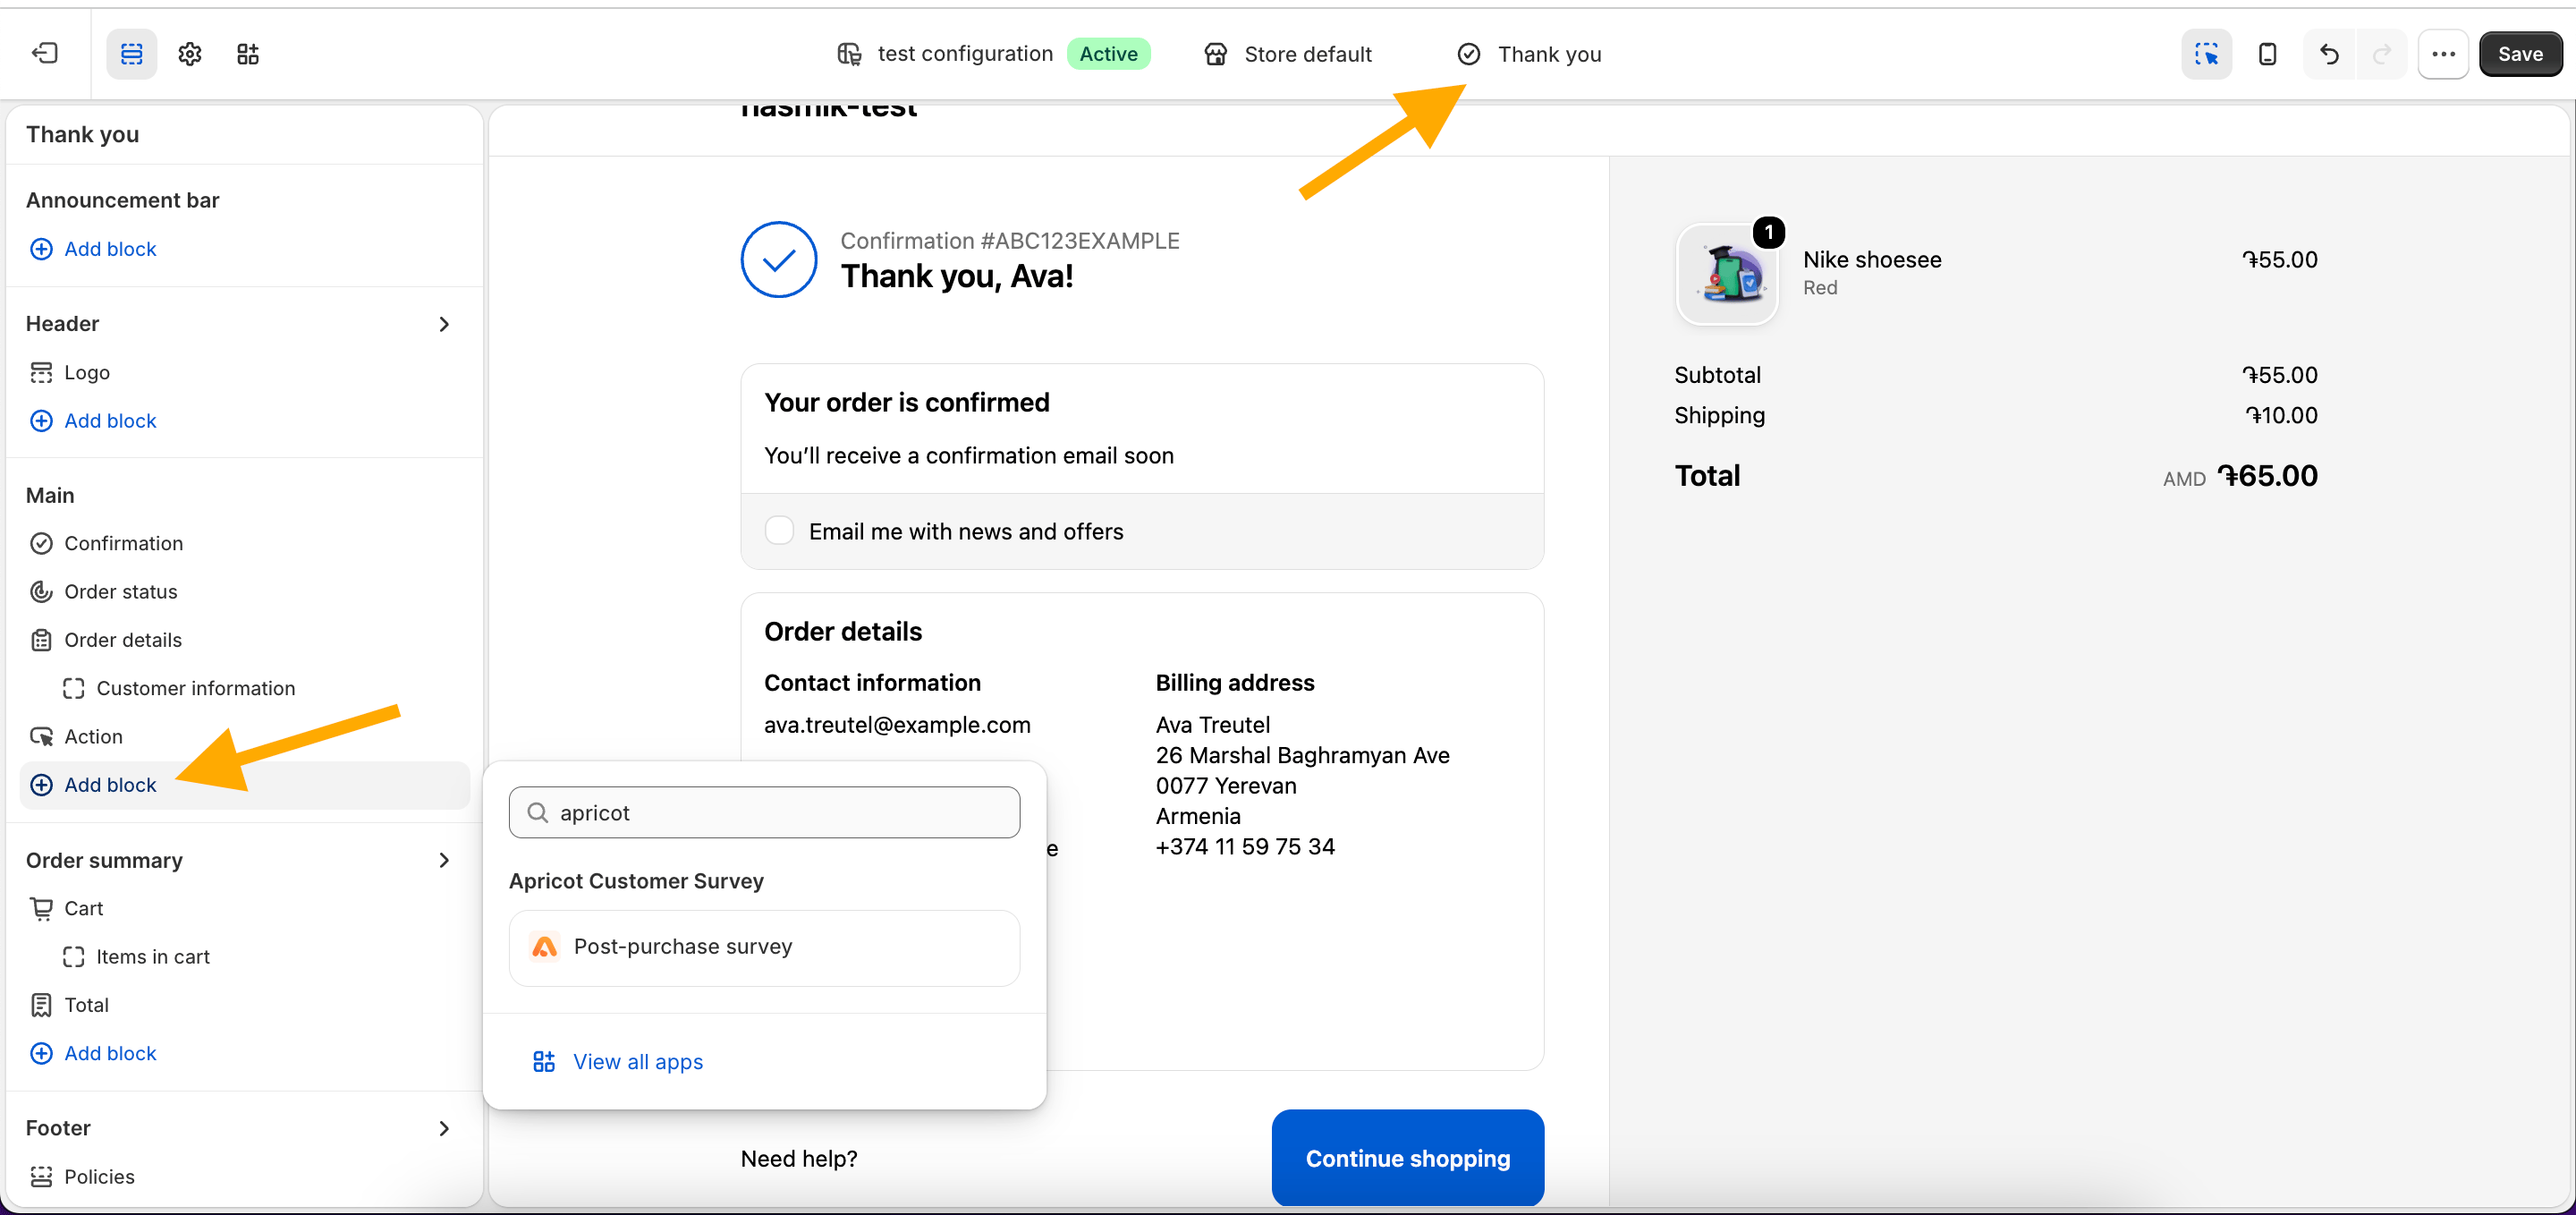
4
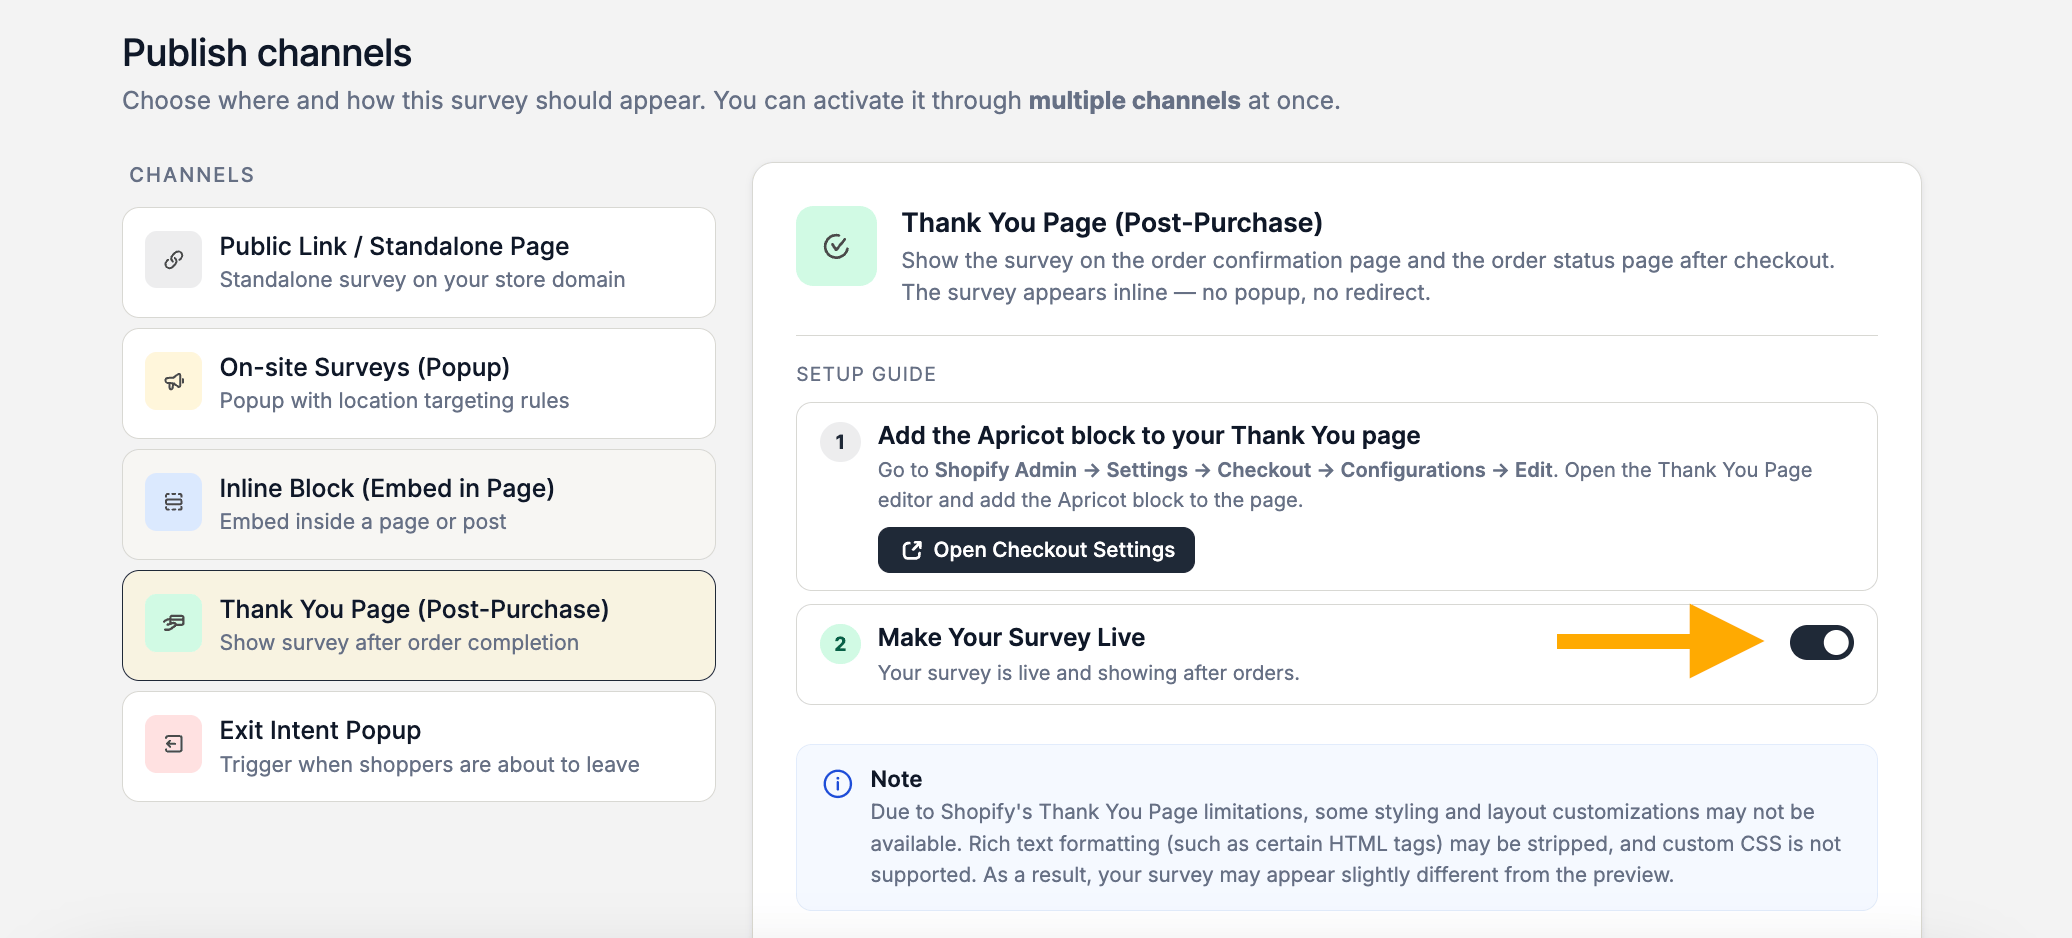
Step 4: Make your survey live
After adding the Apricot block to your Thank You Page, return to the Apricot Dashboard.Enable Make Your Survey Live to activate the survey.